Changing the Default Source/Target Exchange Account
Changing Default Exchange Account
The default Exchange Account (initially displayed on the Connection page of the Exchange server Properties) is set when you add the source or target organization to the migration project (see the Registering Source and Target Organizations section of the Migration Manager for Exchange User Guide for details). If necessary, you can change the default Exchange Account by clicking Modify on the General | Connection page in the properties of the corresponding server in the Migration Manager for Exchange Console.
Mailbox and calendar synchronization
The default Exchange Account for mailbox and calendar synchronization is specified when you create a corresponding synchronization job. To change it, use properties of the corresponding mailbox or calendar synchronization job.
Public folder synchronization
The default Exchange Account for public folder synchronization (initially displayed on the Connection page of the Exchange server Properties) is set when you add the source or target organization to the migration project (see the Registering Source and Target Organizations section of the Migration Manager for Exchange User Guide for details). If necessary, you can change the default Exchange Account for public folder synchronization by clicking Modify on the General | Connection page in the properties of the corresponding server in the Migration Manager for Exchange Console.
To go on using the default Exchange Account for Exchange migration, grant the permissions required for Exchange migration to this account (see the next steps).
Granting Read Access to the Target Active Directory Domain
Target Exchange Account should have Read access to the target Active Directory.
To grant this permission to the Target Exchange Account, complete the following steps:
- In the Active Directory Users and Computers snap-in, right-click the domain name (in our example, targetdomain), and then click Properties.
- On the Security tab, click Add and select the Target Exchange Account (in our example, QMM_Trg_Ex).
- Select the Target Exchange Account, and then check the Allow box for the Read permission in the Permissions box.
- Click the Advanced button. In the Advanced Security Settings dialog box, select the account you specified on step 2, and click Edit.
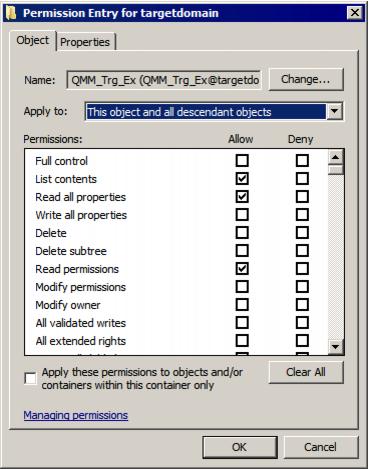
- In the Permission Entry dialog box, select This object and all descendant (child) objects from the Apply to drop-down list.
- Close the dialog boxes by clicking OK.
Granting Membership in Server Local Administrators Group
The Target Exchange Account used by Migration Manager for Exchange agents should be a member of the local Administrators group on each target Exchange server involved in the migration.
|

|
Caution: If the Exchange server is a domain controller, the account should be added to the domain local Administrators group of the domain. |
To add the Target Exchange Account to the local Administrators group on each target Exchange server involved in the migration, perform the following:
- Open the Computer Management snap-in (Click Start | Run, enter compmgmt.msc and then click OK).
- In the left pane click System Tools | Local Users and Groups | Groups.
- Right-click the Administrators group and click Add to Group.
- Click Add and select the Target Exchange Account (in our example, QMM_Trg_Ex).
- Close the dialog boxes by clicking OK.
Granting Full Control on Organizational Unit (Target Exchange Account)
Granting Full Control on Organizational Unit
To work with the target Active Directory objects, the Target Exchange Account needs the Full Control permission on the organizational units and their child objects that contain the objects to be synchronized. This permission should be set on the domain controller where the objects you need to synchronize are located.
To grant the required permissions to the account, perform the following steps:
- In the Active Directory Users and Computers snap-in, right-click the OU where the objects are located, and click Properties.
- On the Security tab, click Add, and select the Target Exchange Account (in our example, QMM_Trg_Ex).
|

|
NOTE: If there is no Security tab, you should select View | Advanced Features in the Active Directory Users and Computers snap-in. |
- Select the account name, and then enable the Allow option for the Full Control permission in the Permissions box.
- Click the Advanced button. In the Advanced Security Settings dialog box, select the account you specified on step 2, and click Edit.
- In the Permission Entry dialog box, select This object and all child (descendant) objects from the Apply onto drop-down list.
- Close the dialog boxes by clicking OK.
