a.On the SharePoint Central Administration page, select Application Management.
b.On the Application Management page, under Metalogix Replicator, select Configure Web Application.
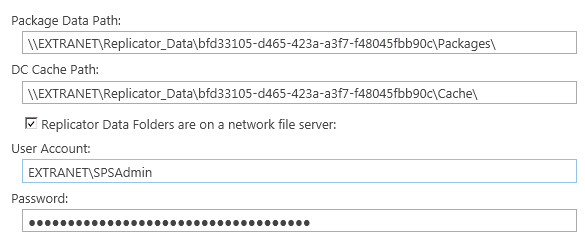
c.Scroll to the bottom of the Configure Web Application page and expand Replicator Data Folders.
d.Ensure the account you selected in step 2 has permission to both read from and write to each of the Replicator Data Folders. Also ensure that account is specified on this page.
e.Note the paths and the user account. We will use this information to configure IIS virtual directories later.
f.If you have not previously enabled this web application for replication, then do that now. This creates the Replicator Data Folders.
a.Start Internet Information Services (IIS) Manager.
b.Expand the site's folder, then _layouts, Metalogix, and Replicator. You will see an Images folder under the Replicator folder.
c.Right-click on the Replicator folder and select Add Virtual Directory.
d.In the Add Virtual Directory dialog:
·For Alias field, enter Import.
·For Physical Path, enter the Import Path from the Configure Web Application page.
e.Click Connect as.
f.In the Connect As dialog:
·Select Specific user.
·Click Set and enter the user account information from the Configure Web Application page. If the user account included a domain, then you must also include it here, for example EXTRANET\spadmin.
·Click OK twice to return to the Add Virtual Directory dialog.
g.Click Test Settings to validate the virtual directory settings you have entered.
h.If both tests pass, then click Close to return to the Add Virtual Directory dialog and then click OK to create the virtual directory.
i.Repeat steps 7 through 12 to create a virtual directory named Export, using the Export Path value from the Configure Web Application page.
j.Restart the site for the extended web application.
The web application extension is now fully prepared for Replicator. You can proceed to configure Replicator as described in the Metalogix Replicator documentation.
When you create the Replication Connection for your web applications, connect to the NTLM-only web application extension.
Web applications using claims-based authentication translate user accounts into claims identities. Each NTLM identity is prefixed with one of the following tokens:
|
Authentication Type |
Token Prefix |
Example Identity |
|---|---|---|
|
Classic |
none |
DOMAIN\username |
|
Claims-based Windows |
i:0#.w| |
i:0#.w|DOMAIN\username |
|
Forms-based |
i:0#.f|<MembershipProviderName>| |
i:0#.f|sqlmember|username |
For more information on remapping domains and user accounts, see SKB 1100224, User and Domain Remapping in the Metalogix Knowledge Base.
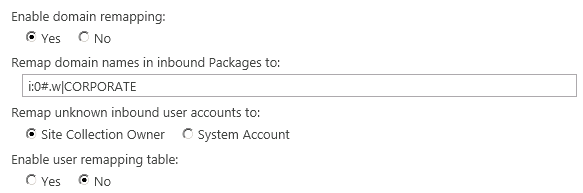
When configuring domain on the Replicator Configure Web Application page, you must specify this prefix before the domain. For example, if the Corporate Portal web application uses claims-based authentication with Windows authentication and we want to remap all inbound changes to the CORPORATE domain, then we would configure the web application as follows:
In this example, changes made by LONDON\paul would be remapped to CORPORATE\paul when they are applied on the Corporate Portal.
Since forms-based authentication accounts do not have a domain, you cannot use domain remapping with web applications using forms-based authentication. You can use user remapping in these situations.