Script Functions execute scripts and return desired results. In this we will create two Script Functions: Send Warning Message and Send Error Message. These functions call the sendMessage() function and that uses a Message Association as input. This function is defined in the FunctionHelper interface available in the WCF API.
For the purpose of this example, we are making a call to the sendMessage() function when a label is selected in order to display a message in the browser interface and illustrate the usage of Message Associations. However, in a typical scenario, you will likely use messages in your code, for example, to inform the users that a background process has finished. This can be done by calling the sendMessage() function from the code instead of creating a Script Function and invoking it from a view.
For complete information about the sendMessage() function and the WCF API, see the WCF API Reference in the online help, accessible from the Getting Started page under Developing Foglight Cartridges.
|
d |
|
e |
|
f |
|
g |
|
2 |
In the Script Text box, type the following text: |

|
3 |
Observe the Output Data Type property. |
In this you will create two Label views: Warning Label and Error Label. Each of these Labels will invoke the appropriate Script Function in their flow.
|
h |
|
i |
|
j |
In the Add View dialog box that appears, on the Create a Blank View tab, choose Common > Label and click OK. |
|
k |
|
a |
Open the Configuration tab. |
|
b |
In the row containing the Label property, in the Value column, click Edit |
|
c |
|
d |
Click Set. |
|
3 |
Enable the triggering of the Send Warning Message function when the Label is selected. |
|
a |
Open the Flow tab. |
|
b |
Click Selection in the list. |
|
c |
|
d |
|
e |
|
f |
|
g |
|
h |
In the Edit dialog box that appears, click the selector button ( |
|
• |
Name: Error Label |
|
• |
Label: Send an Error Message |
|
• |
Update Flow: Configure it to include a context key pointing to the Send Error Message function. |
The Label views are created. Next, add these labels to a dashboard and send test messages.
In this you will create a simple dashboard, Send Messages, and add the Label views to the layout. You will then test the messaging actions by invoking Warning and Error messages and observe the resulting flow.
|
i |
In the Module Contents pane, ensure that Views is selected. |
|
j |
|
k |
In the Add View dialog box that appears, on the Create a Blank View tab, choose Common > Grid Layout. Click OK. |
|
l |
|
a |
Open the Layout tab. |
|
b |
Click Add. |
|
c |
In the Add View dialog box that appears, ensure that Selecting existing view is selected and click Next. |
|
d |
Navigate to your working module and select the Warning Label from the tree. |
|
g |

|
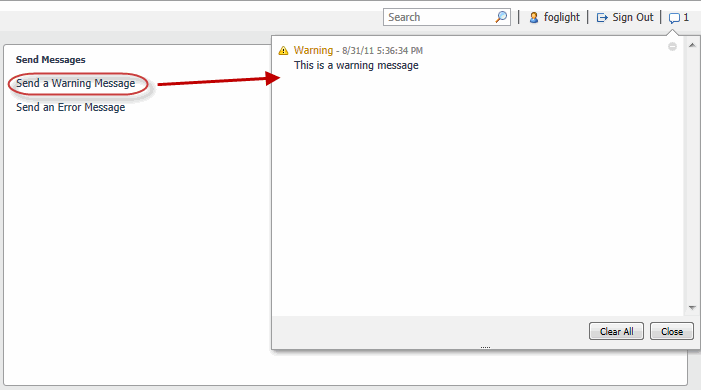
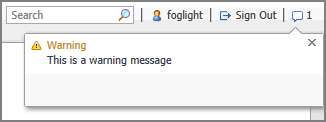
h |
Click Send a Warning Message. |
|
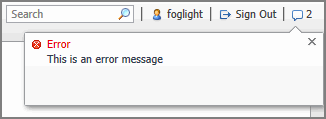
i |
Click Send an Error Message. |

|
k |
Optional. Clear all or individual messages, or close the list. |