Optimal Placement
|
2 |
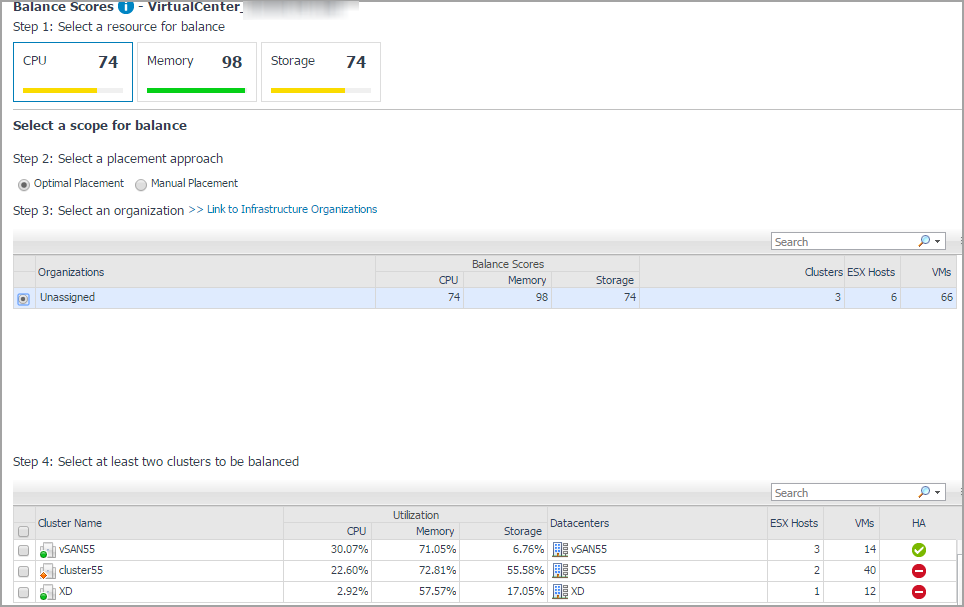
Select Optimal Placement under Step 2: Select a placement approach. |
|
• |
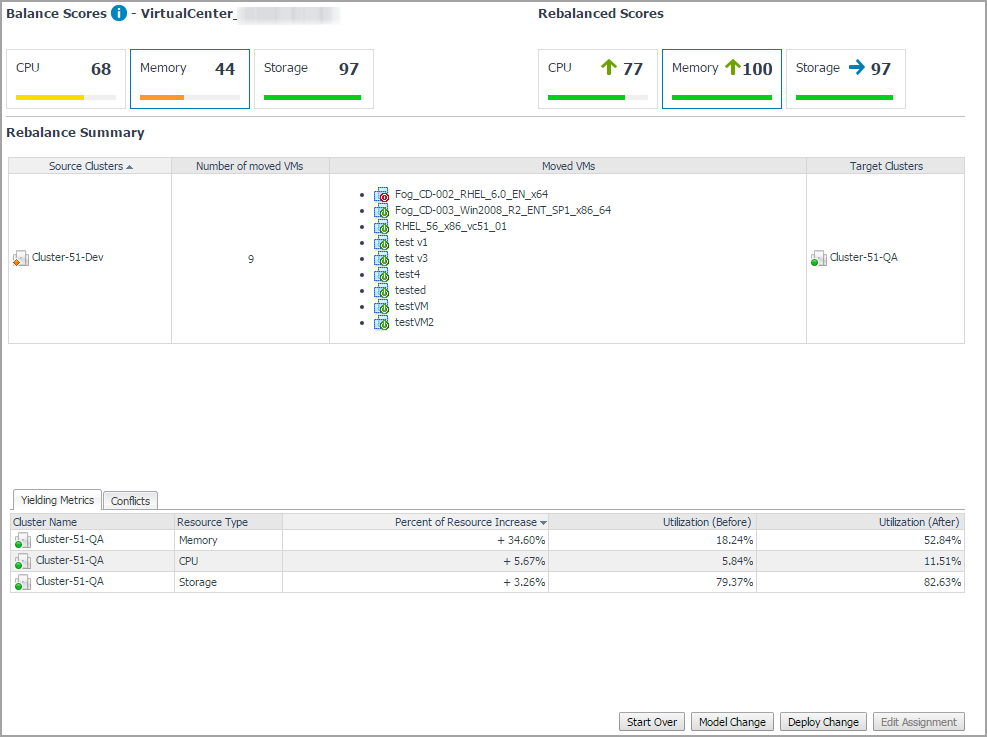
Balance Scores: The original Balance Score before the optimal placement. For more information, see Balance Score. |
|
• |
Rebalance Scores: The updated Balance Score if the optimal placement is deployed. |
|
• |
Source Clusters: The clusters from which virtual machines are moved. |
|
• |
Number of moved VMs: The number of the virtual machines to be moved to the Target Clusters. |
|
• |
Moved VMs: The list of virtual machines to be moved to the Target Clusters. |
|
• |
Target Clusters: The clusters to which virtual machines are moved. |
|
• |
Yielding Metrics: The resource utilization before/after the optimal placement, and the increase percent of resources. |
|
• |
Conflicts: The list of conflicts to occur if the optimal placement is deployed. The types of conflicts include affinity rules violation, organization conflicts, and unavailable network accesses. |
|
6 |
Click Start Over if you want to redo the resource rebalance. |
Balance Score is scaled from 0 (non-balanced) to 100 (balanced). The same resource utilizations across all containers achieve a perfect Balance Score, for example, Balance Score is 100 if the CPU/Memory/Storage Capacity utilizations are 30% for all clusters. The Balance Score is approximately 0 if the resource utilization is 100% for cluster 1 and cluster 2, while resource utilization for cluster 3 is 0%.
Balance Score is divided into the following four ranges:
|
Default value is 25. To change this value, search for and edit CapacityHealthScoreFatal from Dashboards > Administration > Rules & Notifications > Manage Registry Variables. | ||
|
Default value is 50. To change this value, search for and edit CapacityHealthScoreCritical from Dashboards > Administration > Rules & Notifications > Manage Registry Variables. | ||
|
Default value is 75. To change this value, search for and edit CapacityHealthScoreWarning from Dashboards > Administration > Rules & Notifications > Manage Registry Variables. | ||
Modeling Placement
|
1 |
After Step 5 in To perform an optimal placement: or Step 7 in To perform a manual placement:, the placement recommendations appear in the Scenario Modeler pane. |
|
2 |
Click Model Change. |
|
3 |
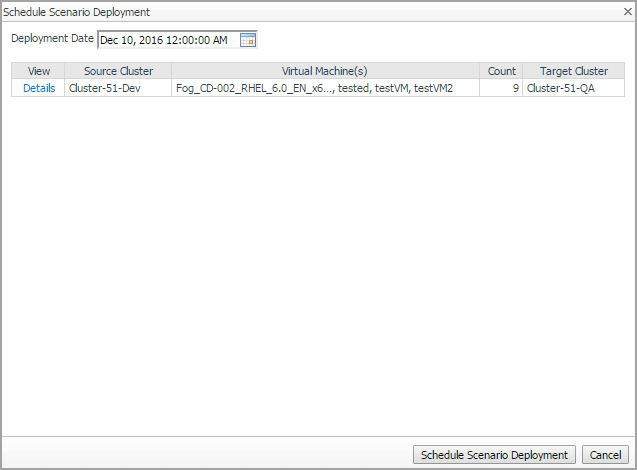
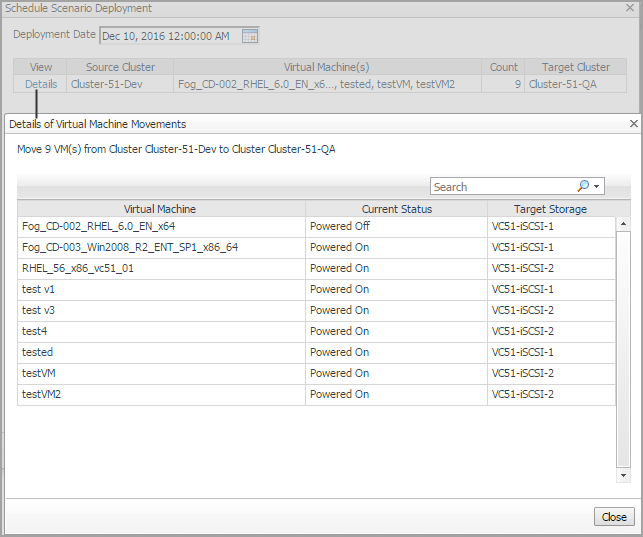
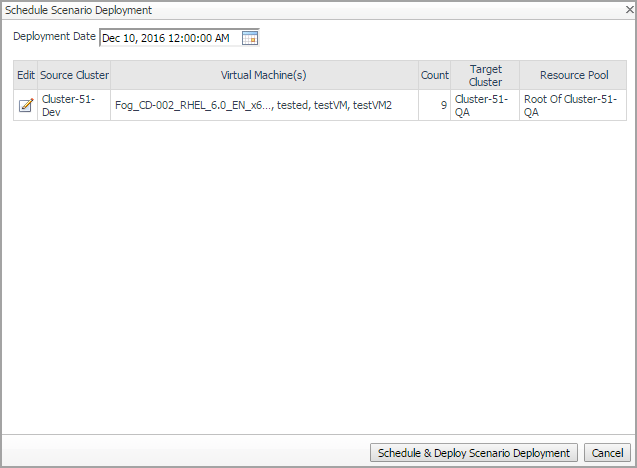
(Optional) In the Schedule Scenario Deployment dialog box, click Details to view details of Virtual Machine Movements. Click Close and return to the Schedule Scenario Deployment dialog box. |
|
4 |
In the Schedule Scenario Deployment dialog box, select the Deployment Date, and click Schedule Scenario Deployment. |
Deploying Placement
|
1 |
After Step 5 in To perform an optimal placement: or Step 7 in To perform a manual placement:, the placement recommendations appear in the Scenario Modeler pane. |
|
2 |
Click Deploy Change. |
|
3 |
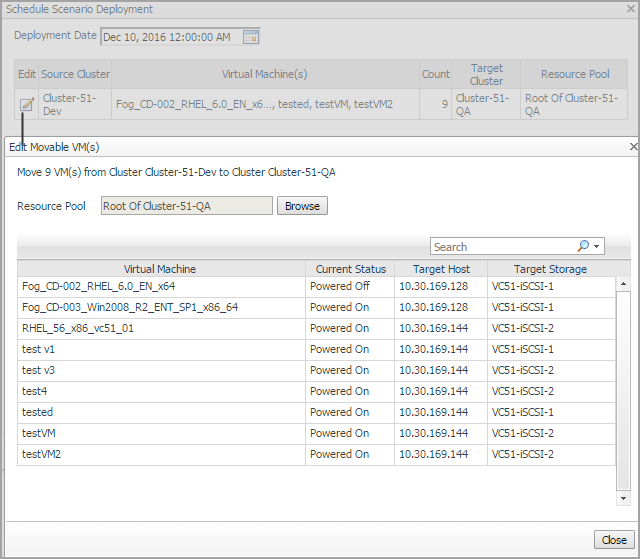
(Optional) In the Schedule Scenario Deployment dialog box, click the Edit icon to open the Edit Movable VM(s) dialog box, and then click Browse next to Resource Pool to make changes as needed. Click Close to save changes and return to the Schedule Scenario Deployment dialog box. |
Manual Placement
|
2 |
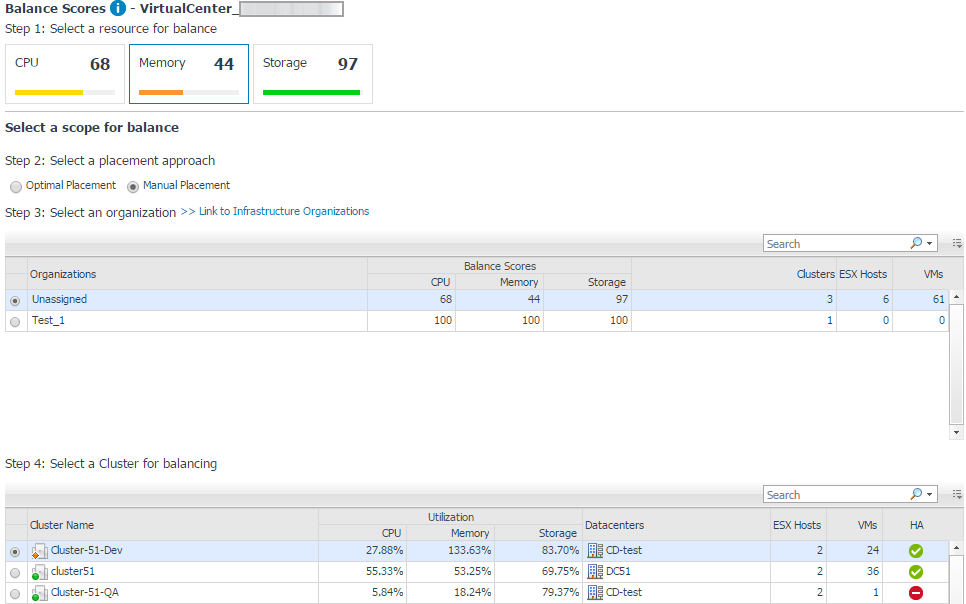
Select Manual Placement under Step 2: Select a placement approach. |
|
• |
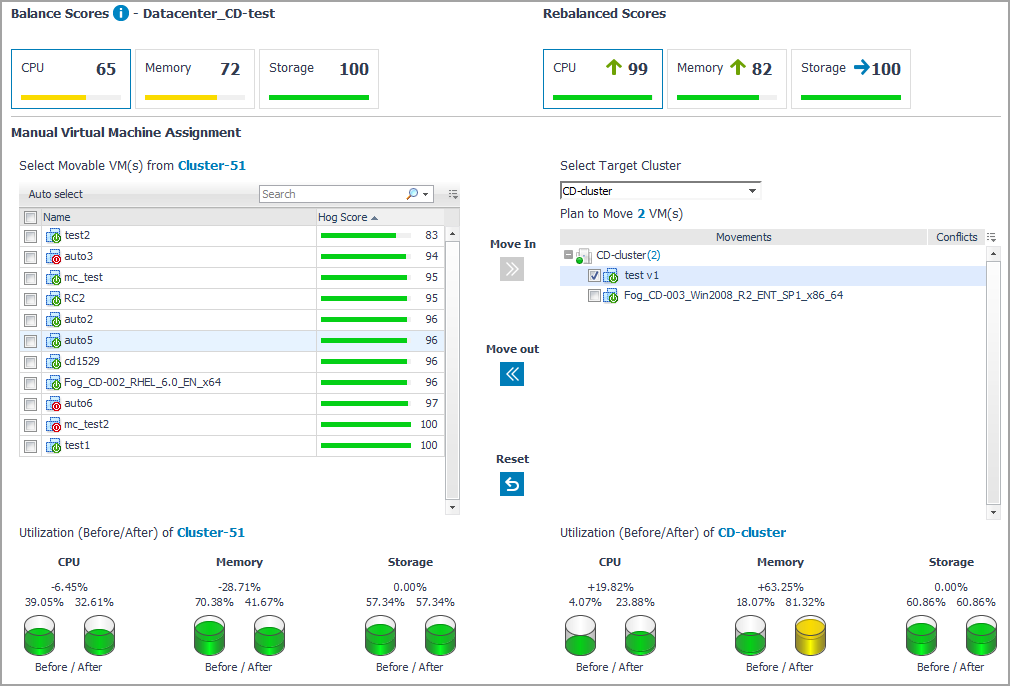
Balance Scores: The original Balance Score before the manual placement. For more information, see Balance Score. |
|
• |
Rebalance Scores: The updated Balance Score if the manual placement is deployed. |
|
6 |
Click Proceed to Summary. |
|
• |
Balance Scores: The original Balance Score before the manual placement. |
|
• |
Rebalance Scores: The updated Balance Score if the manual placement is deployed. |
|
• |
Source Clusters: The clusters from which virtual machines are moved. |
|
• |
Number of moved VMs: The number of the virtual machines to be moved to the Target Clusters. |
|
• |
Moved VMs: The list of virtual machines to be moved to the Target Clusters. |
|
• |
Target Clusters: The clusters to which virtual machines are moved. |
|
• |
Yielding Metrics: The resource utilization before/after the manual placement, and the increase percent of resources. |
|
• |
Conflicts: The list of conflicts that will be occurred if the manual placement is deployed. The types of conflicts include affinity rules violation, organization conflicts, and unavailable network accesses. |
|
8 |
Click Start Over if you want to redo the resource rebalance. |
Hog Score can be regarded as the health score. It is scaled from 0 to 100 and helps achieve more predictable results when performing the rebalance. If Hog Score of a virtual machine is too low and is displayed in red, Foglight for VMware recommends moving this virtual machine to other clusters.
Resource utilization of a virtual machine and free capacity of a cluster are two factors that impact the Hog Score. For example, the Hog Score is low (unhealthy) if CPU utilization of a virtual machine is much higher than other resource utilizations in the same cluster. The Hog Score is high (healthy) if the CPU utilization of a virtual machine is much lower than the free capacity of a cluster on which this virtual machine is deployed.
Hog Score is divided into the following four ranges:
|
Default value is 25. To change this value, search for and edit CapacityHealthScoreFatal from Dashboards > Administration > Rules & Notifications > Manage Registry Variables. | ||
|
Default value is 50. To change this value, search for and edit CapacityHealthScoreCritical from Dashboards > Administration > Rules & Notifications > Manage Registry Variables. | ||
|
Default value is 75. To change this value, search for and edit CapacityHealthScoreWarning from Dashboards > Administration > Rules & Notifications > Manage Registry Variables. | ||

