An Object Page is used to present the details of an Object Instance - a web user selects the object on an Index Page or Diagram, and the Object Page displays its properties.
You must have an Object Page configured for each type of Object you want to see the details of in your Evolve Site.
|
|
You can create more than one Object Page per Object Type. Additional Object Pages you create for an Object Type are displayed as Views. For more information about creating multiple Object Pages as Views, see: Object Page Views. Important: You can only display an individual Property Type, or an Association Type, once on an Object Page, including across Tabs. |
Creating a basic Object Page is a multi-step process. Please follow the steps below.
Step 1 - Create the Page
To create an Object Page:
1.In Evolve Designer, expand the Site node.
2.Right-click the Object Pages node.
3.Select Add Object Page for Object Type.
4.Scroll through the pop-up list to select the Object Type the Object Page represents
The new Object Page is created and is placed at the bottom of the list of Object Pages in the tree. It is given a default name of <object-type-name>.
If you close and reopen Evolve Designer, then the new page will be listed alphabetically.
Step 2 - Specify the page properties
Once you have made an Object Page you should configure its properties.
To specify the page properties:
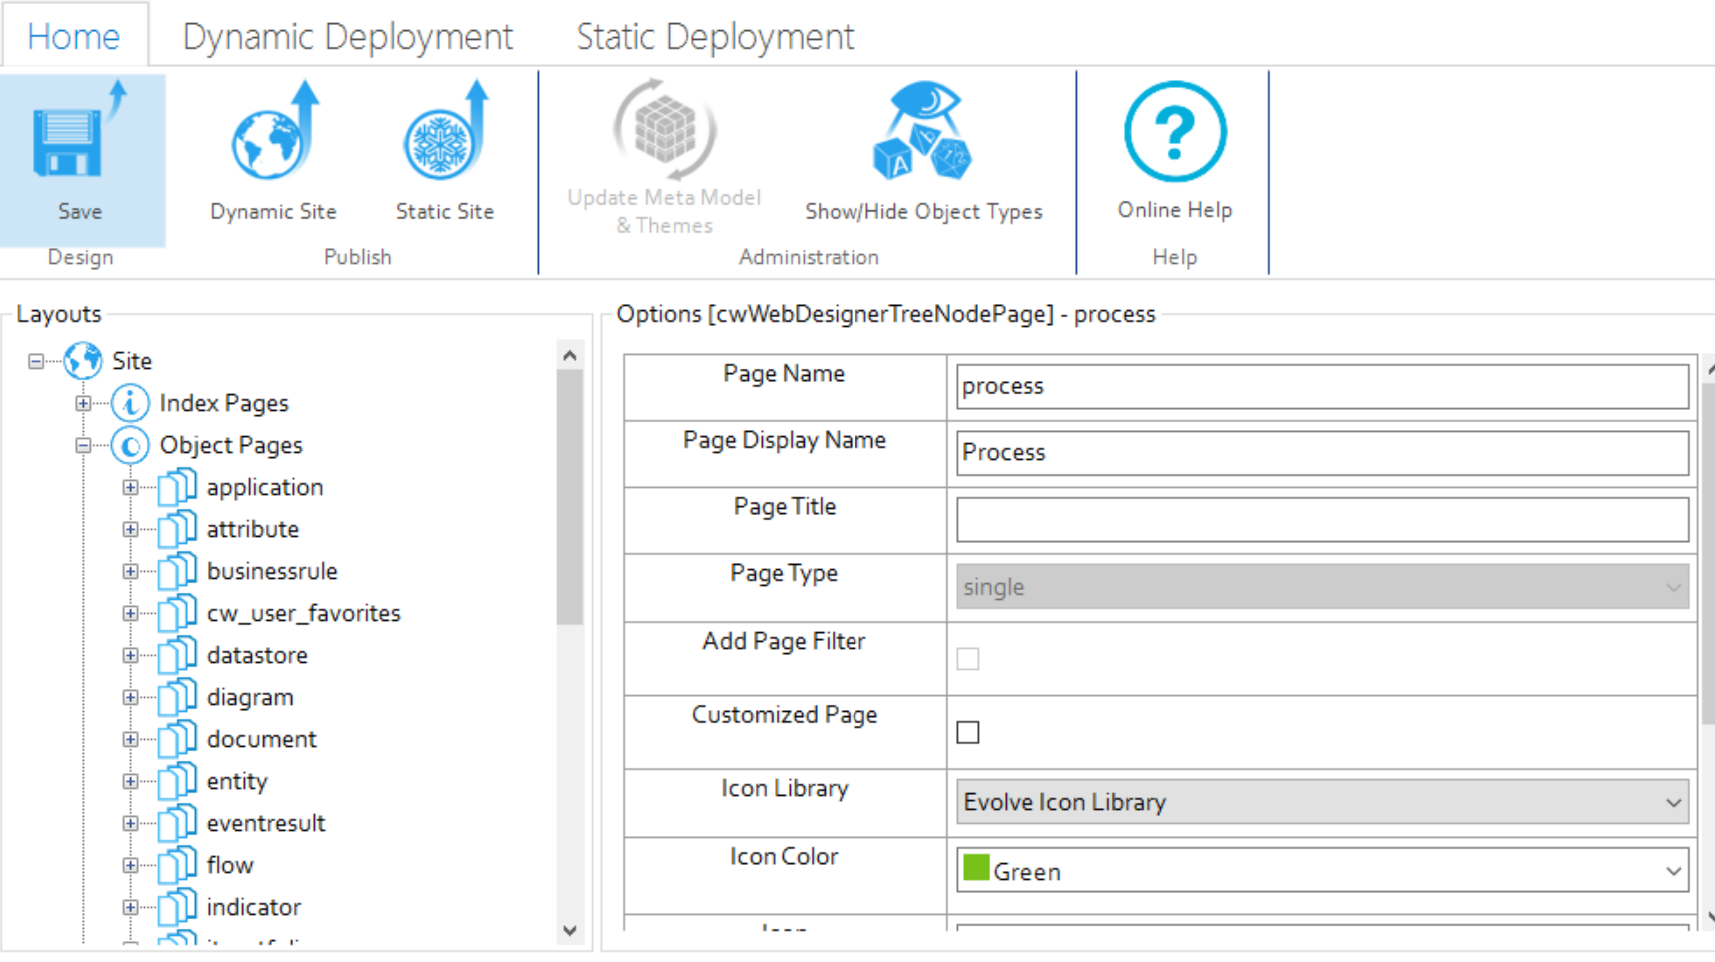
1.Select the node for the Object Page.
The right-hand panel shows the properties for the page.
2.Edit the page's properties:
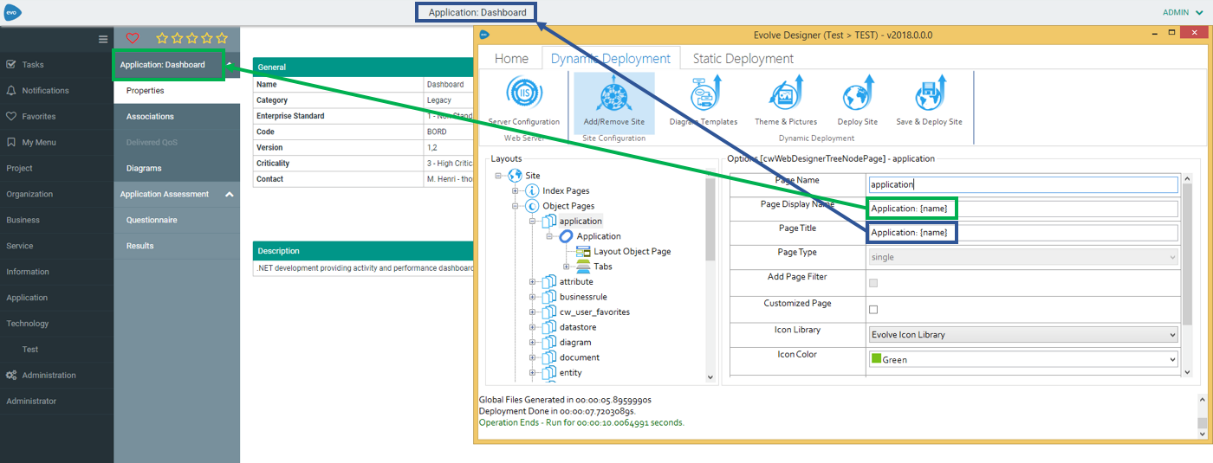
- Use Page Name to specify the name of the page as it appears in the tree in Evolve Designer. Please note you can only use lower case letters with no spaces.
|
|
We recommend you do not change the Page Name, unless you are creating an additional Object Page for the Object Type to act as a View - in which case you must give it a unique name to avoid a conflict. |
- Use Page Display Name to set the name of the page as it appears in Evolve web pages, such as in the menu of Views.
- Use Page Title to set the name of the page as it appears in Evolve web pages, as the title of the Page. Introduced in version 2018, it has possible to use a Custom Display String, to format the Title.
3.Save your Site.
The Object Page's properties are configured and saved.
You have now created an Object Page, but it will not yet display any content.
Step 3 - Show some content
|
|
The instructions here explain how to insert a simple Property Group displaying the basic properties from the 'General' Pane of the object. Object Pages can display much more than this simple element. You can also use Tabs to display more content on Object Pages, including Object Lists for Associated Objects, rather like you would on an Index Page. |
The simplest way to display some content is to show some properties of the Object being viewed.
You do this by inserting a Property Group.
To insert a simple Property Group:
1.Expand the node for the Object Page
2.Right-click the Object Type Name node, for example 'Process', and choose New Property Group > From CM Panel > General
A 'General' node is added beneath the Object Type Name node.
3.Save your Site.
The Object Page is saved.
To read more about Property Groups and how to use them, see Working with Property Groups.
Creating Objects from an Object Grid Using Object Pages (4.0.2 onwards)
You can new create objects in an Object Grid by utilising an existing Create Object page.
To do this:
1.Check the Add Object box
2.Check the Use Object Page For Add box
3.In the Create Object Page Name, select the Object Page from which you wish to generate additional objects.
Just as you can have Multiple Index Pages for one Object Type, you can also have multiple Object Pages for an Object Type.
When you have more than one Object Page for an Object Type, it is called a View.
You can use Views to offer a different perspective on the object in focus, perhaps showing a different set of properties to the default page, or show the object in context, based on its relationships to other objects.
When a user views an Object Page, the default page is the one which has a Page Name matching the Object Type name, such as 'process' for the Process Object Type. Any other pages, or Views, are displayed as links in a menu above the page title, so the user can click them to view the pages.
Creating Object Page Views
To create an Object Page View, simply create a new Object Page for your Object Type - in exactly the same way you would for any Object Page.
However, you must make sure your new Object Page has a unique Page Name - you cannot for example have two Object Pages titled 'process', so you should rename the new one so that it is different.
In every other respect, creating an Object Page View is the same as creating a standard Object Page.
Associating Non-Diagram Objects
You can associate any object with another object that is not part of the diagram. Additionally, you can view, add, update and delete multiple associated objects and their properties in erwin Web Modeler by configuring Evolve Designer.
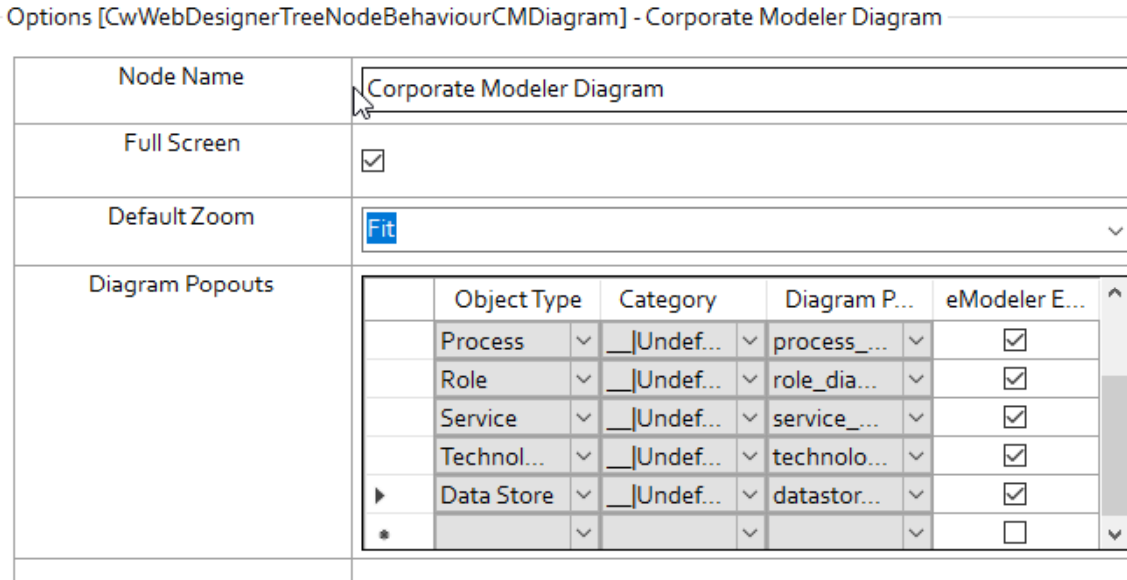
To view the list of Object Types displayed in the Diagram Popouts:
1.Start Evolve Designer.
2.Click a model. For example, EA Foundation – Sample Model.
3.Click Site.
4.Expand Site > Object Pages.
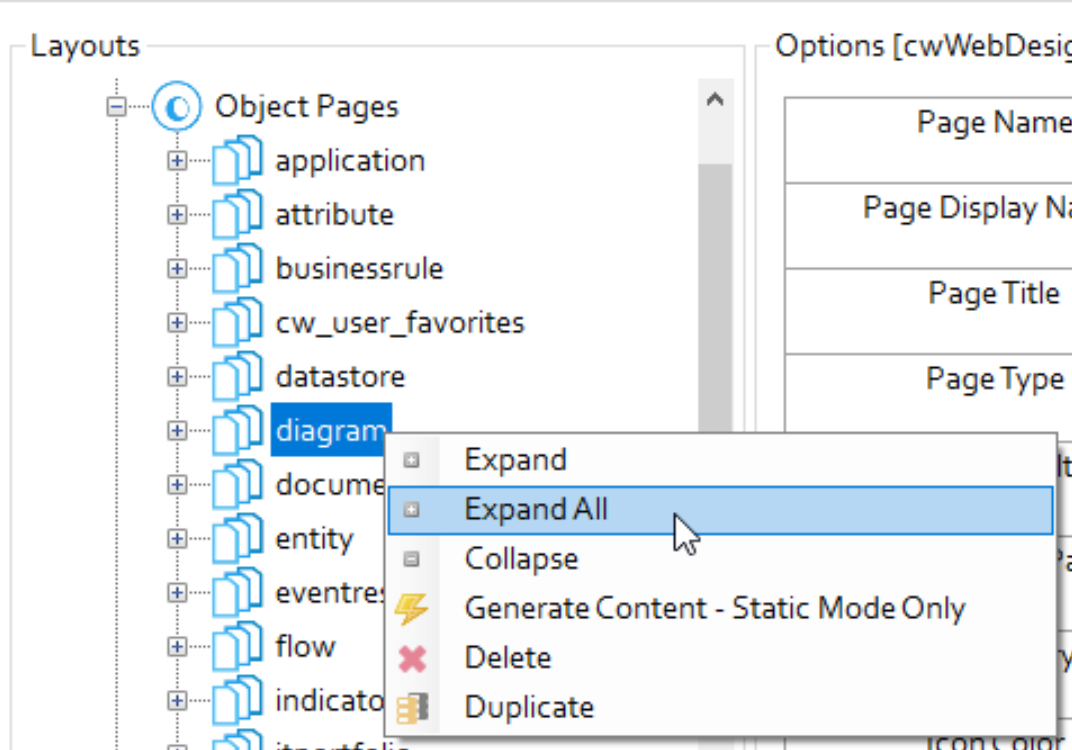
5.Right-click diagram and click Expand All.
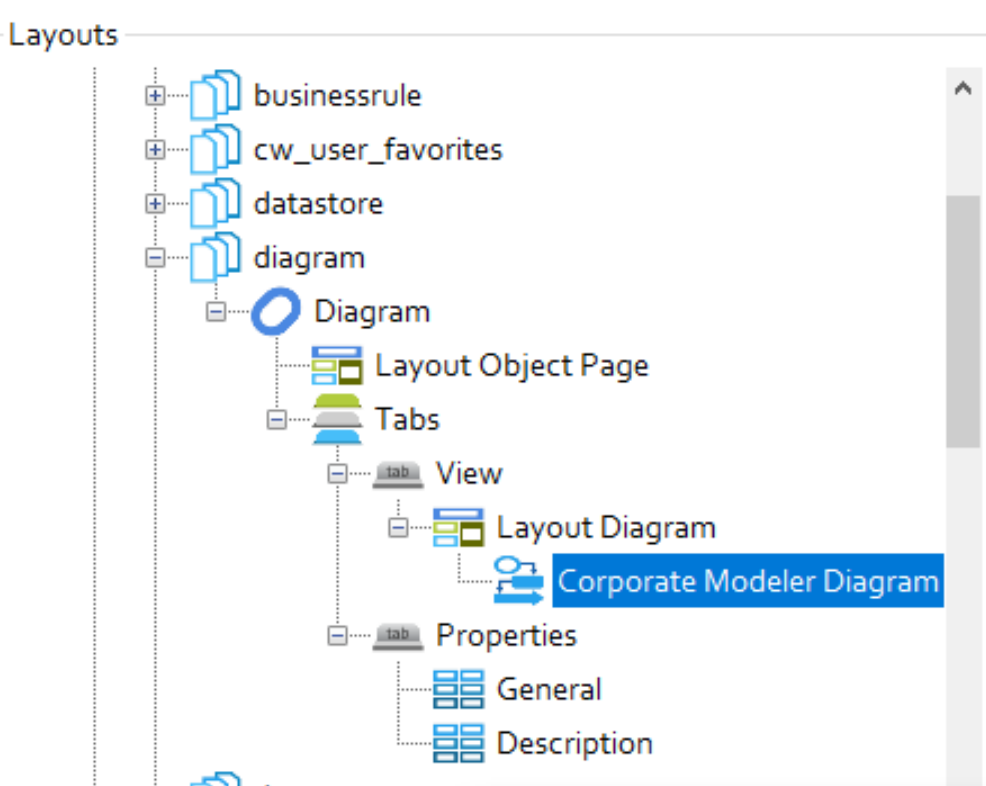
6.Click Corporate Modeler Diagram.
The list of Object Types appears under Diagram Popouts.
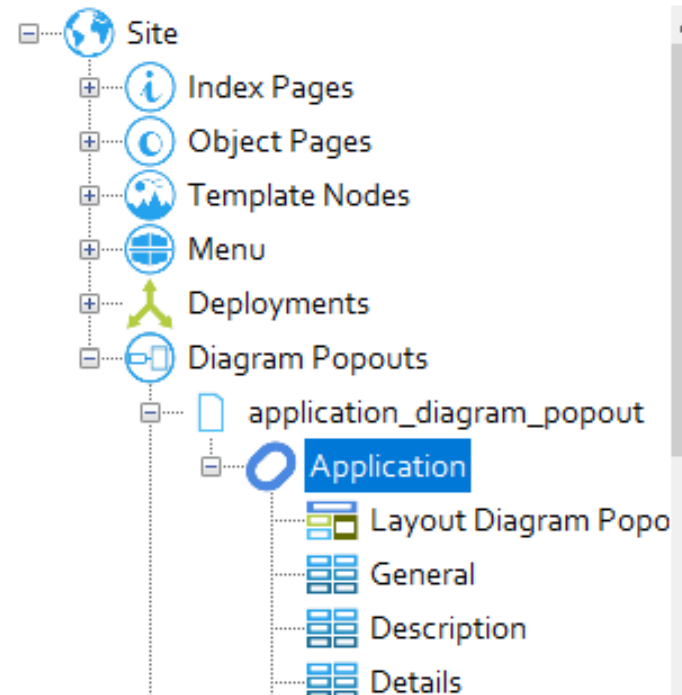
To create an Object Type Association:
1.Start Evolve Designer.
2.Click a model. For example, EA Foundation – Sample Model.
3.Click Site.
4.Expand Site > Diagram Popouts > application_diagram popout > Application.
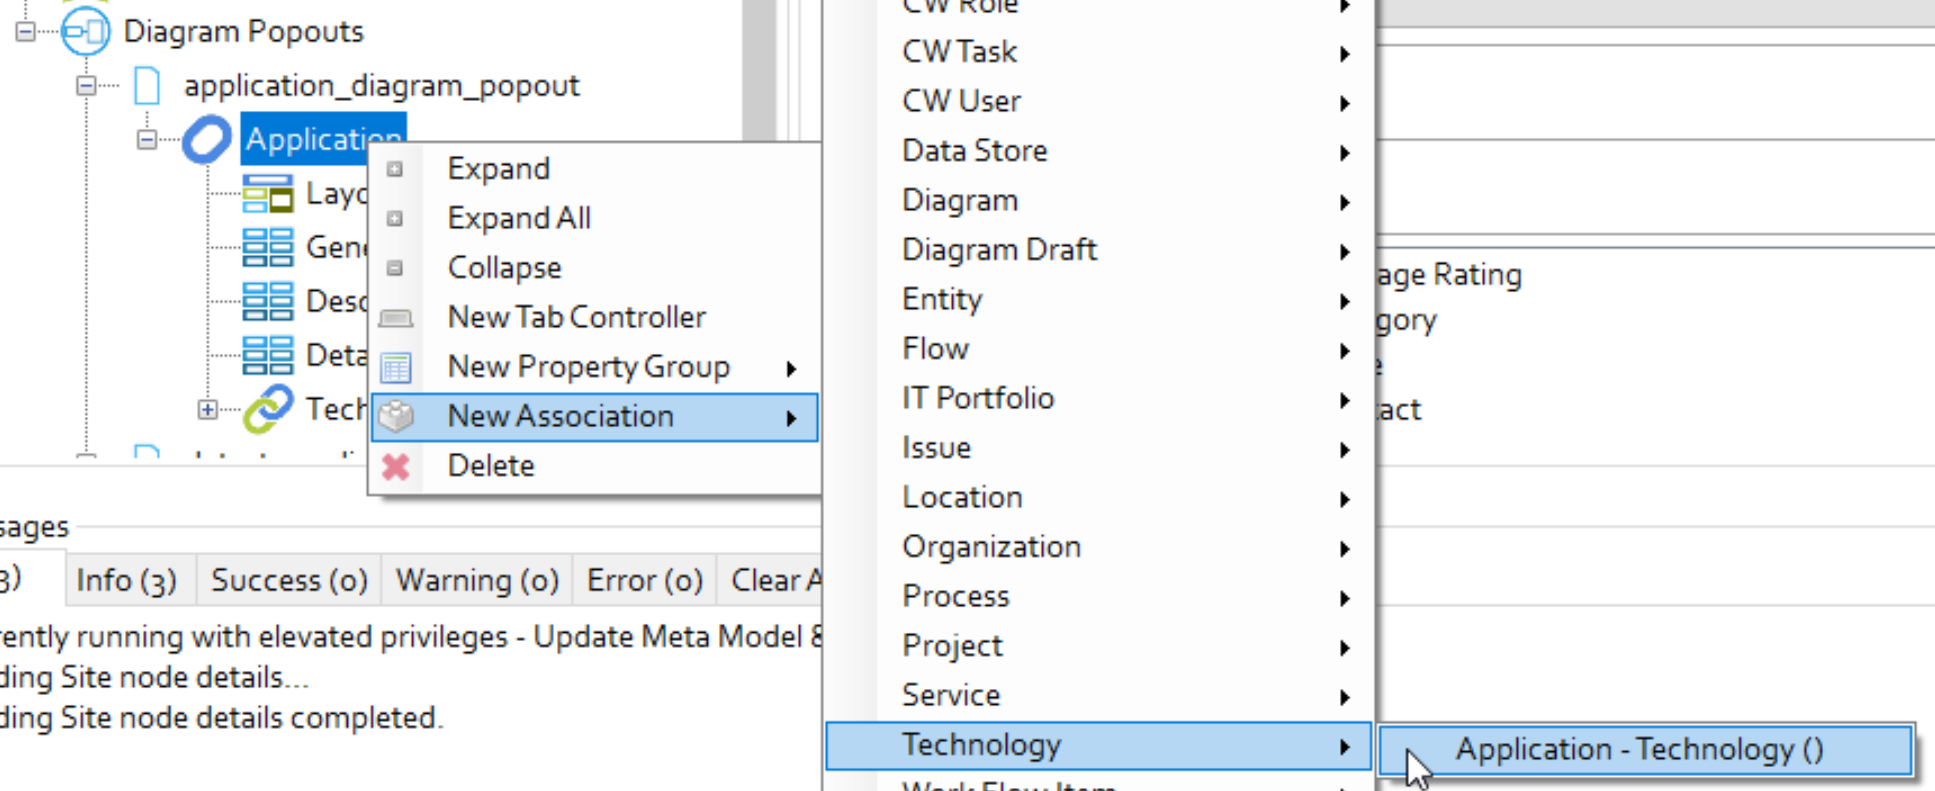
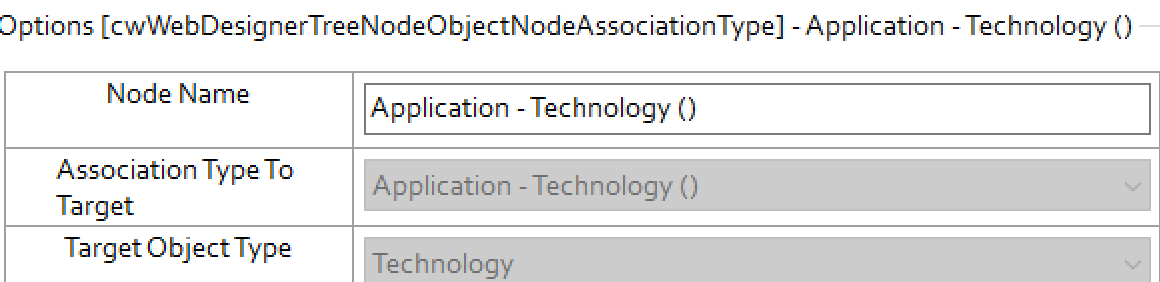
5.Right-click Application and click New Association > Technology > Application – Technology ().
|
|
You can add any Object Type Associations. |
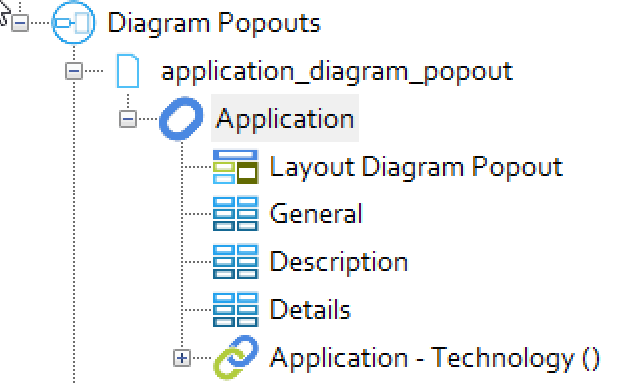
6.Click Application – Technology () node.
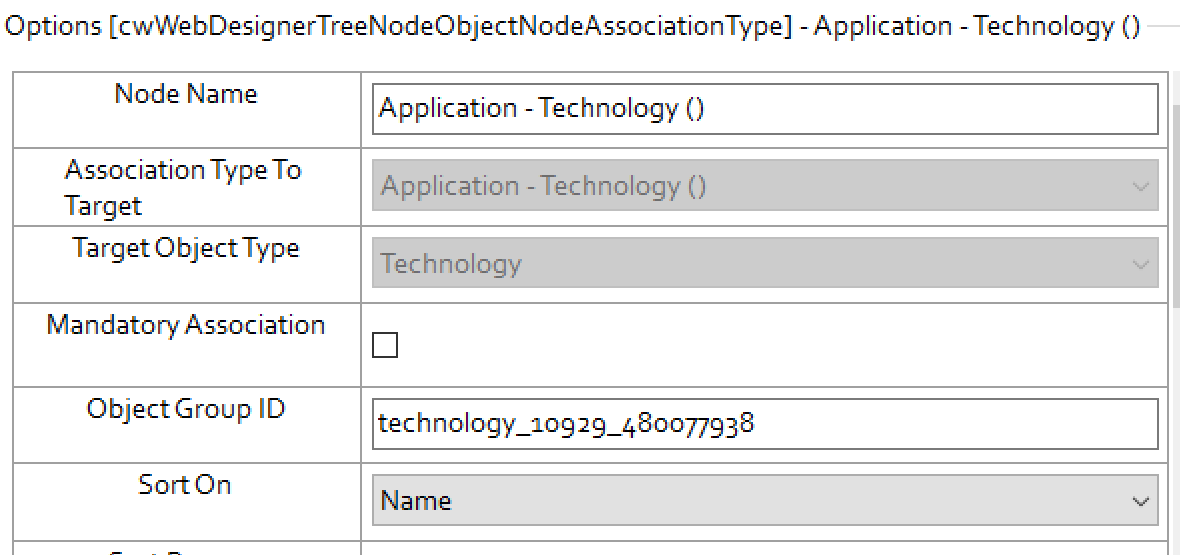
7.In the Node Name box, replace “Application – Technology ()” with “Technologies”.
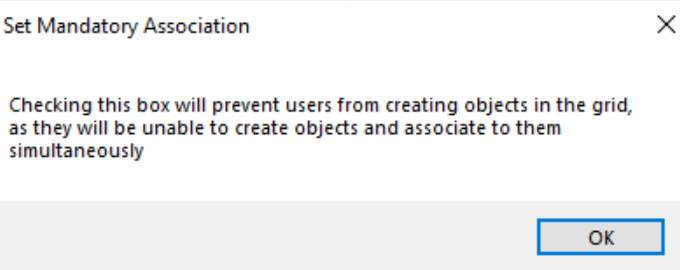
8.Optional: If you want the diagram user to be forced to have at least one associate object, then select the Mandatory Association check box.
A Set Mandatory Association pop-up appears.
9.Click OK.
10.Click Save.
11.Click Dynamic Site.
The Associated Objects are now visible in the diagram.
To view the Associated Objects in the diagram:
1.Open the browser and login to erwin Evolve Web.
2.Click a model. For example, EA Foundation – Sample Model.
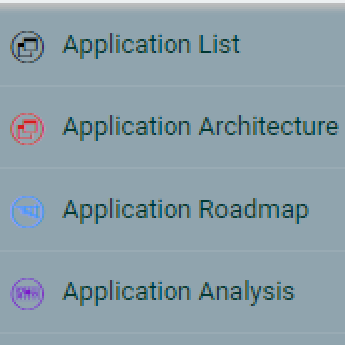
3.In the left pane, click Application.
4.Click Application Architecture.
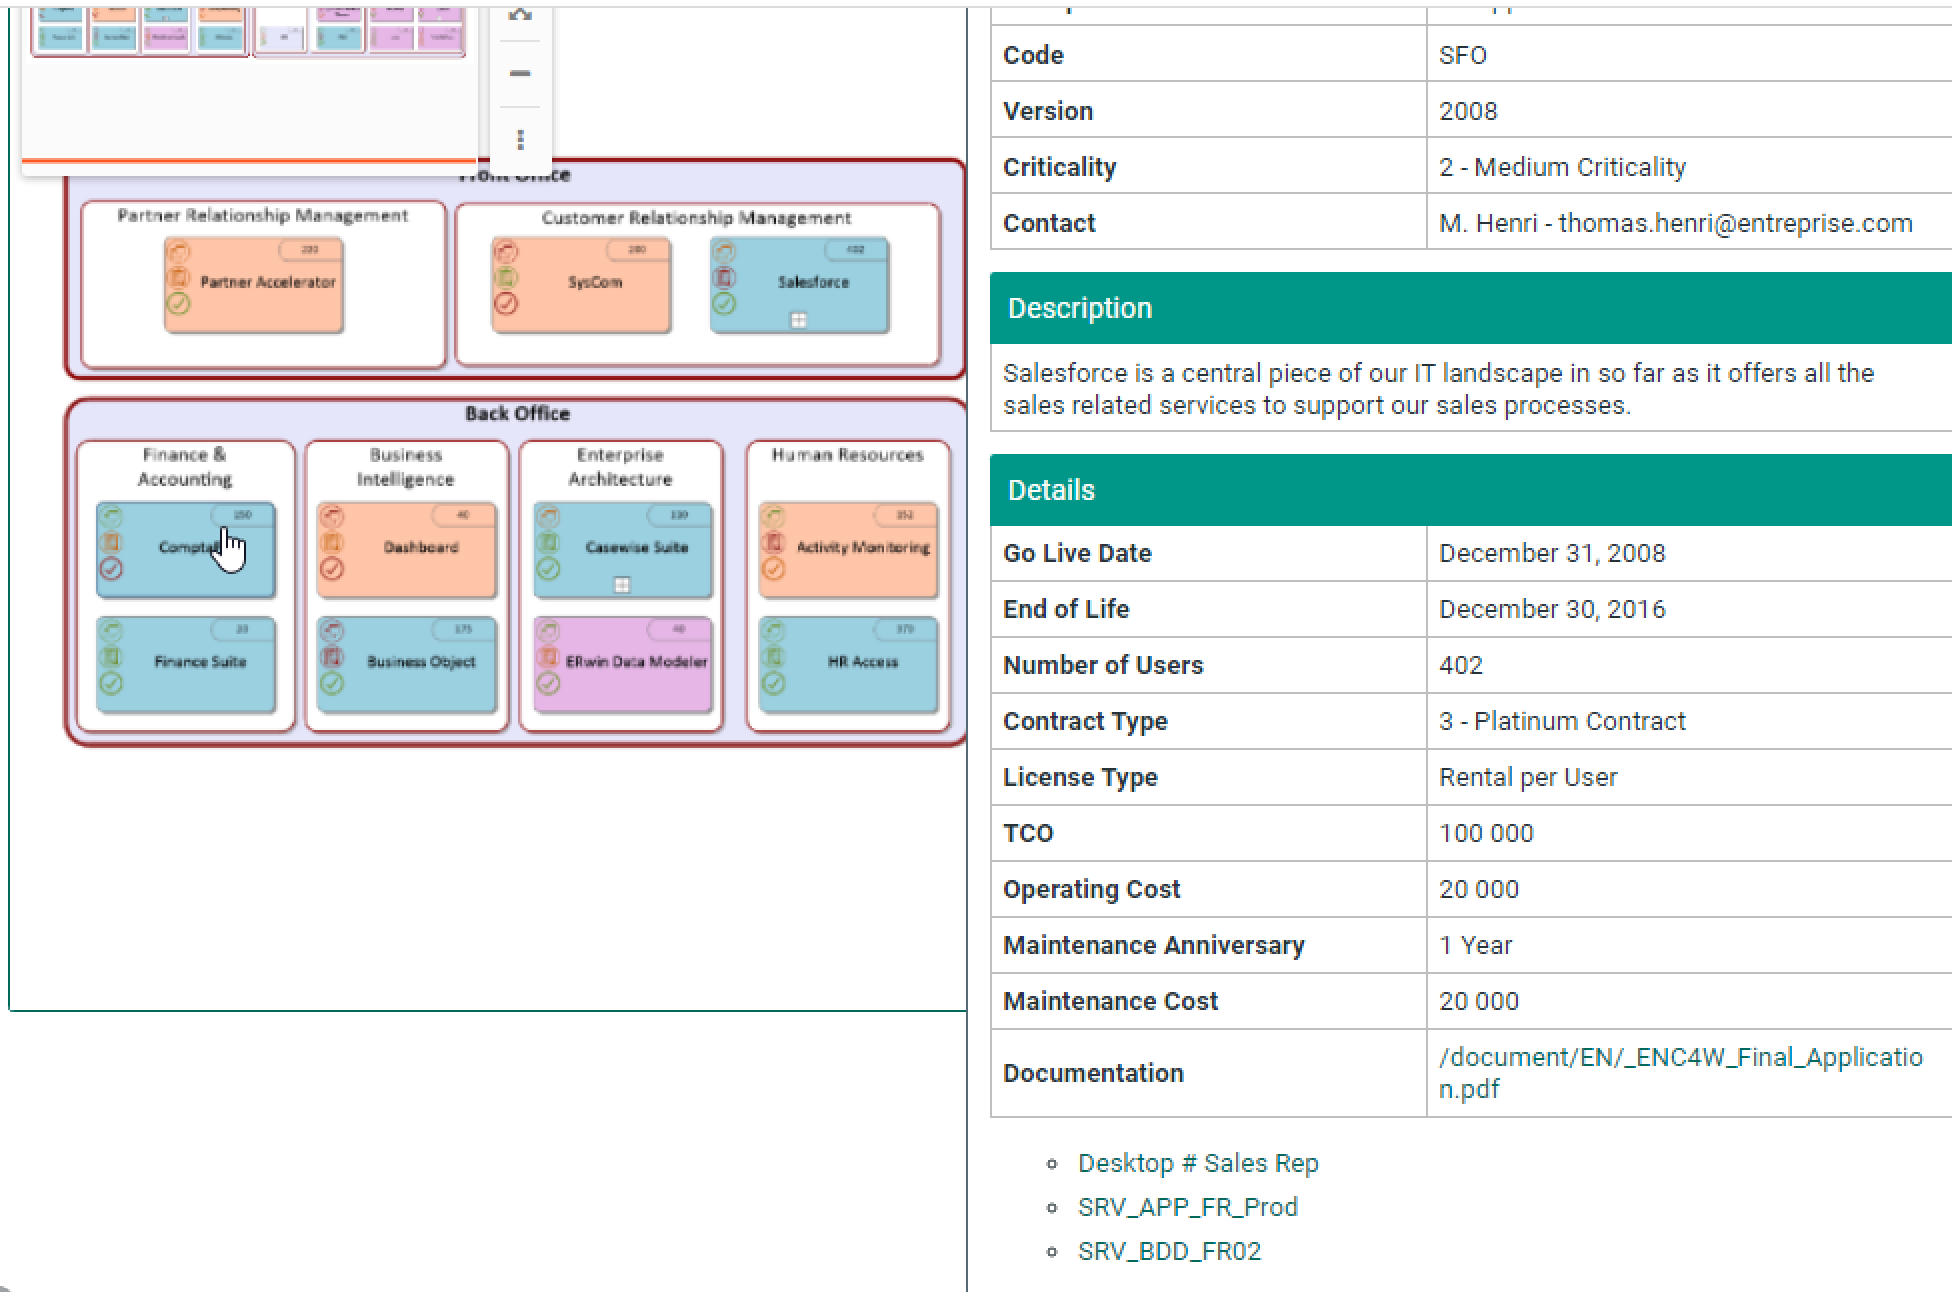
5.Click the required object for which you want to view Associated Object. For example, Salesforce.
The Associated Objects Types are now visible in the right pane.
To add Associated Objects in erwin Web Modeler:
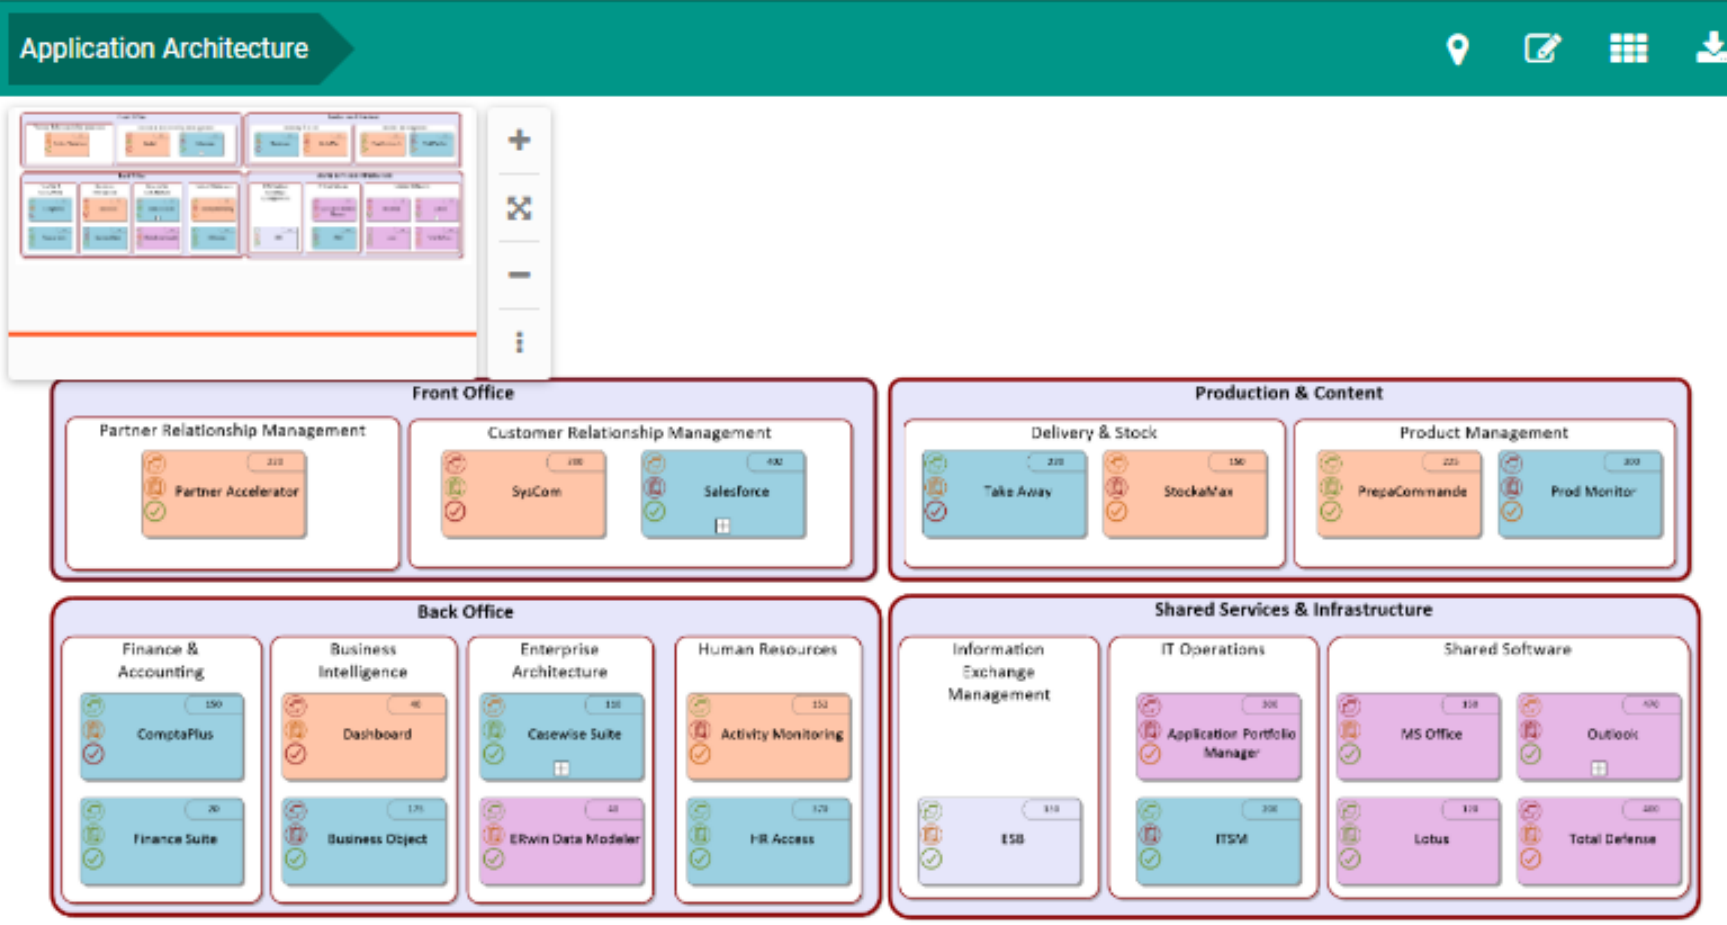
1.Click the Edit Diagram In Web Modeler icon.
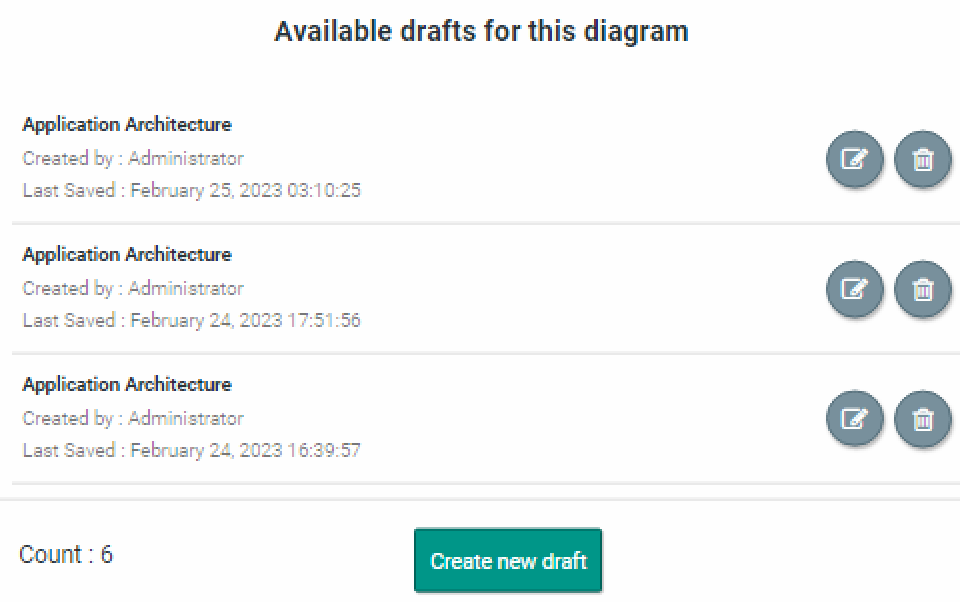
2.Click Create new draft.
The erwin Web Modeler editor opens in the new tab with the predefined Shape Palette of the selected template.
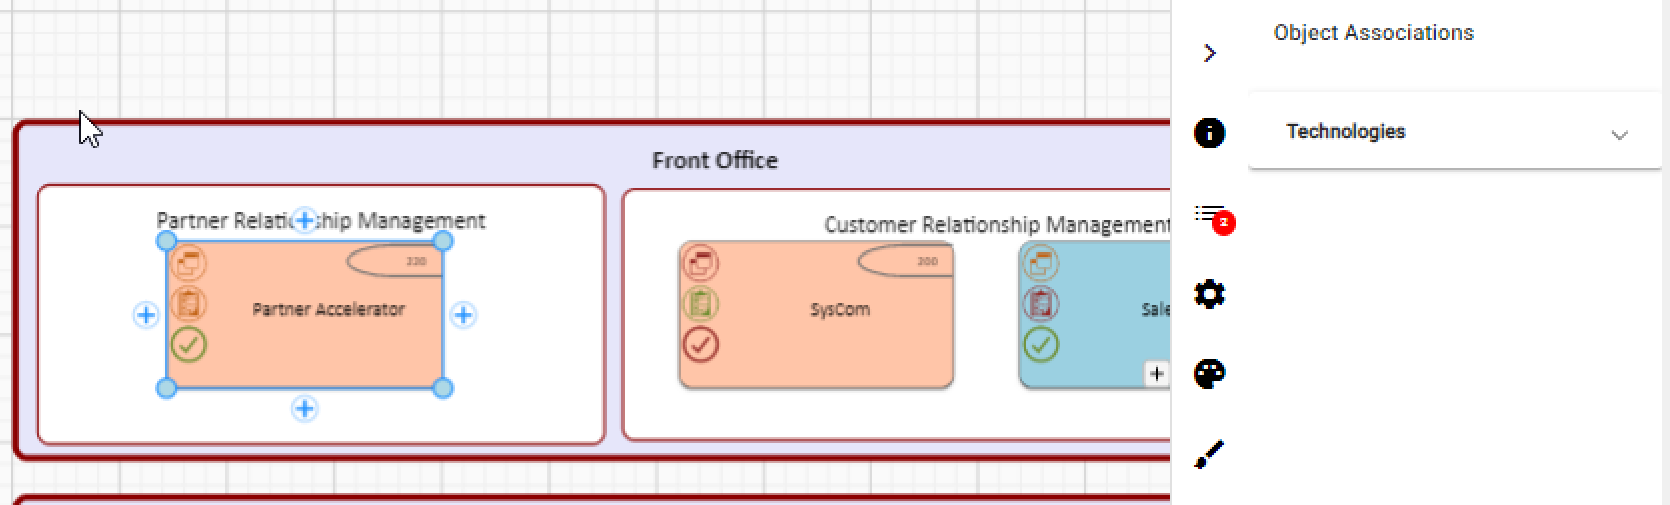
3.Select the object for which you want to add Associated Object. For example, Salesforce.
4.Click 
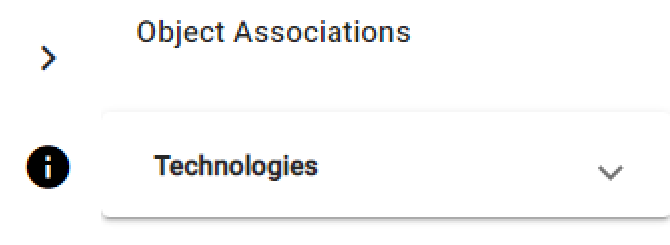
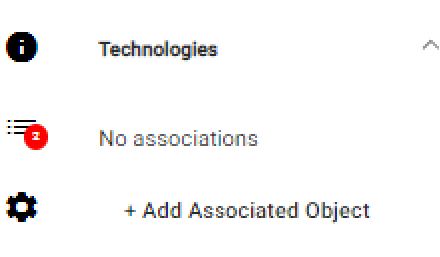
The Object Associations list appears.
5.Click the Technologies drop-down list.
6.Click Add Associated Object.
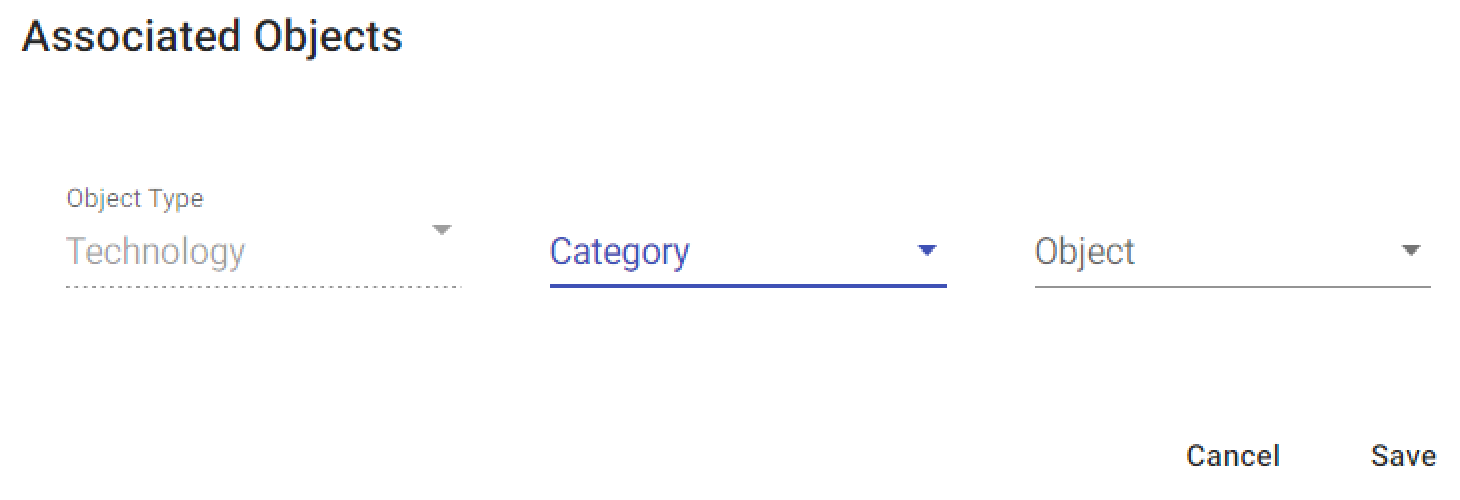
Associated Objects pop-up opens.
|
|
The Object Type field is pre-populated with the Object Type to which you want to add an Associated Object. |
7.Click the Category drop-down list and select the required option.
8.Click the Object drop-down list and select the required option.
9.Click Save.
10.Click 
11.Click Confirm Publish.
Once the diagram is published in the erwin Web Modeler, you can access it from the Modeler in the erwin Evolve Suite.
Mandatory Association
Mandatory Association enforces you to add at least one Object Association.
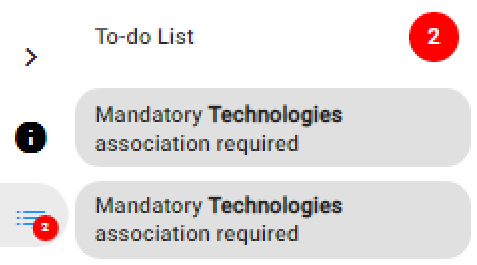
If no Associated Object is added, a pending task appears in the To-do List and the Publish Diagram is disabled.
To add Mandatory Association:
1.Click 
To-do List opens.
2.Click the pending task. For example, “Mandatory Technologies association required”.
Once pending task selected, the object is selected automatically, and the Object Association section appears in the right pane.
3.Click the Technologies drop-down list.
4.Click Add Associated Object.
The Associated Objects pop-up opens.
|
|
The Object Type field is pre-populated with the Object Type to which you want to add an Associated Object. |
5.Click the Category drop-down list and select the required option.
6.Click the Object drop-down list and select the required option.
7.Click Save.
8.Click
9.Click Confirm Publish.
Once the diagram is published in the erwin Web Modeler, it can be accessed from the Modeler in the erwin Evolve Suite.