|
1 |
|
2 |
|
3 |
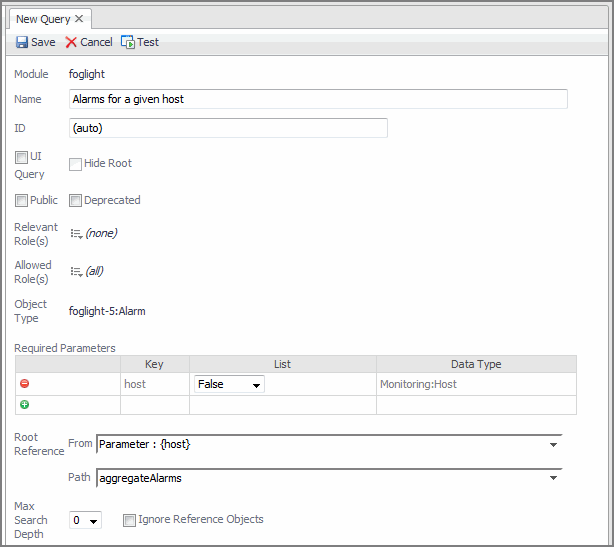
In the Add Query dialog box, on the Create a Blank Query tab, type Alarm in the search box, select the Alarm row, and click OK. |
|
4 |
Test the query by clicking the Test button, appearing at the top of the query definition. |
|
5 |
In the Input Values dialog box that appears, click the button on the right of the host box, and choose a host. |
|
6 |
Close the Query Results dialog box. |
|
7 |
Click Save to save the query. |
|
1 |
|
2 |
In the Module List pane, select My Definitions. |
|
3 |
|
4 |
|
5 |
|
6 |
Click OK. |
|
7 |
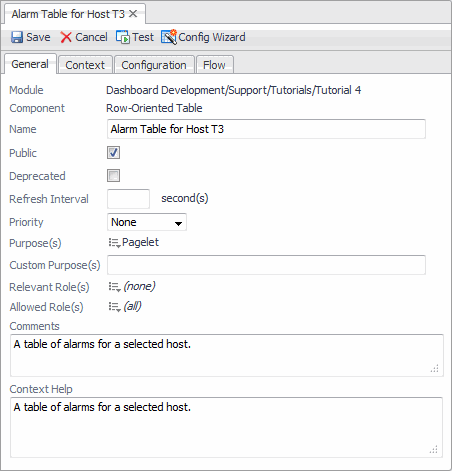
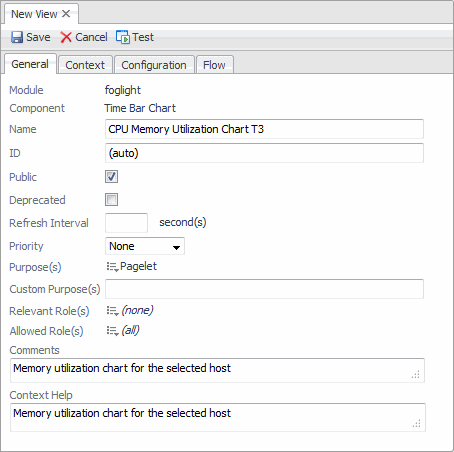
Populate the values on the view’s General tab. |
|
a |
|
b |
|
c |
On the right of Purpose(s), click Edit. In the dwell that appears, select the Pagelet check box, and click Apply. |
|
d |
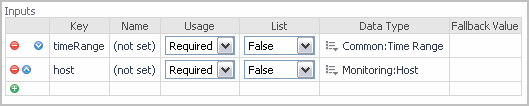
To add columns you use the Configuration tab, but before you do, define a Context to tell the component that it will require an object of type Host for its operation.
|
1 |
Open the Context tab. |
|
2 |
|
1 |
Open the Configuration tab. |
|
3 |
|
4 |
In the table, in the Parameter {host} : of type Monitoring:Host row, in the Value column, click Edit |
|
5 |
In the Edit - Parameter dialog box that appears, click the Input Key box, and choose host (Host) from the list that appears. |
|
6 |
Leave the other values unchanged, and click Set to close the Edit - Parameter dialog box. In the Edit - Rows dialog box, click Set to close it and return to the Configuration tab. |
|
7 |
|
8 |
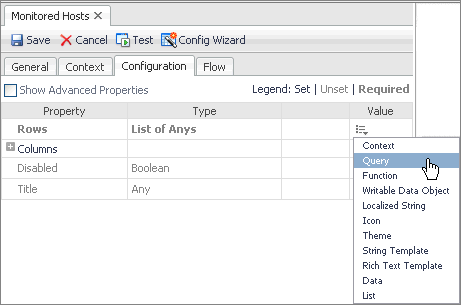
Expand the Column node. |
|
9 |
In the row containing the Value node, in the Value column, click Edit |
|
10 |
In the Edit - Value dialog box, click the Input Key box, and choose currentRow (Alarm) from the list that appears. |
|
11 |
|
12 |
|
1 |
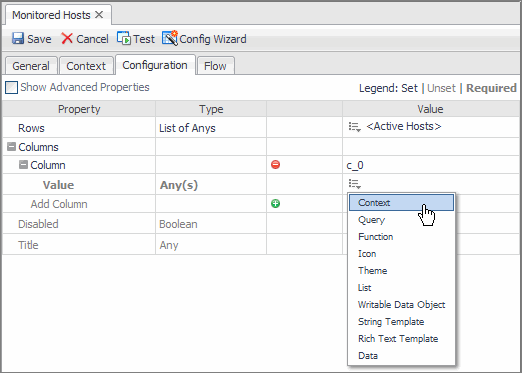
On the Configuration tab, ensure that the Columns node is expanded, and click |
|
2 |
In the second column’s Value row, in the Value column, click Edit |
|
3 |
In the Edit - Value dialog box, click the Input Key box, and choose currentRow (Alarm) from the list that appears. |
|
4 |
|
5 |
|
1 |
On the Configuration tab, in the Title row, click Edit |
|
2 |
|
3 |
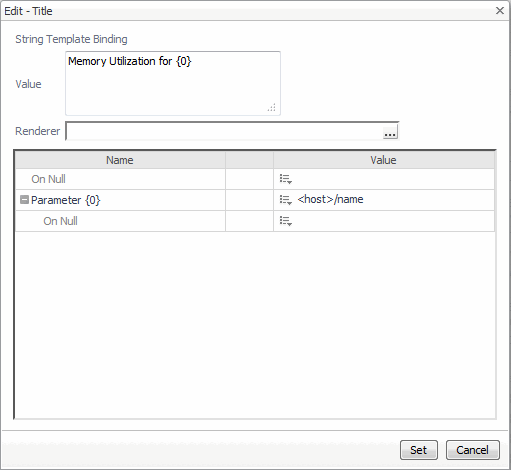
In the Parameter {0} row, in the Value column, click Edit |
|
4 |
In the Edit - Parameter {0} dialog box, click the Input Key box, and choose host (Host) from the list that appears. |
|
5 |
|
6 |
|
7 |
|
8 |
On the Configuration tab, click Save to save your changes to the Alarm Table for Host T3 view. |
|
1 |
|
3 |
|
4 |
In the Add View dialog box, on the Create a Blank View tab, choose Charts and Gauges > Time Plot Chart. |
|
5 |
Click OK. |
|
• |
|
1 |
Open the Configuration tab. |
|
2 |
Expand the Metric Data - Single Parent node. |
|
3 |
In the Metric Parent row, in the Value column, click Edit |
|
4 |
In the Edit - Metric Parent dialog box, click the Input Key box, and choose host (Host) from the list that appears. |
|
5 |
|
6 |
On the Configuration tab, under the Metric Data - Single Parent node, expand its Single Metric Bindings sub-node and then its Single Metric Binding sub-node. |
|
7 |
In the Metric row (a sub-node of Single Metric Binding), in the Value column, click Edit |
|
8 |
In the Edit - Metric dialog box that appears, click the Input Key box, and choose host (Host) from the list that appears. |
|
9 |
|
10 |
|
11 |
On the Configuration tab, in the Title row, in the Value column, click Edit |
|
12 |
|
13 |
In the table below, in the Parameter {0} row that appears, in the Value column, click Edit |
|
14 |
In the Edit - Parameter {0} dialog box that appears, click the Input Key box, and choose host (Host) from the list that appears. |
|
15 |
|
16 |
|
17 |
|
18 |
On the Configuration tab, click save on the toolbar to save your changes to the CPU Memory Utilization Chart T3 view. |