Introduction
This guide describes the configuration for a large set of supported media stores that are categorized into two sections:
You can configure these media stores using the Confguration tool provided to you with your Archive Manager for Exchange or Archive Manager for Files installation package. For more information about managing media stores see the HSM Guide.
On-Premise Media Stores
This chapter describes the on-premise media stores supported by the Metalogix Hierarchical Storage Management.
In this chapter:
·Jukebox, Hard Disk or Network Media
·HP Integrated Archive Platform
·HP Integrated Archive Platform
·XAM
Jukebox, Hard Disk or Network Share
Jukebox file management software provides a Windows file system type access to the media store. This lets applications and users directly access the jukebox without having to use some exotic programming. The jukebox software can make the entire jukebox appear as a single drive letter. Each disc in the jukebox appears as a folder. From the Windows interface, you can then assign drive letters to groups of folders. The jukebox software can also create groups of discs within the jukebox management system and assign drive letters to each group. HSM supports the following jukebox media stores: Amass, Pegasus and PoINT Jukebox Manager.
The Hard Disk or Network Share options are used for media stores that have a fixed size. If you have a hard disk or network share that uses RAID or other virtualized stores that are not size constrained, then is a Simple Path media store configuration is recommended.
|
|
NOTE: Amass is a jukebox management software for UNIX and requires an additional set of properties which are described in the instructions below. |

To create a store:
1.Open the Configuration tool from Start > Metalogix > Archive Manager Configuration or C:\Program Files (x86)\Common Files\PAM\PAMConfig\PAMConfig.exe
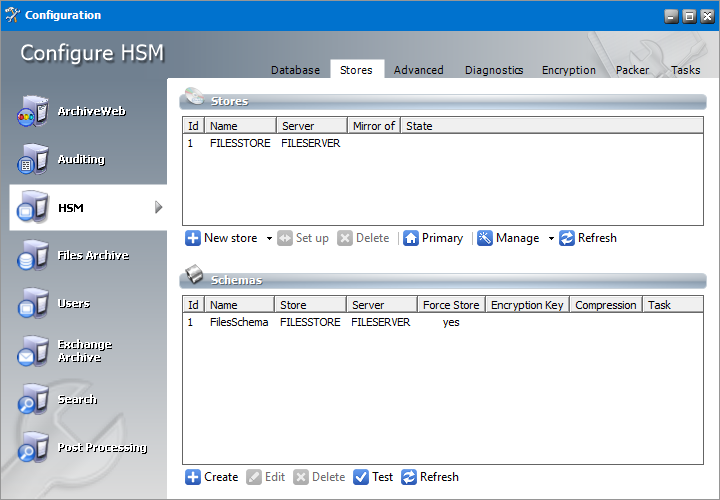
2.Select HSM from the features panel.
3.Click the Stores tab.
4.Click New Store from the Stores section. The Create a new Media Store wizard starts.
5.Click Next. The location information window opens.

Enter the information as described below:
a.Storage Provider - select a jukebox option like Amass, Pegasus and PoINT Jukebox Manager or select Hard disk, UNC Path.
b.Path for the media store - browse and create the folder if it does not exist (eg. C:\HSM). You could specify a UNC path to a shared folder as well.
c.Allow multiple saving - select this check box if you want to archive the file in an alternate location. For example C:\HSM-Backup.
d.Path for multiple saving - alternate media store location. Browse and create the folder if it does not exist (eg. C:\HSM). You could specify a UNC path to a shared folder as well. This field is available if Allow multiple saving selected.
e.Path for fast file access - choose between the Path for the media store and Path for multiple saving that are listed in the drop-down. Typically, if the first path is a slow media store like Pegasus Jukebox, and the second path is a large SAN like a local RAID or Harddisk, then you should use SAN because it is much faster. This field is available if Allow multiple saving selected.
|
|
NOTE: If archiving to any one path fails, file store operation will result in an error. |
f.Retention time support - from the drop-down box, select one of two predefined retention time support options or select <None> to ignore retention time support:
·NetApp SnapLock - if you are using NetApp and want to use SnapLock for compliance with law regulations about archiving of electronic documents. (e.g. HIPAA, OFRS, COSO etc.)
·EMC Celerra - if you use EMC Celerra.
|
|
NOTE: Retention time support is not available if you select the Jukebox file management options like Amass, Pegasus or PoINT. |
6.Click Next. The Multiple saving and media switch window opens if you selected Allow multiple saving in the previous step.
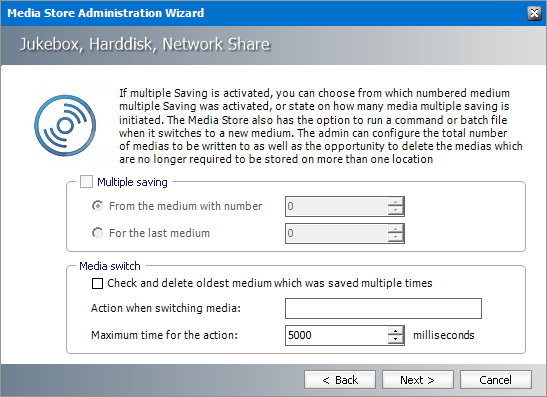
7.Enter the information as described below:
·Multiple Saving - select this check box to setup specific media that will support multiple saving.
a.From the medium with number - choose this option to specify the medium identifier of the first medium that should start multiple saving.
b.For the last medium - choose this option to specify the medium identifier of the last medium that should allow multiple saving.
·Media Switch
a.Check and delete oldest medium which was saved multiple times - select this check box to allow the system to check for files which are no longer required to be stored on more than one location and deletes the duplicate copies.
b.Action when switching media - enter a command or a batch file that will be run when switching between media.
c.Maximum time for the action - specify a maximum timeout value in milliseconds for the Action when switching media command.
8.If you selected Amass as the storage provider, click Next to open the Amass properties window. Otherwise continue with the next step.
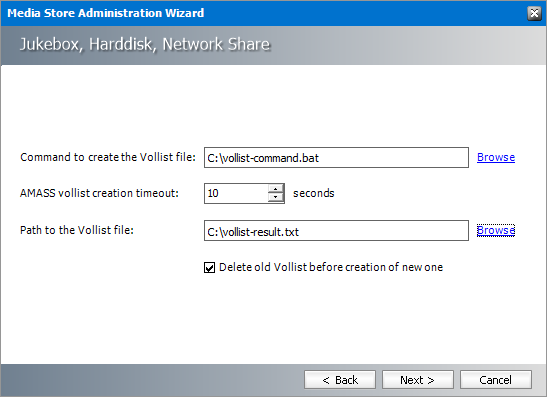
Enter the information as described below:
a.Command to create the Vollist file - To get the size of each medium Amass provides a command-line-program called vollist. The user must create a command file (EXE, CMD or BAT) which runs these commands on the UNIX environment and creates a file with the result of this command that the store can read. Normally customers do this via RSH commands. Enter the location of the command file or click Browse to locate the file.
b.AMASS vollist creation timeout - set a time limit in seconds for the vollist command to complete.
c.Path to the Vollist file - enter the path to the batch file or click Browse to locate the file.
d.Delete old vollist before creation of new one - select this check box to remove old command files when a new new command file is generated.
9.Click Next. The Media naming convention window opens.
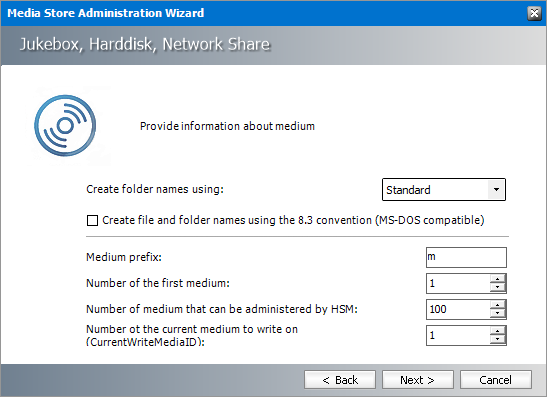
Enter the information as described below:
a.Create folder names using - select the format of HSM folders names from the drop down from the following options: Standard, Only LowerCase or Only Uppercase.
b.Create file and folder-names using 8.3 convention - select this check box to truncate long file names to 8 characters with an extension of 3 characters only if the media storage system does not support long file names.
c.Medium prefix - Enter a maximum of 2 alphanumerical characters. Each file will be prefixed with these characters along with the respective media number. For example, if you select LS, the name of one of the media would be LS000001.
d.Number of the first medium - specify a number that will be assigned to the first medium.
e.Number of medium that can be administered by HSM - specify the number of media to be administered by Archive Manager. For instance, if there are 20 media in a Jukebox, then enter 20.
f.Number of current media to write on (CurrentWriteMediaID) - specify the number of the medium that will be used as the first one for archiving.
10.Click Next. The Directory management window opens.
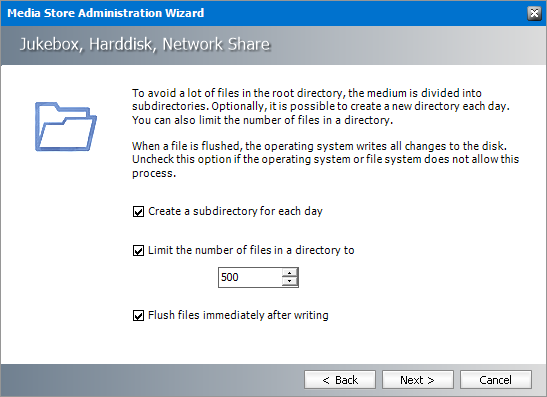
Enter the information as described below:
a.Create a sub directory for each day - select this check-box to create a directory for each day (recommended). Sub-directories are created with the path 000001, 000002, and so on. This is necessary for performance reasons because the more files a directory contains the longer it takes to search for a file.
b.Limit the number of files in directory to - select this check box to limit the number of files per directory to control directory growth.
c.Flush files immediately after writing - select this check box to delete files from the cache. Normally all file systems support flushing of files. Deactivate the option only if the file system does not allow flushing.
11.Click Next. The Media space management window opens.
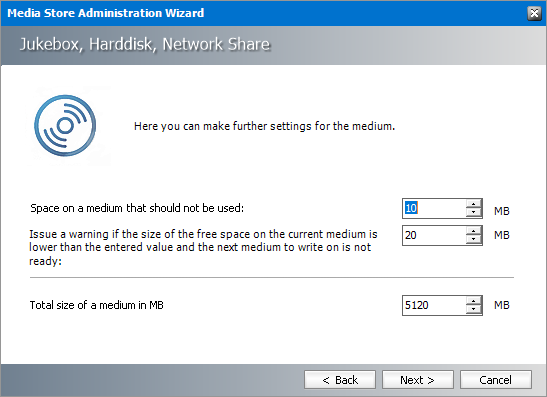
Enter the information as described below:
a.Space on a media that should not be used - Set a storage space that should not to be used on a medium. This value is defined in MB.
b.Issue a warning - Set a low space warning limit. The default is 20 MB. As soon as free storage space is lower than the value specified, a warning message is generated. When this value is reached, the availability of a new medium is verified. This value should comply with the approximate average daily amount of MB to archive, so that a new medium can be checked in a timely manner.
c.Total size of media in MB - Enter the total size of a medium.
12.Click Next. The Free space calculator window opens.
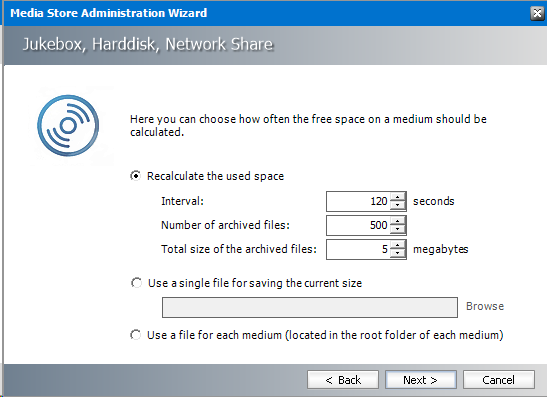
13.Enter the information as described below:
·Recalculate the used space - HSM needs to know when to start a new medium, as there is maximum medium size that was set. Choose this option to recalculate the used space periodically, and specify the parameters that will be used to perform the check.
a.Interval - Recalculates the free space on the medium in the time span specified in seconds.
b.Number of archived files - Recalculates the free space on a medium depending on the number of files that have been archived since the most recent calculation.
c.Total size of the archived files -Recalculates the free space on a medium depending on the archived volume in MB since the most recent calculation.
·Use a single file for saving the current size - chose this option if the user does not want to allow HSM to recalculate the used space periodically because it could be a time-consuming operation. Specify a file where the value of the used space on a medium will be saved. Since the size of the file being archived is known, the size of the used space is updated each time a file is stored or removed from the medium.
·Use a file for each medium - Choose this option to use a single file for saving the current size of all storage media. The file is located in the root folder.
14.Click Next. The HSM server connection information window opens. Every media store must provide this information so the HSM server can connect to it. For more information about various media stores see the Archive Manager for Exchange - Media Store Administration Guide.
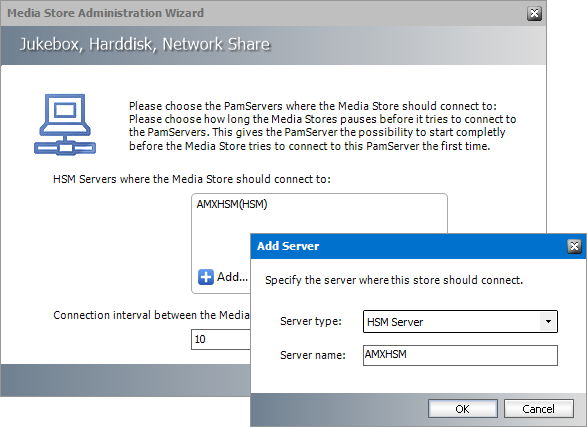
15.Click Add. The Add Server window opens. Enter the following information:
a.Server type - select HSM Server
b.Server name - name of the server where HSM is installed (eg. AMXHSM)
16.Click OK to close the window and add the HSM Server to the list.
17.Click Next. The final configuration window appears.
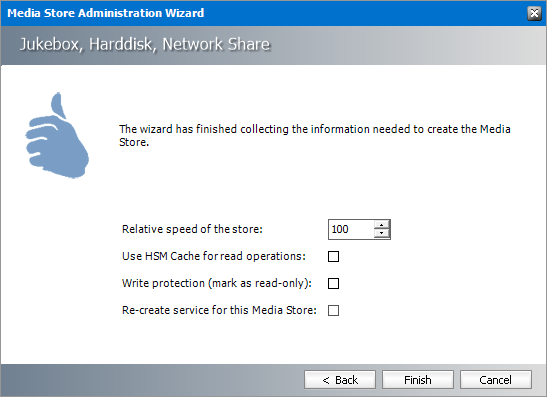
Enter the information as described below:
a.Relative speed of the store - the relative speed of this store compared to other stores.
b.Use HSM Cache for read operations - select this check box to allow HSM to use its internal cache to copy files during read operations.
c.Write protection (mark as read only) - not supported for this store type.
d.Re-create service for this Media Store - not supported for this store type.
18.Click Finish. The Service Restart window opens.
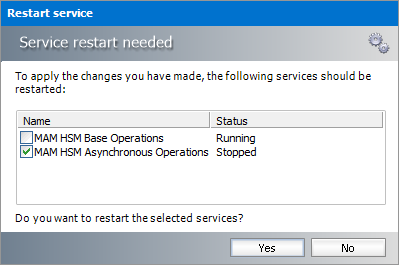
Select one or more check boxes where the Status indicates Stopped. Click Yes to restart the service so that the HSM service is aware of the media store configuration.
19.Verify that the media store appears in the Stores section.
20.Create a Schema for this media store.
|
|
TIP: Whenever a Jukebox type is store created, a service called PMSStoreSv<NameOfTheStore> is created as well. The service startup type is set to Manual. We recommend that you change the startup type to Automatic from Start > Settings > Control panel > Administrative tools > Services. |
Simple Path
If you have a hard disk or RAID system that does not need directories with a specific size, then choose the Simple Path media store. This is also the default media store that is configured when you install Hierarchical Storage Manager (HSM). This kind of store is faster and outperforms all other stores under the same circumstances (same hardware, same path).
Advantages:
·It does not do size checking.
·It writes files on any UNC path (e.g. Harddisk or Network-Share)
·Files are stored in subdirectories because there are no medias with a specific size in the format <RootPath>\<Year>\<Month>\<Day>\<Hour>\<counter>\Filename.txt e.g. \\Fileserver\HSM\2021\04\26\18\000\ 4_000000f4.tif
To create a store:
1.Open the Configuration tool from Start > Metalogix > Archive Manager Configuration or C:\Program Files (x86)\Common Files\PAM\PAMConfig\PAMConfig.exe
2.Select HSM from the features panel.
3.Click the Stores tab.
4.Click New Store from the Stores section. The Create a new Media Store wizard starts.
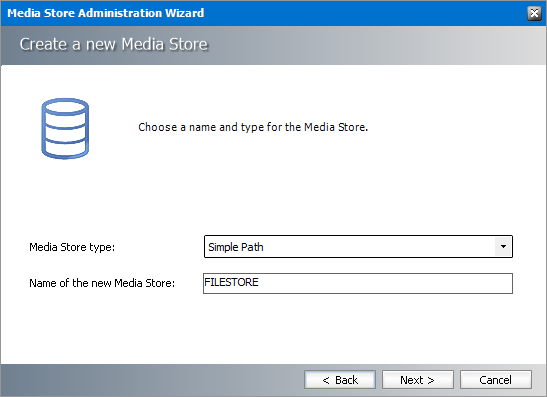
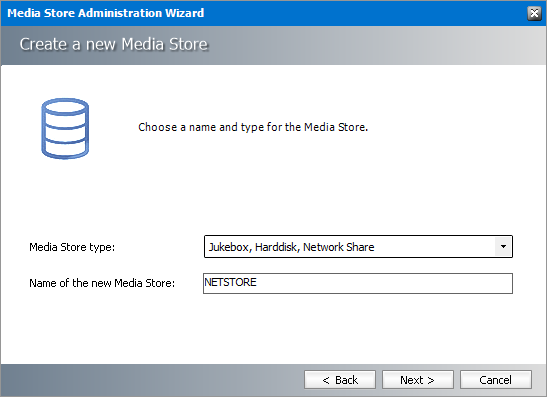
Enter the information as described below:
a.Media Store Type - select Simple Path from the drop down list.
b.Name of the new Media Store - enter a unique name for this store.
5.Click Next. The Media Store Administration Wizard step for the Simple Path opens.
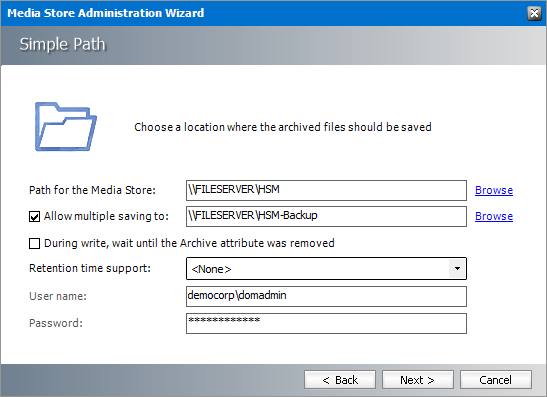
Enter the information as described below:
a.Path for the Media Store - local or network share path to the media store.
b.Allow multiple saving to - select this check box if you want to archive the file in an alternate location.
c.During write, wait until the Archive attribute was removed - Secret key configured in Simple Path instance.
d.Retention time support - from the drop-down box, select one of two predefined retention time support options or select <None> to ignore retention time support:
·NetApp SnapLock - if you are using NetApp and want to use SnapLock for compliance with law regulations about archiving of electronic documents. (e.g. HIPAA, OFRS, COSO etc.)
·EMC Celerra - if you use EMC Celerra.
e.User name - Enter the domain\username to access the network share. Activated only if a network share is specified. If you need to access a share you have to allow the computer account (Local System) to access a share or run PamHsmTSv with a special user.
f.Password - Enter the password to access the network share. Activated only if a network share is specified.
6.Click Next.
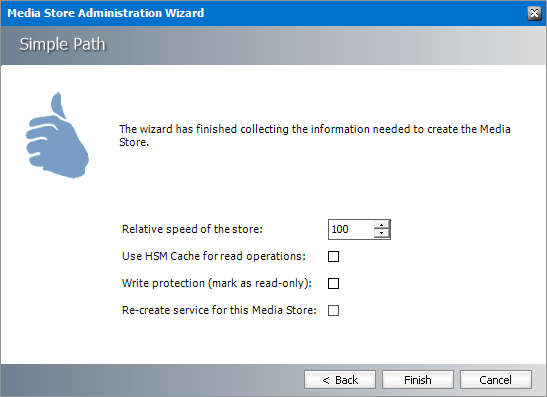
Enter the information as described below:
a.Relative speed of the store - the relative speed of this store compared to other stores.
b.Use HSM Cache for read operations - select this check box to allow HSM to use its internal cache to copy files during read operations.
c.Write protection (mark as read only) - not supported for this store type.
d.Re-create service for this Media Store - not supported for this store type.
7.Click Finish.
8.Restart HSM services.
9.Verify that the media store appears in the Stores section.
10.Create a Schema for this media store.