|
• |
On the navigation panel, under Dashboards, click Infrastructure > Hosts > Hosts. |
|
NOTE: The Add Host icon and the Monitored column are available only if Foglight for Infrastructure is installed. |
The Monitored column shows whether the host is already configured for monitoring , or is not monitored
yet (in which case, you can click the icon to add a monitored host).
Once sufficient data has been collected, the CPU (Utilization, Current), Memory Current, Disk (I/O, Usage), and Network Current columns and the Utilization sparklines display the resource utilization for each monitored host. Hover over each of these columns to see the resource utilization graph for a host.
You can launch this wizard from several places in the Foglight browser interface:
|
• |
From the Infrastructure Environment dashboard, by clicking Single Host in the upper-right corner. |
|
• |
From the Infrastructure Environment dashboard > Monitoring tab > Resource Utilizations view. If a host is not being monitored, the Resource Utilizations view displays a warning message. You can add the selected host to the list of monitored hosts by clicking Configure Host Monitoring |
|
• |
From the Hosts dashboard, by clicking Add Host |
|
1 |
In the Add Monitored Host wizard, on the Host and Agent Manager page, specify the host that you want to monitor. |
|
• |
Remote Host: Type the host name or the IP address of the host you want to monitor. If you clicked the Monitored icon for an unmonitored host, this box already contains the host name. |
|
• |
Optional Settings: Expand this area and type the host name that you want to override the previously specified host. This step is optional. |
|
• |
Agent Manager: Select the agent manager that you want to use to collect the information about the remote host. The list includes only the Foglight Agent Managers to which the Foglight for Infrastructure agent package is deployed. |
|
• |
OS Type: Select the OS type of the remote host that you want to monitor: Windows, *nix (HP-UX, AIX), Linux, or Solaris. |
|
• |
Virtual / Guest: Ensure this check box is disabled. |
|
2 |
Click Next. |
|
NOTE: If you selected the Virtual/Guest check box in Step 1, the Collect Metrics check boxes are disabled, preventing the agent from collecting these type of metrics. |
|
3 |
On the Agent Properties page, specify the properties of the monitoring agents. For complete information, see Creating agent instances. Click Next. |
|
• |
If the test fails, click the FAILED link to open a dialog box that displays additional information about the issues encountered during the validation, and helps you troubleshoot the root of the problem. |
|
• |

|
4 |
On the Credentials Verification page, select one of the following options: |
|
• |
Do not configure a credential: Select this option if you want to configure the credential for this resource at a later time. Local credentials for Windows® and UNIX® are set up by default when Foglight for Infrastructure is installed. Click Next and continue with Step 7. |
|
• |
Add host(s) to a new credential: Select this option if you want to add the host to a new credential. This option is suitable if none of the existing credentials have the connection details needed to access the new host. Click Next and continue with Step 5. |
|
• |
Add host(s) to an existing credential: Select this option if you want to add the host to an existing credential. This option is suitable if an existing credential has the security data needed to access the new host, but you need to edit its resource mappings to include this host. Click Next and continue with Step 6. |
|
• |
If the selected host name matches the host on which the Agent Manager is running, click Next and continue with Step 7. |
|
a |
On the Credential Type page that appears, select the credential type from the available options. |
|
b |
Click Next. |
|
c |
|
d |
On the Credential Name and Lockbox page, provide a name to identify the credential, and select a lockbox in which you want to keep the credential. A lockbox can be used to group credentials for access and/or security. In smaller Foglight installations, using the default System lockbox should be sufficient. |
|
e |
On the Resource Mapping page, indicate which hosts you want to associate with this credential. You can either select the host that you are about to start monitoring, all monitored hosts, or hosts whose name contains a specific text string. |
|
f |
Optional. On the Policies page, define one or more policies for this credential. A policy defines the number of times a credential can be used, the number of allowed authentication failures, the time range during which the credential is valid, or the length of time the credential data can be cached on the client. For example, you can specify the number of times the credential can be used, or the time period during which it can be used. For complete information about the available credential policies, see the Administration and Configuration Help. |
|
a |
On the Credential page that appears, select an existing credential to contain this host. |
|
b |
Click Next. |
|
c |
On the Resource Mapping page, indicate which hosts you want to associate with this credential. You can either select the host that you are about to start monitoring, all monitored hosts, or hosts whose name contains a specific text string. |
|
7 |
On the Summary page that appears, review the information provided about the host and the monitoring agent. |
|
8 |
To perform a connectivity check, select Check for Connectivity. |
|
9 |
Click Finish. |
|
• |
If the operation is successful, the Add Monitored Host dialog box appears. |
|
NOTE: The Agent Status dashboard does not refresh with the latest state unless an action is performed on the page, or the Refresh button on the page is clicked. Agents created using the Add Monitored Host wizard appear on the Agent Status dashboard only after clicking the Refresh button. |
The Add Monitored Host - List wizard allows you to start monitoring multiple hosts in your infrastructure environment.
You can launch this wizard from the Infrastructure Environment dashboard, by clicking Multiple Hosts in the upper-right corner.
|
• |
Agent Manager: Select the agent manager that you want to use to collect the information about the hosts that you want to monitor. The list shows the Foglight Agent Managers to which the Foglight for Infrastructure agent package is deployed. |
|
• |
Virtual / Guest: Ensure this check box is disabled. |
|
• |
Start monitoring existing unmonitored hosts: Choose this option if you want to start monitoring one or more hosts that already exist in your environment, but are not currently monitored. On the Host List page, click Add Known Unmonitored Hosts. |
|
• |
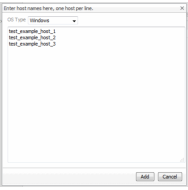
Start monitoring new hosts. Choose this option if you want to start monitoring new hosts, that are not currently showing as unmonitored hosts in your environment. Click Add New Hosts. |
|
3 |
Optional. Specify host name overrides for one or more hosts. To specify a name override for a host, in the row containing the host, in the Host Name Override column, click Set override. In the dwell that appears, type the name and click Save. |
|
4 |
Click Next. |
|
5 |
On the Credential Verification - Windows page, select one of the following options: |
|
• |
Do not configure a credential: Select this option if you want to configure the credential for these hosts at a later time. Local credentials for Windows® and UNIX® are set up by default when Foglight for Infrastructure is installed. Click Next. |
|
• |
Add host(s) to a new credential: Select this option if you want to add the hosts to a new credential. This option is suitable if none of the existing credentials have the connection details needed to access the new host. Click Next and continue with Step 6. |
|
• |
Add host(s) to an existing credential: Select this option if you want to add the host to an existing credential. This option is suitable if an existing credential has the security data needed to access the new host, but you need to edit its resource mappings to include this host. Click Next and continue with Step 7. |
|
a |
On the Credential Type page that appears, select the credential type. |
|
b |
Click Next. |
|
c |
|
d |
On the Credential Name and Lockbox page, provide a name to identify the credential, and select a lockbox in which you want to keep the credential. A lockbox can be used to group credentials for access and/or security. In smaller Foglight installations, using the default System lockbox should be sufficient. |
|
e |
On the Resource Mapping page, indicate which hosts you want to associate with this credential. You can either select all hosts in the list, or all monitored hosts. |
|
f |
Optional. On the Policies page, define one or more policies for this credential. A policy defines the number of times a credential can be used, the number of allowed authentication failures, the time range during which the credential is valid, or the length of time the credential data can be cached on the client. For example, you can specify the number of times the credential can be used, or the time period during which it can be used. For complete information about the available credential policies, see the Administration and Configuration Help. |
|
a |
On the Credential page that appears, select an existing credential to contain this host. |
|
b |
Click Next. |
|
c |
On the Resource Mapping page, indicate which hosts you want to associate with this credential. You can either select the host that you are about to start monitoring, all monitored hosts, or hosts whose name contains a specific text string. |
|
8 |
|
9 |
On the Summary page, review the information provided about the hosts you want to monitor and their credentials. |
|
10 |
To perform a connectivity check, select Check for Connectivity. |
|
11 |
Click Finish. |
|
12 |
Close the Add Monitored Host dialog box. |
|
NOTE: The Agent Status dashboard does not refresh with the latest state unless an action is performed on the page, or the Refresh button on the page is clicked. Agents created using the Add Monitored Host wizard appear on the Agent Status dashboard only after clicking the Refresh button. |
The WindowsAgent monitors Windows® systems and collects the following information:
There are views, rules, and data associated with this agent. For more information, see Reference.
|