Chat now with support
Chat mit Support

Toad Data Modeler 7.3 - User Guide

Introduction User Interface Models and Model Objects
Physical Data Model
Entity Relationship Diagram Objects Basic Database Design Advanced Database Design
Universal Data Model Logical Data Model Working with Model Objects
Features and Tools
Application Variables Export/Import DDL Script Generation Graphics Model Actions Print Create New Project Reports Reverse Engineering Scripting and Customization About Templates Tips and Tricks Toad for Oracle Integration Toad Intelligence Central (TIC) Integration Tools Version Control
Options and Configuration Databases
Amazon Redshift 1.0 IBM DB2 LUW 9.5 IBM DB2 LUW 9.7 IBM DB2 LUW 10.1 IBM DB2 LUW 10.5 IBM DB2 LUW 11.1 IBM DB2 z/OS 10 IBM DB2 z/OS 11 Greenplum 4.1 Greenplum 4.2 Ingres 9.3 Ingres 10.0 EDB Postgres Advanced Server 10 Microsoft Access 2007/2010 Microsoft Azure SQL Database V12 Microsoft SQL Server 2005 Microsoft SQL Server 2008 Microsoft SQL Server 2012 Microsoft SQL Server 2014 Microsoft SQL Server 2016 Microsoft SQL Server 2017 Microsoft SQL Server 2019 MySQL 5.0 MySQL 5.1 MySQL 5.5 MySQL 5.6 MySQL 5.7 MySQL 8.0 Oracle 10g Oracle 11g Release 1 Oracle 11g Release 2 Oracle 12c Release 1 Oracle 12c Release 2 Oracle 18c Oracle 19c PostgreSQL 9.0 PostgreSQL 9.1 PostgreSQL 9.2 PostgreSQL 9.3 PostgreSQL 9.4 PostgreSQL 9.5 PostgreSQL 10 PostgreSQL 11 PostgreSQL 12 SQLite 3.7 Sybase ASE 15.5 Sybase ASE 15.7 SAP ASE 16.0 Sybase IQ 15.2 Sybase SQL Anywhere 11 SAP SQL Anywhere 17 Teradata 13 Vertica Database 8.0
Copyright Legal Notices

Toad® for Oracle® Icons

If you are used to Toad for Oracle icons, Toad Data Modeler gives you the option to change the icon theme. Go to View Menu | Icons Theme and select Toad for Oracle Icons. Notice the changed icons on toolbars and in Model Explorer.
Toad Intelligence Central (TIC) Integration

Basic Actions

With Toad Intelligence Central, you can store and access all of your important files created in various Toad tools in one place. Learn how to:
Connecting to TIC server
  1. Open Intelligence Central using one of the two ways:
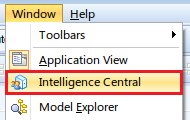
    1. Go to Window Menu and choose Intelligence Central.

    2. Click the Intelligence Central button on Intelligence Central Toolbar.

  2. Click the Connect button in Intelligence Central.

  3. In the opened TIC Connections dialog, click the New Connection button and fill in connection details. Then, click the Save Connection button (or you can Connect right away, changes will be saved).


    Note: If your TIC server is located in the same domain as your computer, you can server discovery to detect its connection details (the ... button next to Host).

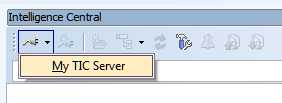
  4. Now simply choose your saved Connection from the list in the Intelligence Central.

Saving files (artifacts) from TIC server

In Intelligence Central, you can save any file you see to your computer. To do so, right-click a file, select Save and then choose a location on your drive.

Publishing files to TIC server

Intelligence Central displays all items that are shared with you. You can publish all types of models and reports to your TIC server:

Models

  • Click the Publish to Intelligence Central button on Intelligence Central Toolbar. See Publishing Models/Reports for more information.

Reports

  • Reports can be published to TIC by checking the appropriate option in the Select File section of Report Wizard. See Publishing Models/Reports for more information.

Naming Conventions

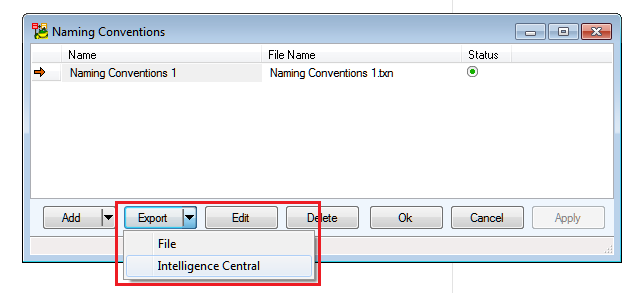
  • You can also publish your customized Naming Conventions to a TIC server. Go to Tools Menu | Naming Convention | Manage, select your Naming Conventions and choose Export | Intelligence Central.


Publishing Models/Reports

When you choose to publish model/report to your TIC server, you can also describe your file, customize its sharing and link it to existing artifacts.
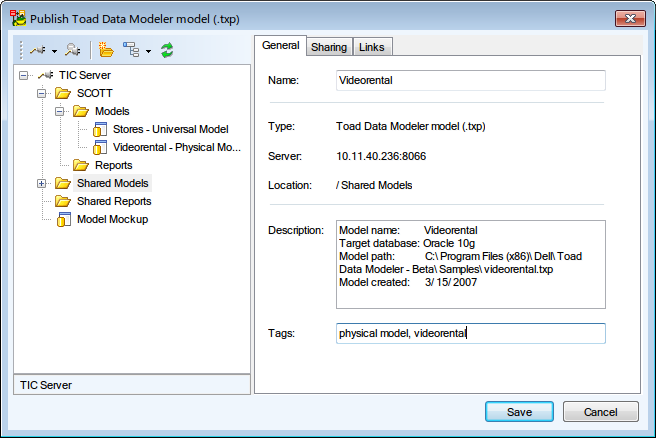
  1. Choose the destination folder in the section on the left. There, you can also see all files of the same type as the file you are going to publish.
  2. Look into the General, Sharing and Links tabs and customize the options.

General tab

Option Description
Name The name under which the file will be stored on TIC server.
Type The file type.
Server Server host name/IP address.
Location Folder on the server in which the published file will be stored.
Description An editable file description
Tags You can enter several comma separated, searchable tags.

Sharing tab

You can choose to share your file in several ways:

Note: 'Artifact' refers to a file stored on a TIC server.

  • Do not share this artifact with any other user - Only you will be able to see and manage the file on TIC server.
  • Share this artifact with any other user - All users will be able to see the file on TIC server. Additionally, when you check Allow any user to manage this artifact, all users will be able to manage the file.
  • Share this artifact with selected user or group - You can share the file with a specific user/group by moving them to the Shared with field. You can also allow users/groups to manage the file by checking the appropriate checkbox.

Links tab

Links represent logical relationships between artifacts. You can create one between your published file and one or more existing artifacts. In Link Description, describe the nature of the relationship.

Verwandte Dokumente

The document was helpful.

Bewertung auswählen

I easily found the information I needed.

Bewertung auswählen