Enabling VMware Performance Agents to collect data from a Virtual Center
Foglight™ for VMware uses the VMware Performance Agent to collect information from monitored environments. Each VMware Performance Agent can monitor an entire Virtual Center. To enable the agent to monitor your virtual environment, you must grant the agent privileges for accessing the Virtual Center and collecting data from it.
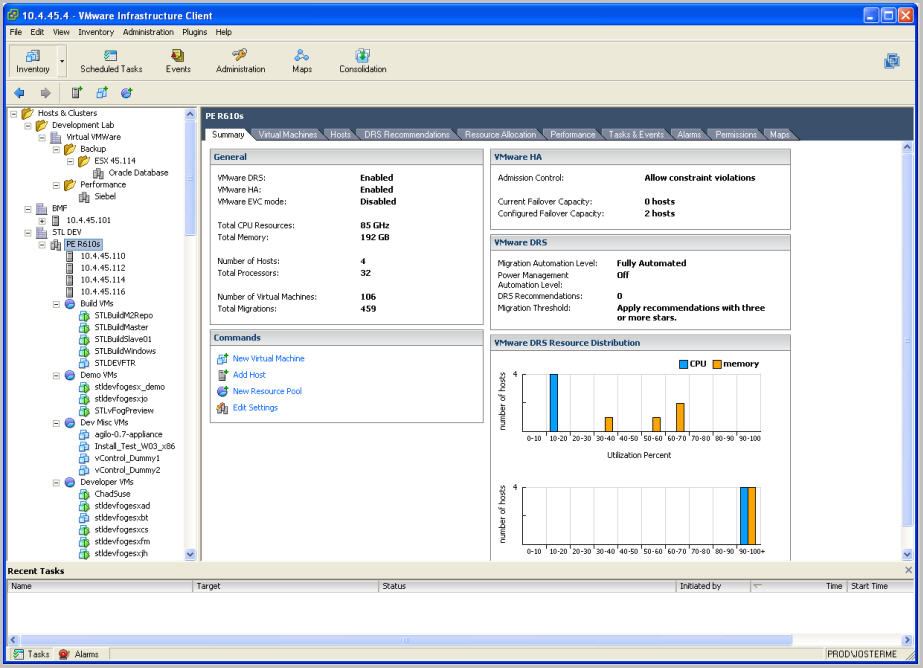
Configure these privileges on the Virtual Center using the VMware® Virtual Infrastructure Client.
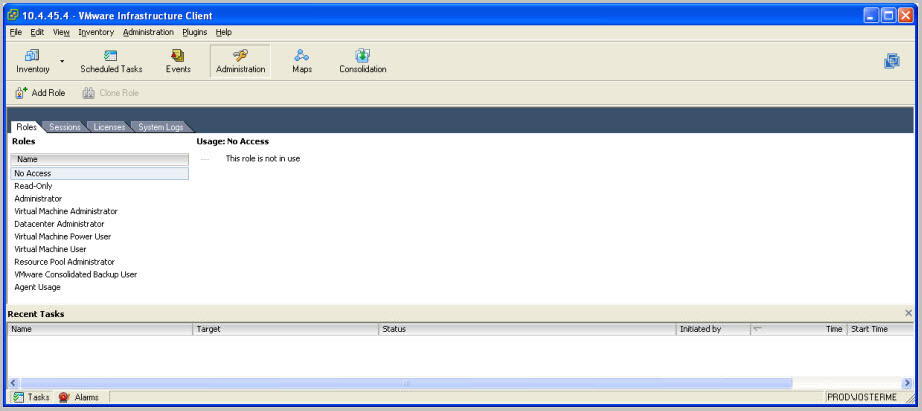
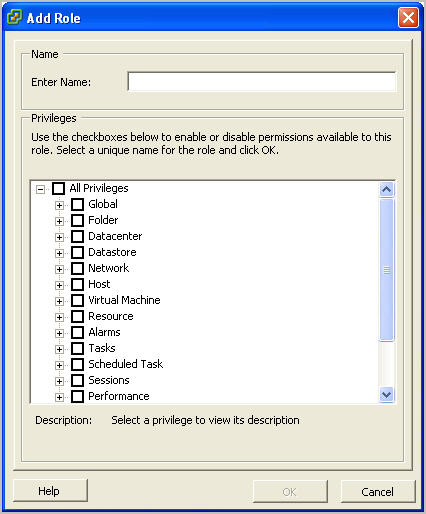
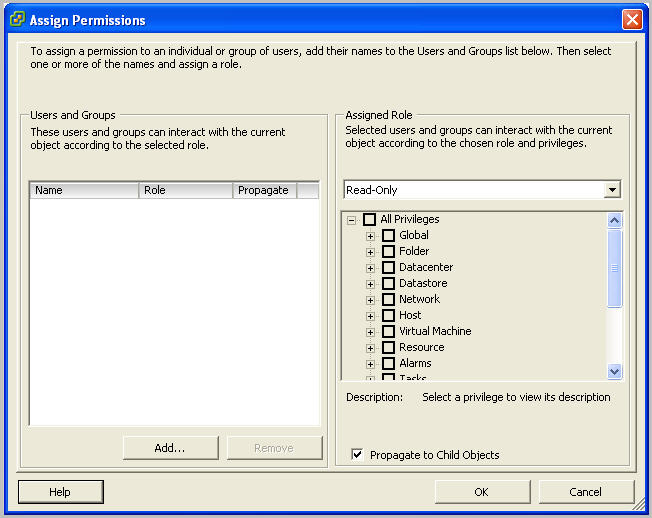
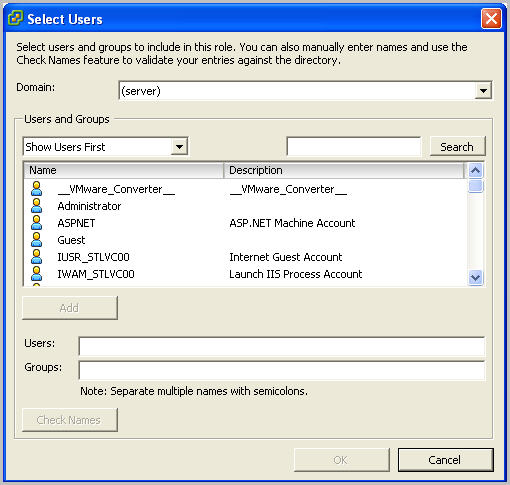
First, you create a role and assign it privileges for browsing datastores, viewing and terminating sessions, and modifying performance intervals. Next, you assign that role to a user account that you want the VMware Performance Agent to use for accessing the Virtual Center. You will associate the selected user account with the VMware Performance Agent instance in a later step, when you configure the VMware Performance Agent properties (see Setting the Configuration properties ).
|
1 |
|
2 |
Right-click a role and choose Add from the shortcut menu that appears. |
|
3 |
|
5 |
Important. If you are using Foglight for Resource Optimization, you must include additional privileges to this role. For more information, see the Foglight for Resource Optimization User Guide. |
|
6 |
Click OK. |
|
8 |
In the left pane, right-click Hosts & Clusters, and choose Assign Permissions from the shortcut menu that appears. |
|
9 |
|
10 |
|
12 |
Click OK. |
Configuring VMware Performance Agents for data collection
Foglight™ for VMware uses the VMware Performance Agent to collect information from monitored environments. Creating a VMware Performance Agent instance creates the agent process on the Agent Manager host. Activating the VMware Performance Agent starts that agent process, while starting an agent instance’s data collection enables the agent to start collecting data from the monitored Virtual Center and to send it to Foglight for VMware.
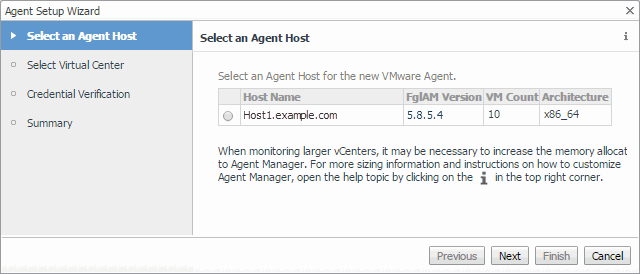
When the VMware Performance Agent package is successfully deployed, create one or more agent instances, activate them, and start their data collection. To perform these steps in a single operation for one or more monitored hosts, use the Administration tab of the VMware Environment dashboard.
Each VMware Performance Agent monitors a single Virtual Center. When you create a VMware Performance Agent instance and the Agent Setup wizard determines that the Virtual Center was not previously monitored by this Foglight instance, it starts importing historical data into Foglight. This data is not immediately available as it takes some time to collect it. This process can import data collected over 30 days or less, depending on the amount of data available in the Virtual Center. This allows you to explore VMware metrics as soon as the data is imported, instead for waiting for the agent to collect some data from the Virtual Center. The Metric History column in the Agents table indicates the progress of the historical data import. Historical data is intended for charting, trending, and general presentation purposes. It does not cause any alarms to fire.
|
2 |
|
3 |
On the VMware Environment dashboard that appears in the display area, open the Administration tab. |
|
4 |
|
a |
In the Virtual Center box, type the fully qualified name of the host on which the Virtual Center is running. |
|
b |
In the Port box, type the port number of the host running the Virtual Center that will be used by the VMware Performance Agent to connect to the Virtual Center. |
|
c |
If you want to enable the VMware Performance Agent to collect the Foglight for Storage Management data, select the Enable Storage Collection check box. Foglight for Storage Management can help you optimize the VMware environment by monitoring virtual storage and its underlying physical storage components. For more information about this product, see the Foglight for Storage Management documentation. |
|
d |
If you want to import historical data, select the Enable Historical Metric Data check box. This data is not immediately available as it takes some time to collect it. This process can import data collected over 30 days or less, depending on the amount of data available in the Virtual Center. Selecting this option allows you to explore VMware metrics as soon as the data is imported, instead for waiting for the agent to collect some data from the Virtual Center. |
|
e |
Click Next. |
|
• |
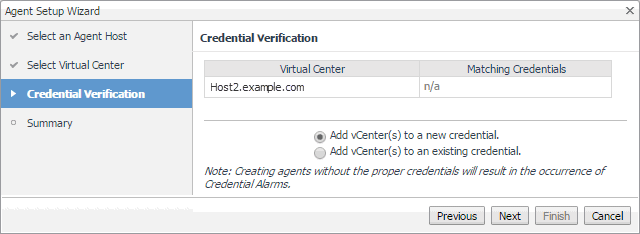
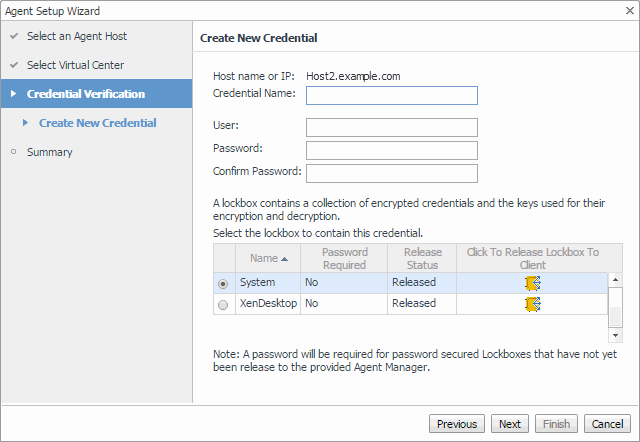
Add vCenter(s) to a new credential: Select this option if you want to create a new credential for the selected vCenter. Click Next and continue to Step 8. |
|
• |
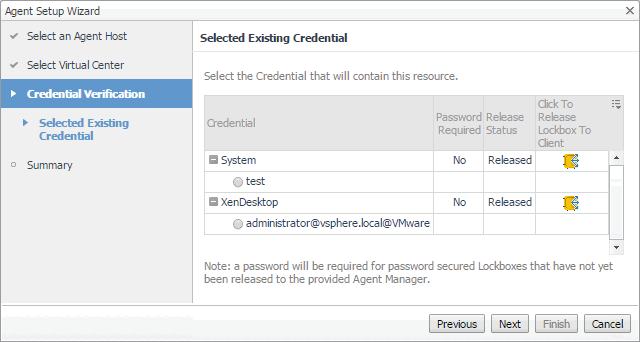
Add vCenter(s) to an existing credential: Select this option if you want to use an existing credential for the selected vCenter. This option is suitable if an existing credential has the information needed to access the vCenter. Click Next and continue to Step 9. |
|
• |
Credential Name: Type a name that uniquely identifies the credential. |
|
• |
User: Type the vCenter user name. |
|
• |
Password: Type the vCenter password. |
|
• |
Confirm Password: Type the vCenter password. |
|
c |
Click Next. |
|
d |
Click Finish. |
|
b |
Click Next. |
|
c |
Click Finish. |
Using an alternative method to create and configure VMware Performance Agents
Another way to create agent instances is using the fglcmd command-line interface. For more information about the available fglcmd commands, see the Command-Line Reference Guide.
|
2 |
|
3 |
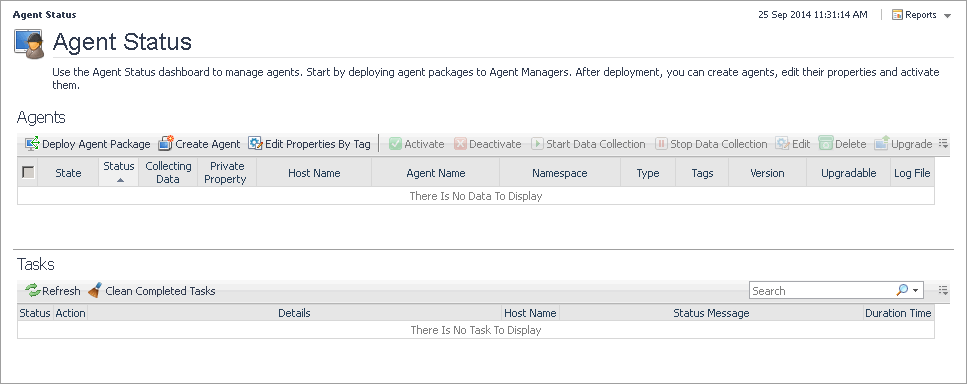
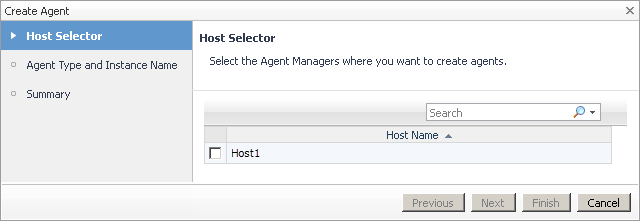
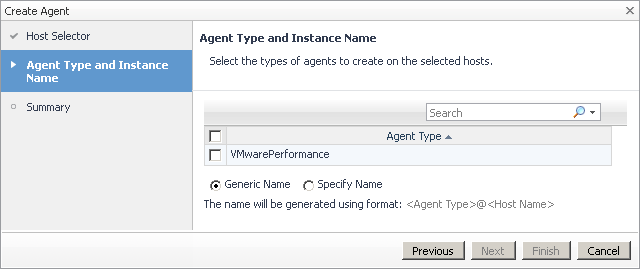
On the Agent Status dashboard, click Create Agent. |
|
IMPORTANT: If the VMwarePerformance agent type is not listed, you likely need to deploy the VMware Performance Agent package to that host. For more information, see Deploying VMware Performance Agent packages to monitored hosts . |
|
5 |
|
• |
To have Foglight for VMware assign a generic name, ensure that Generic Name is selected. |
|
• |
To use a specific agent name, select Specify Name, and in the Name box that appears, type the agent name. |
|
7 |
Click Next. |
|
8 |
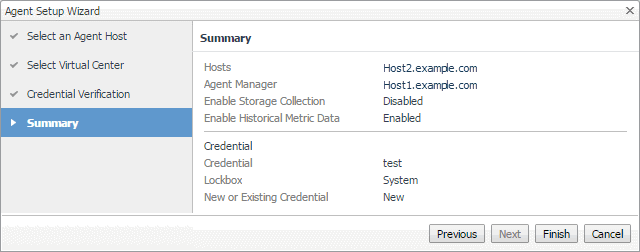
In the Create Agent wizard, on the Summary page, verify that the host name and agent name are correct, and click Finish. |
|
b |
From the menu that appears, choose Edit Properties. |
|
c |
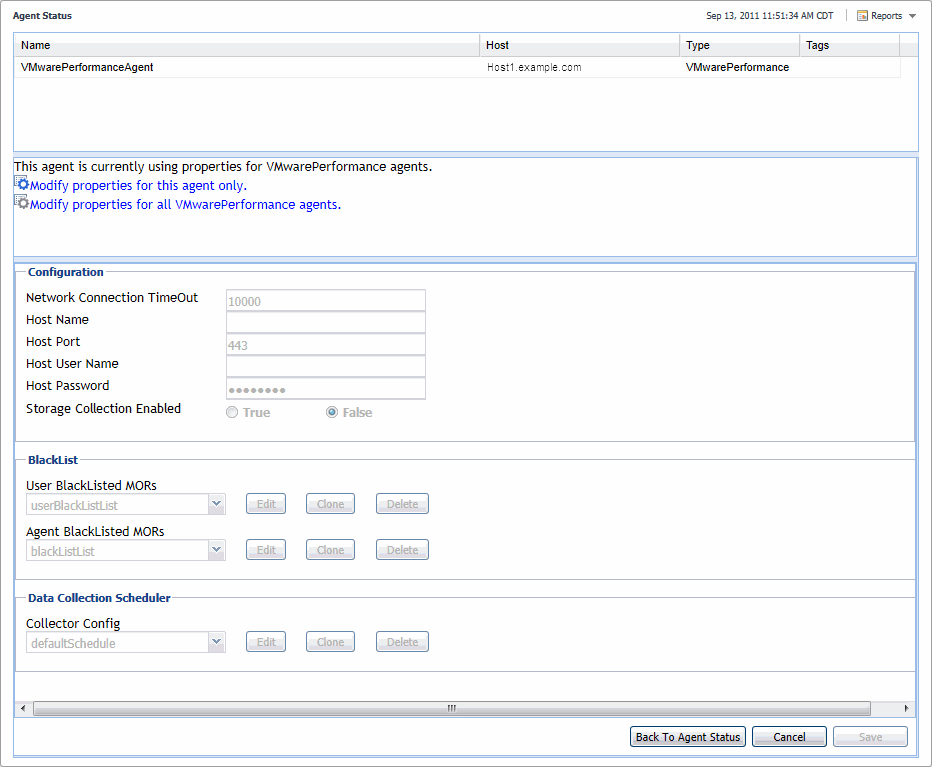
Click Modify properties for this agent only. |
|
e |
Setting the VMware Performance Agent properties
There are two ways to access the VMware Performance Agent properties:
|
• |
On the VMware Environment dashboard, on the Administration tab, select an agent instance and click Edit Properties (see Configuring VMware Performance Agents for data collection ). This method only provides access to the Configuration properties, but not the Black List and Data Collection Scheduler properties. |
|
• |
On the Agent Status dashboard, select an agent instance and click Edit Properties. This method provides access to the full set of VMware Performance Agent properties, and is described in this |
For more information about working with agent properties, see the Administration and Configuration Guide.
|
f |
|
g |
|
h |
Click Modify the private properties for this agent to indicate that you want to edit the properties of the selected VMware Performance Agent instance. |
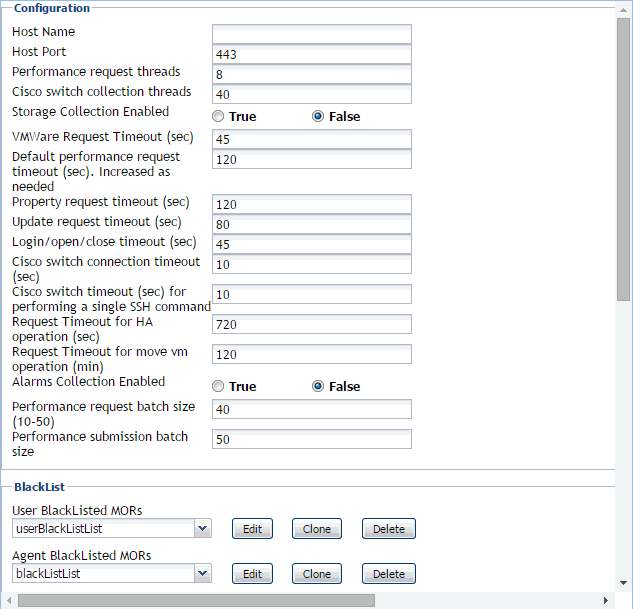
The configuration of agent properties described in this section include:

