
Adding a custom rule
The Rule Configuration dashboard shows a list of existing rules and a set of rule management commands at the top of the list. Use the Add Custom Rule button to create a new rule as needed.
|
3 |
|
4 |
Click Rule Configuration. |
|
5 |
|
6 |
In the Create Custom Rule dialog box, specify the following: |
|
a |
Type the name of custom rule in the Name field. |
|
b |
Select an Object Type, and then select a metric from the Metric drop-down list. The value of Metric varies from the Object Type. |
|
c |
|
• |
Threshold: Specify Condition, Time Period, Severity, and then specify whether or not fire actions if the specified data attempts are reached. The value of Condition cannot be negative. |
|
• |
% Change: Specify Condition, Time Period, and Severity Label. The value of Condition cannot be negative. |
|
b |
|
c |
(Optional) Notifications: Click Add New, then the Edit Notification Config - Dialog box appears. In this dialog box, type the E-mail Address and Description as needed, and then click Add. |
|
7 |
Click Save. |
Removing custom rule(s)
The Rule Configuration dashboard shows a list of existing rules and a set of rule management commands at the top of the list. Use the Remove Custom Rule button to delete existing custom rule(s) as needed.
|
3 |
|
4 |
Click Rule Configuration. |
|
5 |
|
6 |
Click Yes. |
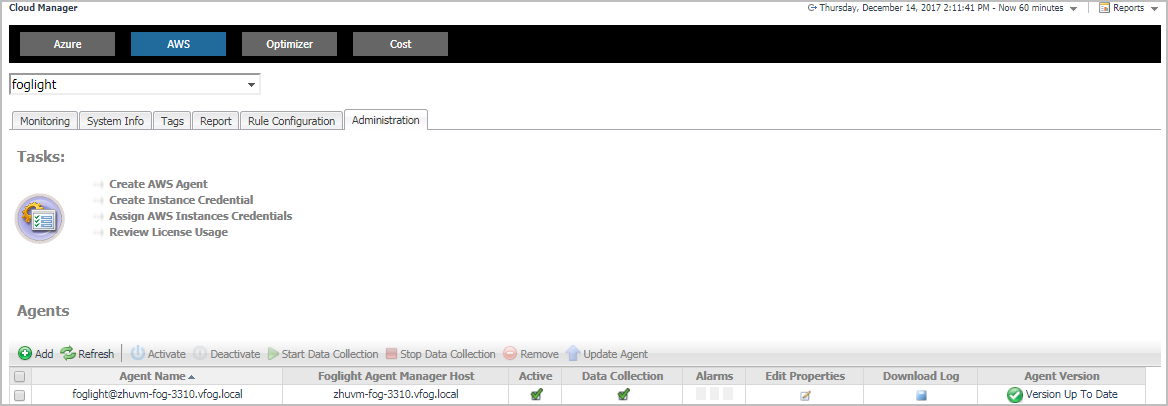
Administration Tab
The Administration tab of the Cloud Manager dashboard contains links to agent administration tasks that you can use to manage AWS performance agents.
|
3 |
|
4 |
Click Administration in the actions bar. |
For more information, see the following topics:
Tasks view
The Tasks view allows you to create an AWS agent, to create instance credentials, to assign AWS instances credentials, and to review license usage. For more information about how to create an AWS agent, refer to Creating an AWS Agent .
|
3 |
|
4 |
Click Administration. |
|
5 |
On the Tasks view, click Create Instance Credential, and then click User Name and Password from the prompted dialog box. |
|
6 |
In the Credential Properties view, type User Name and Password, confirm the password, and then click Next. |
|
7 |
|
8 |
|
3 |
|
4 |
Click Administration. |
|
5 |
On the Tasks view, click Create Instance Credential, and then click RSA Key from the prompted dialog box. |
|
6 |
|
7 |
|
8 |
|
3 |
|
4 |
Click Administration. |
|
5 |
|
6 |
|
7 |
|
8 |
The Choose Instance Dialog box closes, and the selected instance appears on the EC2 Instances table. Click save. |
|
3 |
|
4 |
Click Administration. |
|
5 |
|
6 |
|
7 |
Click the number in the Monitored Instance Count column. |