
2.1.5 Change Step To
2.1 Importing Users
The first step to prepare for the migration of user mail files is to create a list of the users to be migrated.
|
|
The tabs listed below provide information used by the tools in this procedure. Before proceeding, be sure that the values in the following fields are configured correctly in Configuration | Settings:
|

To begin importing users:
-
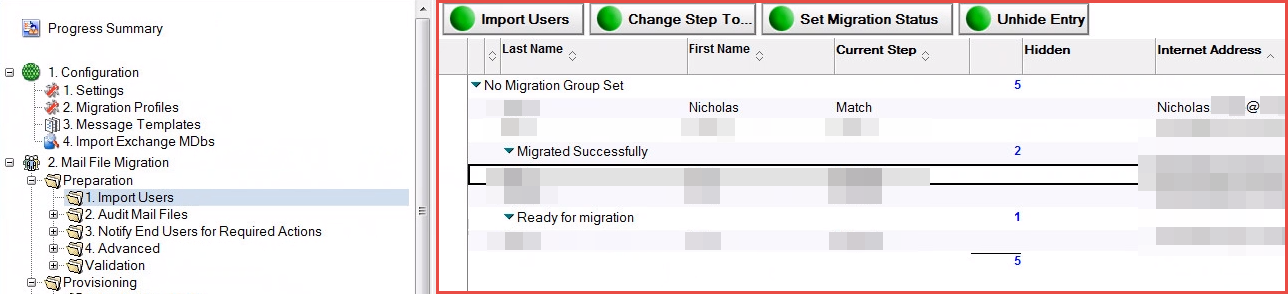
In the Import Users view, click the Import Users button; the Import Users drop-down menu displays:
Import Users View
-
Select one of the following options from the drop-down menu.

|
Option |
Description |
|
All Users |
Select all users from the Domino directory to import |
|
Select Users to Import |
Select specific users from the Domino directory to import |
|
Import Select Users from Excel |
Select an Excel file of users to import |
2.1.1 All Users
-
Click All Users from the drop-down menu
-
A message box appears indicating the number of users selected from the Domino directory for import; click Yes.
-
Depending on the number of entries being processed, this could take from a few seconds to several minutes. When complete, a status message is displayed. The message confirms that all users have been imported and moved to the next step of migration (Audit Mail Files); click OK.
A Person document for each user has been created and saved in the Migrator for Notes database. The list of imported users displays in the Data Pane (see Data Pane screenshot below). A Control document for each user will be created in the SQL database once the Migrator for Notes migration engine queues up a user for migration:
Data Pane
2.1.2 Select Users to Import
-
Click Select Users to Import from the drop-down menu; the dialog box displays the People view of the Domino Directory
-
Click in the white column next to each user that you’d like to select and then click OK:
People View Dialog Box
-
A message box appears indicating the number of users selected from the Domino Directory for import; click OK
-
Depending on the number of entries being processed, this could take from a few seconds to several minutes. When complete, a status message is displayed. The message confirms that selected users have been imported and moved to the next step of migration (Audit); click OK
-
The list of selected imported users displays in the Data Pane. A Control document for each user will be created in the SQL database when Migrator for Notes migration engine queues up the users for migration.

2.1.3 Import Select Users from Excel
Migrator for Notes offers two options for importing user information from Excel. The most commonly used method is Import Select Users from Excel, which will import new users and mail-in databases (users and MIDBs that don’t already exist in the application) into the application.
|
|
|
|
|
|
A second advanced option is available, import field values from Excel, that modifies field data for users already existing in the application. This method is detailed in Appendix C: Work with Files (Import/Export).
-
Click Import Select Users from Excel from the drop-down menu; the document selection dialog box appears
-
Select the Excel file (.xls or .xlsx) and then click Open; Note that Excel must be installed and properly registered with the operating system:
-
The first row of the Excel spreadsheet must include the field names used during the import. The key values ‘ShortName’ and ‘InternetAddress’ will automatically open the correct corresponding lookup views in Migrator for Notes.
-
Field names should match Migrator for Notes field names to be visible in the Migrator for Notes interface. All fields will be imported from the Excel headers and the Domino Directory even if the field does not exist on the Migrator for Notes document.
An example Excel spreadsheet with ‘InternetAddress’ as the key column is below:

-
If multiple Domino directories are configured in Migrator for Notes, you are prompted to select the Domino directory to use during the import
-
If multiple Excel sheets are present, you are prompted to select which sheet to use
-
You are prompted to choose a key column from the Excel file that will be used during the import process to locate the entries in the Domino Directory
-
If the selected key column is either ‘ShortName’ or ‘InternetAddress’, the import will use the appropriate view
-
If the key column is another value, you are prompted with the lookup view to be used in Migrator for Notes. The key value must match the header of the first sorted column in the view for the Migrator for Notes document to be found.
-
The Notes agent will search for a matching document in the Migrator for Notes lookup view. If a document cannot be located, the Domino directory will be searched, and the user record imported.
|
|
Notes uses both “scripts” and “agents” as does the Migrator for Notes application, but for ease reference we’re using the term “agent”. This refers to a macro or piece of code that runs in the background of HCL Notes to “help perform repetitive tasks, such as managing documents and sending memos.” Refer to HCL Support for more information. |

-
If a user document does not exist in the Migrator for Notes application and a match is found in the Domino directory, all fields on the user document will be imported, and the following fields will be set:
-
BTNextStep = “Stage” (e.g. Audit, Notify, Match, Migrate)
-
ADStatus = “Unmatched”
-
MailFileName = MailFile value from the directory document
-
PNAB_NOTEID = noteID value from the directory document.
-
-
If a user document exists in Migrator for Notes, the document will be updated under the following conditions:
-
If the Migrator for Notes document’s migrationStatus is “Migration completed successfully”, the document in Migrator for Notes will not be modified, and results will be reported to the file.
-
If the Migrator for Notes documents migrationStatus is "MIGRATION PENDING", "MIGRATED WITH ERRORS", "ROLLBACK REQUESTED", "ROLL FORWARD REQUESTED", "MIGRATION FAILED" the Migrator for Notes document will not be modified, and the current migration status will be reported to the output file.
-
If the Migrator for Notes documents migrationStatus is “Ready to migrate” or not set, the following fields will be set:
-
ImportFileName = file name of the Excel spreadsheet used during the import
-
LastImportRun = time the agent was run
-
Values for all fields in the excel file will be copied to the Migrator for Notes person document; if a field exists on the CMT document (copied from the domino directory document when created above) that corresponds to an existing field name, that field will be overwritten and the value from the excel spreadsheet will be set
-
-
2.1.4 Person Document
Whenever a user is imported, a new Person document is created in the Migrator for Notes application. These documents are populated with a variety of information which is used during user mail migration. These documents are also updated with status information after each migration task is completed (including links to cumulative and individual migration logs); therefore, they are an important control point for user mail migration. Double-click a user in the Data Pane to open the user’s Person document.

Person Document Sample
The Change Step To button allows you to move a user back or forward to a step where you can audit, notify, match, or migrate the user.
|
|
|
-
Select users (a checkmark appears next to selected users), and then click the Change Step To button; a dialog box appears:
Change Step To… Window
-
Click Audit, Notify, Match or Migrate and then click OK. The selected users are moved to the selected step; for example, if you select Audit, the selected users are moved to the Audit Mail File Data folder. Similarly, if you select Notify or Match, the selected users can be moved back and forth between steps to run the tools again.
-
You can select the Migrate option if you are ready to move those users to the final step of migration
The Set Migration Status button is explained in Section 8: Setting Migration Status.

|
|

2.2 Auditing Mail Files
2.2 Auditing Mail Files
Next, you need to audit imported users’ mail files using the Audit Mail Files agents. This tool will check the following (depending upon selections made in the Installation and Configuration for the Required Settings) against each mail file:
-
Mail file exists
-
Migration Notes ID has sufficient access (see the Migrator for Notes Requirements document for more information about required access).
-
Mail file size
-
Number of Contacts
-
Number of Encrypted Items
-
Number of Rules
-
Number of Journal entries (Notebook Entries)
To audit mail files:
-
In the Navigation Pane, expand 2. Mail File Migration and then expand the Audit Mail Files | Audit Mail File Data view
-
Select the user Person Documents in the Data Pane; you can either audit a select number of users or all the users at once
-
Click the Audit Actions button in the Data Pane; the Audit Actions drop-down menu displays:
Audit Actions Drop-down Menu
-
Select one of the following options from the drop-down menu:

|
Option |
Description |
|
Audit workflow and delegation |
Determines the number of calendar entries affected by delegation for each user and will check for custom repeating meetings. This will provide a report for meetings with repeating patterns that are not supported by Notes Integration (MTCW).
Delegation in Notes and Forwarding in Outlook are similar methods of enabling an invitee to share a meeting with someone else; however, these two processes are very different from a system perspective. Migrator for Notes makes every effort to fully support the calendar workflow (see the Known Limitations.pdf for details on unsupported patterns), but some customers may wish to identify users heavily affected by delegated meetings prior to migration.
If the Settings option to Audit calendar unsupported patterns is enabled this will also collect a list of any current and future meetings that Outlook cannot fully support. Custom repeating meeting patterns in Notes are migrated to Outlook but are not fully supported for changes in Outlook. |
|
Audit Mail File & Personal Data For Selected Users |
Determines each user’s mail file size (includes count of contacts and journal entries (notebook entries))
This option will also query the options that you selected in the Required Settings > Domino tab. |
|
Audit pNAB DB For Selected Users |
Determines if users’ pNAB database is accessible and the number of contacts
This agent audits the server-based pNAB for selected users if one is defined in their Person document. This menu option is not used for migration. Irrespective of whether the migration mail agent is used to prompt the user to synchronize their own contacts or the administrator syncs their contacts for them, it is imperative that contacts must be synced into the users’ mail files to migrate contacts.
The purpose of the server-based pNAB field is so that the migration coordinator can perform the synchronization on behalf of the user by clicking Actions > Other to access the Synchronize Address Book agent.
Note: If pNAB database information is not populated in the users’ Person documents in Migrator for Notes, then you need to either send users a message to sync the pNAB to the mail file or specify pNAB details to be sure that Migrator for Notes is pointing to the server where pNAB is stored. |
2.2.1 Audit workflow and delegation
-
Click the Audit workflow and delegation menu option
-
Totals will appear in the following columns:
-
Unsupported workflow - unsupported calendar recurrence patterns
-
Was Delegated - another Domino user delegated attendance
-
Delegator – the Chair delegated the meeting
-
Delegatee – the user was delegated to attend the meeting on someone’s behalf
|
|
|
-
The Calendar MTCW Audit Report will be populated with any meetings that the user is a Chair for, are in the Notes Integration cache range (typically 90 days from current date) and have a repeating meeting pattern that would not be supported for Outlook to Notes coexistence. This will include any meeting in the cache range including cancelled meetings.
|
|
|
-
If the Settings to Audit calendar unsupported patterns is enabled then the Calendar audit RTF report will be populated with any meetings that have a Notes custom pattern. This will be for meetings where the user is the Chair but can also include meetings where the user an Invitee if that option is enabled. This will not include meetings that have been cancelled. The audit can be sent to the end user through the Remediation Summary message template.
|
|
2.2.2 Audit Mail File & Personal Data for Selected Users
-
Click the Audit Mail File & Personal Data for Selected Users menu option; a message box appears indicating the number of selected users to audit
-
Click Yes
-
Depending upon the number of selected users, this process could take from a few seconds to several minutes. Upon completion, a message box confirms that auditing of the mail database is complete, and all users have been promoted to the next step of migration; click OK. If no errors are found, skip to step 4.
All errors must be fixed and then the Audit Mail File & Personal Data for Selected Users tool must be re-run without errors prior to the mail file migration. See Appendix B: Pre-Migration Troubleshooting for common audit errors and troubleshooting steps.
|
|
If you cannot resolve the errors or need assistance determining why an error occurred, check the Knowledge Base under Support on the product web site or contact Product Support. |
-
After the error is resolved, to re-audit the user, select the user in the Check Errors view and, from the Data Pane, click the Audit Actions | Audit Mail File & Personal Data For Selected Users button in the Data Pane:
Check Errors View
-
Successfully audited users are promoted to the next step of migration (Notify)
-
To view the result of the audit, you can go to the Mail File Migration | Advanced document view in the Navigation Pane

Notice that the tool has audited users’ mail file size and listed the number of encrypted items, rules, contacts and journal entries (notebook entries) that each user’s mail file contains. In addition, the Data Pane also lists the people, journal (notebook) and rule count in all of the user mail files.
2.2.3 Moving the Selected Users Back to Audit Mail File Data
As soon as an audit is run, the successfully audited users are moved to the Notify step; however, you may wish to run the remaining Audit options on the users. To perform more audits, move them back to the Audit step.
2.2.4 Audit pNAB DB for Selected Users
Local Contact Data
Users’ contact data needs to be in the $PeopleGroupsFlat view in their mail file to be migrated. The local contact data needs to be synchronized through Notes replication on the end users’ workstation. This can be enabled through Domino/Notes policies, but if that has not been configured you will need to send each user an email message containing a special button. When clicked, the user’s contact and personal distribution list data found in their local names.nsf will be synchronized with their mail file. This data is then stored in a hidden view called $PeopleGroupsFlat in their mail files. If the view doesn’t exist, it will be created when the user clicks the embedded button in the migration message.
Server-based Contact Data
If a user’s contact data is stored on the Domino server, then you can edit the user’s Person document to point to the location and the name of the Personal Name and Address Book (pNAB). For example, if user Susan Johnson has pNAB on the Acme_mail Domino server in the Contacts folder, then his/her Person document must be edited and saved to update this information.
|
|
This action is only required if the end user contact data is not being synchronized by Notes directly into their email file using Notes Replication and Sync processing. |
-
Open a user’s Person document in the Data Pane
-
Open the Additional Databases tab and either click the Edit Document button or double-click inside the document
-
Edit the PNAB Server and PNAB File Name fields; specify the Domino server name and the full path to user's server-based personal name and address book (pNAB)
-
Click the Open link to verify whether the database can access the specified location and open the pNAB
-
Click Save & Close:
Person Document
-
With the user selected in the Data Pane, click the Actions | Other menu option
-
Select Synchronize Address Book from the list of agents in the Run Agent dialog box, and then click OK
-
Once the Person document is edited and saved, and the contact data synchronized, select the user (Susan Johnson using the example above), and then select Audit Actions | Audit pNAB DB For Selected Users.. The server-based pNAB is validated and its size is audited and moved to the next step.


2.2.1 Audit workflow and delegation
2.2 Auditing Mail Files
Next, you need to audit imported users’ mail files using the Audit Mail Files agents. This tool will check the following (depending upon selections made in the Installation and Configuration for the Required Settings) against each mail file:
-
Mail file exists
-
Migration Notes ID has sufficient access (see the Migrator for Notes Requirements document for more information about required access).
-
Mail file size
-
Number of Contacts
-
Number of Encrypted Items
-
Number of Rules
-
Number of Journal entries (Notebook Entries)
To audit mail files:
-
In the Navigation Pane, expand 2. Mail File Migration and then expand the Audit Mail Files | Audit Mail File Data view
-
Select the user Person Documents in the Data Pane; you can either audit a select number of users or all the users at once
-
Click the Audit Actions button in the Data Pane; the Audit Actions drop-down menu displays:
Audit Actions Drop-down Menu
-
Select one of the following options from the drop-down menu:
|
Option |
Description |
|
Audit workflow and delegation |
Determines the number of calendar entries affected by delegation for each user and will check for custom repeating meetings. This will provide a report for meetings with repeating patterns that are not supported by Notes Integration (MTCW).
Delegation in Notes and Forwarding in Outlook are similar methods of enabling an invitee to share a meeting with someone else; however, these two processes are very different from a system perspective. Migrator for Notes makes every effort to fully support the calendar workflow (see the Known Limitations.pdf for details on unsupported patterns), but some customers may wish to identify users heavily affected by delegated meetings prior to migration.
If the Settings option to Audit calendar unsupported patterns is enabled this will also collect a list of any current and future meetings that Outlook cannot fully support. Custom repeating meeting patterns in Notes are migrated to Outlook but are not fully supported for changes in Outlook. |
|
Audit Mail File & Personal Data For Selected Users |
Determines each user’s mail file size (includes count of contacts and journal entries (notebook entries))
This option will also query the options that you selected in the Required Settings > Domino tab. |
|
Audit pNAB DB For Selected Users |
Determines if users’ pNAB database is accessible and the number of contacts
This agent audits the server-based pNAB for selected users if one is defined in their Person document. This menu option is not used for migration. Irrespective of whether the migration mail agent is used to prompt the user to synchronize their own contacts or the administrator syncs their contacts for them, it is imperative that contacts must be synced into the users’ mail files to migrate contacts.
The purpose of the server-based pNAB field is so that the migration coordinator can perform the synchronization on behalf of the user by clicking Actions > Other to access the Synchronize Address Book agent.
Note: If pNAB database information is not populated in the users’ Person documents in Migrator for Notes, then you need to either send users a message to sync the pNAB to the mail file or specify pNAB details to be sure that Migrator for Notes is pointing to the server where pNAB is stored. |
-
Click the Audit workflow and delegation menu option
-
Totals will appear in the following columns:
-
Unsupported workflow - unsupported calendar recurrence patterns
-
Was Delegated - another Domino user delegated attendance
-
Delegator – the Chair delegated the meeting
-
Delegatee – the user was delegated to attend the meeting on someone’s behalf
|
|
|
-
The Calendar MTCW Audit Report will be populated with any meetings that the user is a Chair for, are in the Notes Integration cache range (typically 90 days from current date) and have a repeating meeting pattern that would not be supported for Outlook to Notes coexistence. This will include any meeting in the cache range including cancelled meetings.
|
|
|
-
If the Settings to Audit calendar unsupported patterns is enabled then the Calendar audit RTF report will be populated with any meetings that have a Notes custom pattern. This will be for meetings where the user is the Chair but can also include meetings where the user an Invitee if that option is enabled. This will not include meetings that have been cancelled. The audit can be sent to the end user through the Remediation Summary message template.
|
|
2.2.2 Audit Mail File & Personal Data for Selected Users
-
Click the Audit Mail File & Personal Data for Selected Users menu option; a message box appears indicating the number of selected users to audit
-
Click Yes
-
Depending upon the number of selected users, this process could take from a few seconds to several minutes. Upon completion, a message box confirms that auditing of the mail database is complete, and all users have been promoted to the next step of migration; click OK. If no errors are found, skip to step 4.
All errors must be fixed and then the Audit Mail File & Personal Data for Selected Users tool must be re-run without errors prior to the mail file migration. See Appendix B: Pre-Migration Troubleshooting for common audit errors and troubleshooting steps.
|
|
If you cannot resolve the errors or need assistance determining why an error occurred, check the Knowledge Base under Support on the product web site or contact Product Support. |
-
After the error is resolved, to re-audit the user, select the user in the Check Errors view and, from the Data Pane, click the Audit Actions | Audit Mail File & Personal Data For Selected Users button in the Data Pane:
Check Errors View
-
Successfully audited users are promoted to the next step of migration (Notify)
-
To view the result of the audit, you can go to the Mail File Migration | Advanced document view in the Navigation Pane
Notice that the tool has audited users’ mail file size and listed the number of encrypted items, rules, contacts and journal entries (notebook entries) that each user’s mail file contains. In addition, the Data Pane also lists the people, journal (notebook) and rule count in all of the user mail files.
2.2.3 Moving the Selected Users Back to Audit Mail File Data
As soon as an audit is run, the successfully audited users are moved to the Notify step; however, you may wish to run the remaining Audit options on the users. To perform more audits, move them back to the Audit step.
2.2.4 Audit pNAB DB for Selected Users
Local Contact Data
Users’ contact data needs to be in the $PeopleGroupsFlat view in their mail file to be migrated. The local contact data needs to be synchronized through Notes replication on the end users’ workstation. This can be enabled through Domino/Notes policies, but if that has not been configured you will need to send each user an email message containing a special button. When clicked, the user’s contact and personal distribution list data found in their local names.nsf will be synchronized with their mail file. This data is then stored in a hidden view called $PeopleGroupsFlat in their mail files. If the view doesn’t exist, it will be created when the user clicks the embedded button in the migration message.
Server-based Contact Data
If a user’s contact data is stored on the Domino server, then you can edit the user’s Person document to point to the location and the name of the Personal Name and Address Book (pNAB). For example, if user Susan Johnson has pNAB on the Acme_mail Domino server in the Contacts folder, then his/her Person document must be edited and saved to update this information.
|
|
This action is only required if the end user contact data is not being synchronized by Notes directly into their email file using Notes Replication and Sync processing. |
-
Open a user’s Person document in the Data Pane
-
Open the Additional Databases tab and either click the Edit Document button or double-click inside the document
-
Edit the PNAB Server and PNAB File Name fields; specify the Domino server name and the full path to user's server-based personal name and address book (pNAB)
-
Click the Open link to verify whether the database can access the specified location and open the pNAB
-
Click Save & Close:
Person Document
-
With the user selected in the Data Pane, click the Actions | Other menu option
-
Select Synchronize Address Book from the list of agents in the Run Agent dialog box, and then click OK
-
Once the Person document is edited and saved, and the contact data synchronized, select the user (Susan Johnson using the example above), and then select Audit Actions | Audit pNAB DB For Selected Users.. The server-based pNAB is validated and its size is audited and moved to the next step.
2.2.2 Audit Mail File & Personal Data for Selected Users
2.2 Auditing Mail Files
Next, you need to audit imported users’ mail files using the Audit Mail Files agents. This tool will check the following (depending upon selections made in the Installation and Configuration for the Required Settings) against each mail file:
-
Mail file exists
-
Migration Notes ID has sufficient access (see the Migrator for Notes Requirements document for more information about required access).
-
Mail file size
-
Number of Contacts
-
Number of Encrypted Items
-
Number of Rules
-
Number of Journal entries (Notebook Entries)
To audit mail files:
-
In the Navigation Pane, expand 2. Mail File Migration and then expand the Audit Mail Files | Audit Mail File Data view
-
Select the user Person Documents in the Data Pane; you can either audit a select number of users or all the users at once
-
Click the Audit Actions button in the Data Pane; the Audit Actions drop-down menu displays:
Audit Actions Drop-down Menu
-
Select one of the following options from the drop-down menu:
|
Option |
Description |
|
Audit workflow and delegation |
Determines the number of calendar entries affected by delegation for each user and will check for custom repeating meetings. This will provide a report for meetings with repeating patterns that are not supported by Notes Integration (MTCW).
Delegation in Notes and Forwarding in Outlook are similar methods of enabling an invitee to share a meeting with someone else; however, these two processes are very different from a system perspective. Migrator for Notes makes every effort to fully support the calendar workflow (see the Known Limitations.pdf for details on unsupported patterns), but some customers may wish to identify users heavily affected by delegated meetings prior to migration.
If the Settings option to Audit calendar unsupported patterns is enabled this will also collect a list of any current and future meetings that Outlook cannot fully support. Custom repeating meeting patterns in Notes are migrated to Outlook but are not fully supported for changes in Outlook. |
|
Audit Mail File & Personal Data For Selected Users |
Determines each user’s mail file size (includes count of contacts and journal entries (notebook entries))
This option will also query the options that you selected in the Required Settings > Domino tab. |
|
Audit pNAB DB For Selected Users |
Determines if users’ pNAB database is accessible and the number of contacts
This agent audits the server-based pNAB for selected users if one is defined in their Person document. This menu option is not used for migration. Irrespective of whether the migration mail agent is used to prompt the user to synchronize their own contacts or the administrator syncs their contacts for them, it is imperative that contacts must be synced into the users’ mail files to migrate contacts.
The purpose of the server-based pNAB field is so that the migration coordinator can perform the synchronization on behalf of the user by clicking Actions > Other to access the Synchronize Address Book agent.
Note: If pNAB database information is not populated in the users’ Person documents in Migrator for Notes, then you need to either send users a message to sync the pNAB to the mail file or specify pNAB details to be sure that Migrator for Notes is pointing to the server where pNAB is stored. |
2.2.1 Audit workflow and delegation
-
Click the Audit workflow and delegation menu option
-
Totals will appear in the following columns:
-
Unsupported workflow - unsupported calendar recurrence patterns
-
Was Delegated - another Domino user delegated attendance
-
Delegator – the Chair delegated the meeting
-
Delegatee – the user was delegated to attend the meeting on someone’s behalf
|
|
|
-
The Calendar MTCW Audit Report will be populated with any meetings that the user is a Chair for, are in the Notes Integration cache range (typically 90 days from current date) and have a repeating meeting pattern that would not be supported for Outlook to Notes coexistence. This will include any meeting in the cache range including cancelled meetings.
|
|
|
-
If the Settings to Audit calendar unsupported patterns is enabled then the Calendar audit RTF report will be populated with any meetings that have a Notes custom pattern. This will be for meetings where the user is the Chair but can also include meetings where the user an Invitee if that option is enabled. This will not include meetings that have been cancelled. The audit can be sent to the end user through the Remediation Summary message template.
|
|
-
Click the Audit Mail File & Personal Data for Selected Users menu option; a message box appears indicating the number of selected users to audit
-
Click Yes
-
Depending upon the number of selected users, this process could take from a few seconds to several minutes. Upon completion, a message box confirms that auditing of the mail database is complete, and all users have been promoted to the next step of migration; click OK. If no errors are found, skip to step 4.
All errors must be fixed and then the Audit Mail File & Personal Data for Selected Users tool must be re-run without errors prior to the mail file migration. See Appendix B: Pre-Migration Troubleshooting for common audit errors and troubleshooting steps.
|
|
If you cannot resolve the errors or need assistance determining why an error occurred, check the Knowledge Base under Support on the product web site or contact Product Support. |
-
After the error is resolved, to re-audit the user, select the user in the Check Errors view and, from the Data Pane, click the Audit Actions | Audit Mail File & Personal Data For Selected Users button in the Data Pane:
Check Errors View
-
Successfully audited users are promoted to the next step of migration (Notify)
-
To view the result of the audit, you can go to the Mail File Migration | Advanced document view in the Navigation Pane
Notice that the tool has audited users’ mail file size and listed the number of encrypted items, rules, contacts and journal entries (notebook entries) that each user’s mail file contains. In addition, the Data Pane also lists the people, journal (notebook) and rule count in all of the user mail files.
2.2.3 Moving the Selected Users Back to Audit Mail File Data
As soon as an audit is run, the successfully audited users are moved to the Notify step; however, you may wish to run the remaining Audit options on the users. To perform more audits, move them back to the Audit step.
2.2.4 Audit pNAB DB for Selected Users
Local Contact Data
Users’ contact data needs to be in the $PeopleGroupsFlat view in their mail file to be migrated. The local contact data needs to be synchronized through Notes replication on the end users’ workstation. This can be enabled through Domino/Notes policies, but if that has not been configured you will need to send each user an email message containing a special button. When clicked, the user’s contact and personal distribution list data found in their local names.nsf will be synchronized with their mail file. This data is then stored in a hidden view called $PeopleGroupsFlat in their mail files. If the view doesn’t exist, it will be created when the user clicks the embedded button in the migration message.
Server-based Contact Data
If a user’s contact data is stored on the Domino server, then you can edit the user’s Person document to point to the location and the name of the Personal Name and Address Book (pNAB). For example, if user Susan Johnson has pNAB on the Acme_mail Domino server in the Contacts folder, then his/her Person document must be edited and saved to update this information.
|
|
This action is only required if the end user contact data is not being synchronized by Notes directly into their email file using Notes Replication and Sync processing. |
-
Open a user’s Person document in the Data Pane
-
Open the Additional Databases tab and either click the Edit Document button or double-click inside the document
-
Edit the PNAB Server and PNAB File Name fields; specify the Domino server name and the full path to user's server-based personal name and address book (pNAB)
-
Click the Open link to verify whether the database can access the specified location and open the pNAB
-
Click Save & Close:
Person Document
-
With the user selected in the Data Pane, click the Actions | Other menu option
-
Select Synchronize Address Book from the list of agents in the Run Agent dialog box, and then click OK
-
Once the Person document is edited and saved, and the contact data synchronized, select the user (Susan Johnson using the example above), and then select Audit Actions | Audit pNAB DB For Selected Users.. The server-based pNAB is validated and its size is audited and moved to the next step.