When Configuring a Microsoft Outlook Profile element it is necessary to know the parameters of the Exchange environment, parameters like Exchange Server name, Proxy Server name, and any other configuration options needed to create a mail profile. To aid in this process, an Outlook Profile can be created manually on a user’s computer. After configuring the profile manually, Outlook should be launched to verify the settings are correct. If Outlook launches without any issue then the settings can be manually imported into a Desktop Authority’s Outlook Profile element.
Below are a few screenshots of some of the configuration settings located in the mail profile.
1. Microsoft Exchange server and Mailbox:
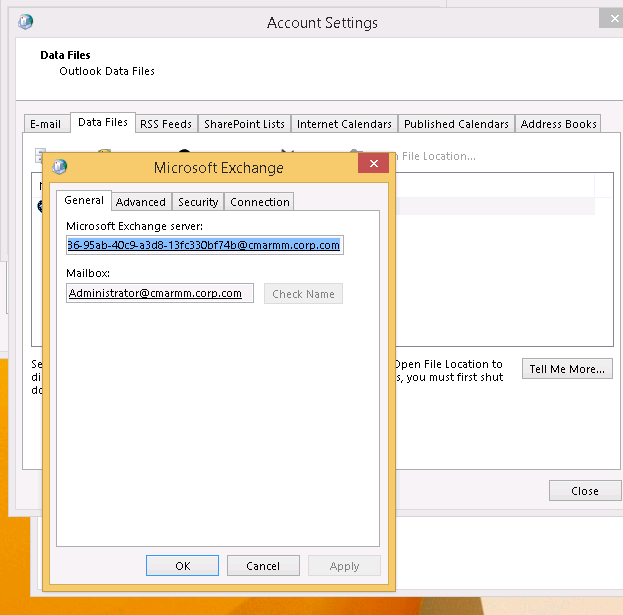
NOTE: When configuring the Mail Profile Element in Desktop Authority DO NOT use the GUID listed in the manually created mail profile. Instead use the Exchange Server name that was used during the creation of the profile.
Newer versions of Microsoft Exchange the server field will show a GUID instead of a server name after it has been configured. This happens because in Exchange servers are now both a Client Access Server (CAS) and a Mailbox Role server, it is now no longer routing to a specific server but is utilizing an auto discover feature to connect to any available Microsoft Exchange 2013 server. This allows for easier load balancing and failover protection. More Information here: What's new in Exchange 2013.
2. Connect to Microsoft Exchange using HTTP:
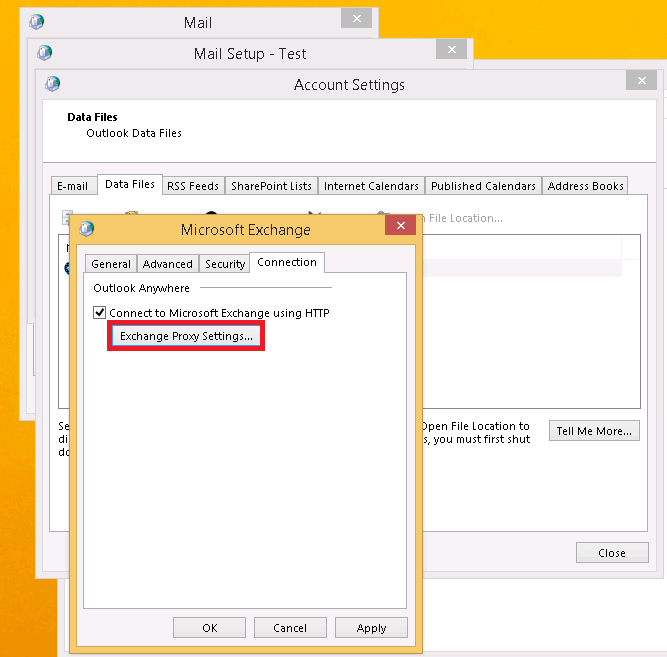
Under the Connection tab if “Connect to Microsoft Exchange using HTTP” is checked then click on the button “Exchange Proxy Settings…” to view the proxy configuration.
3. Exchange Proxy Settings

The image below shows an example of how the settings found in a manually configured Mail profile can be placed into a Desktop Authority Element to be deployed to multiple users. The left side shows the Microsoft Outlook Proxy Settings of the client computer and the right side shows a Microsoft Outlook Profiles Element in Desktop Authority.

