SQL Server can be configured to require Force Encryption from clients that connect to the database. If not configured properly, erwin Mart Portal Configuration will not be able successfully connect to the SQL Server database.
Potential error messages displayed when clicking on the erwin Mart Portal Configuration utility "TEST" button:
This secure network connection for erwin Mart Portal Configuration utility tool requires a properly configured SQL Server .cer certificate. This certificate must be installed on the SQL Server and also exported and then installed on the client system that requires 3rd party applications (i.e. erwin Mart Portal Configuration) to connect to the SQL Server database.
Please note that this article strictly only demonstrates using a self-signed certificate. This is NOT the recommended type of certificate to be using for production environments. Consult with the third party SSL vendor, SQL Server IT administrator and Windows Administrator if you need assistance on how to create and properly install a public certificate. This process will require administrative privileges.
01. Create a self-signed certificate from the SQL Server side for the SQL Server encryption protocol requirement. How to do this step can be found online and is beyond the scope of this article.
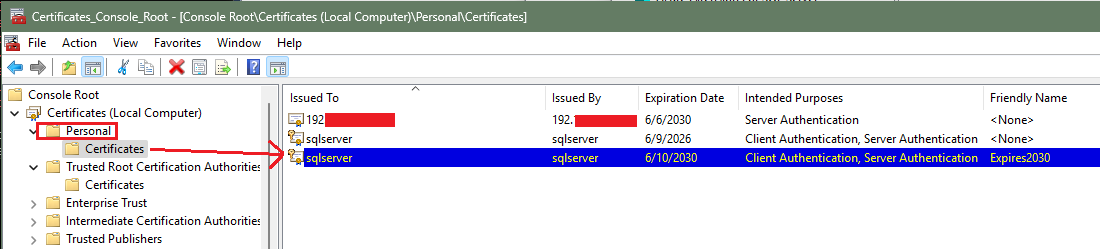
02. Once the certificate is generated, verify that it is installed under the Personal | Certificates store. The example below is a self-signed certificate given a "Friendly Name" Expires2030 since it was generated to expire after 5 years from the time of creation (2025).

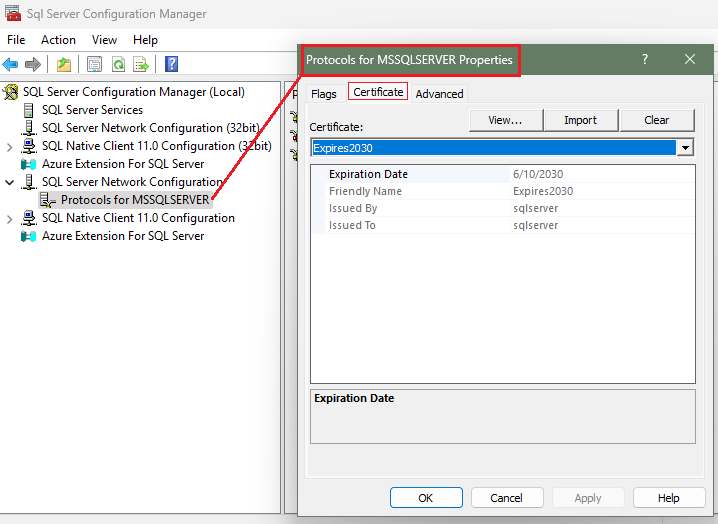
 03. Launch the SQL Server Configuration Manager, then expand the tree for SQL Server Network Configuration. Right-click on Protocols for <SQLServer_Instance_Name> (i.e. MSSQLSERVER), then left click on Properties. Navigate to the "Certificate" tab, under the Certificate drop-down menu, the options to select the proper self-signed certificate should be available if stored under the Personal store (Certificates [Local Computer] > Personal > Certificates).
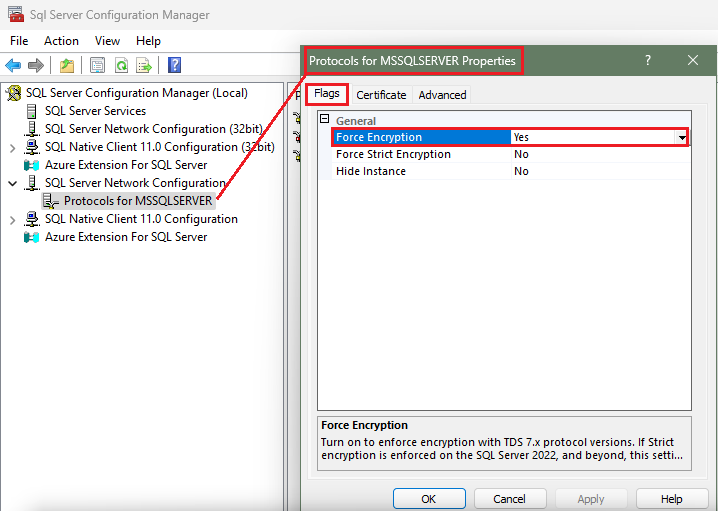
04. Next, click on the "Flags" tab. To enable SQL Server to require all connections to that database, at minimum the Force Encryption option needs to be switched from No to Yes. The other options are left alone, those options are not supported in this article demonstration. Once SQL Server Force Encryption feature is enabled, all clients that attempts to connect to it will require a secure connection.
Note: A start or restart of the SQL Server service is required for the changes to take place. If SQL Server service was previously running successfully, but an error appears after restarting the service, then please see if the error matches the KB article below:
Unable to start SQL Server service after configuring certificate
05. A test can be performed to verify if the SQL Server Force Encryption is enabled or not. Connect to the SQL Server database using the Microsoft SQL Server Management Studio (SSMS). Since the SQL Server is using a self-signed certificate in this article's example, the SSMS connect page must have the "Trust Server Certificate" checkbox checked. Run the following query against the SQL Server database:
| SELECT session_id, encrypt_option FROM sys.dm_exec_connections WHERE session_id = @@SPID; |
Explanation:
sys.dm_exec_connections shows details about current connections.@@SPID returns the session ID of your current connection.encrypt_option will return:
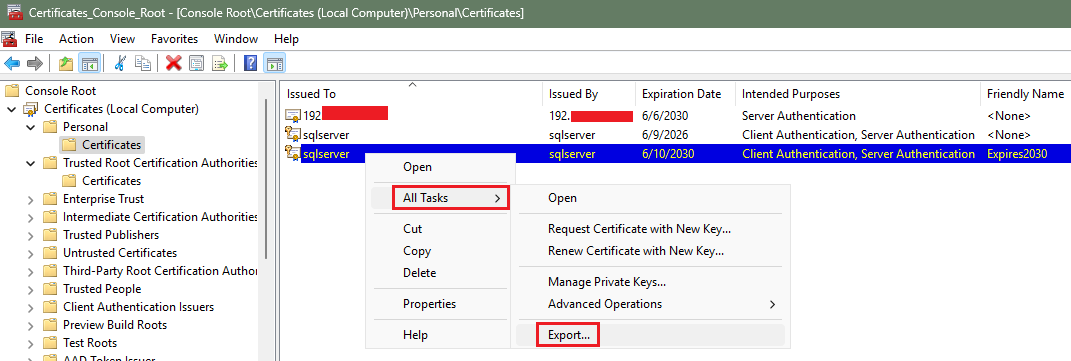
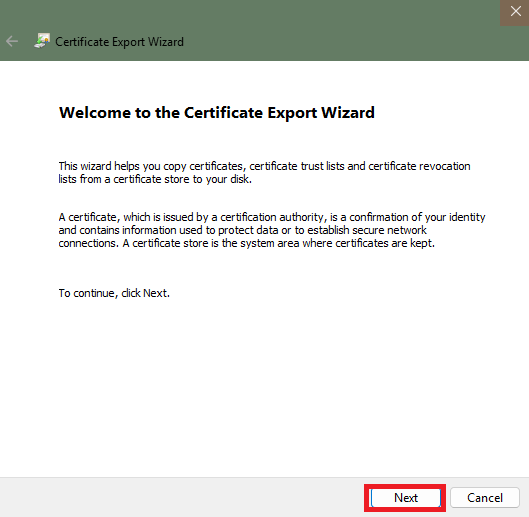
'TRUE' → the connection is encrypted (SSL/TLS is in use).'FALSE' → the connection is not encrypted.06. From the SQL Server, please locate and export the SQL Server certificate. The self-signed certificate in this article's example is located under the Certificates (Local Computer) | Personal | Certificates store. Right-click on the self-signed certificate, then click on All Tasks > Export and this will bring up the Certificate Export Wizard.
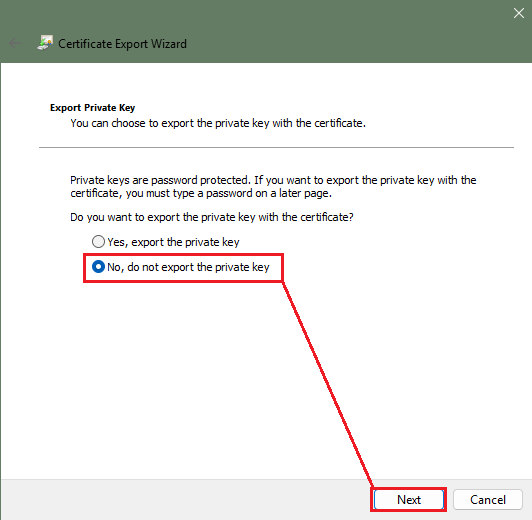
07. Do not export the private key. Click next.
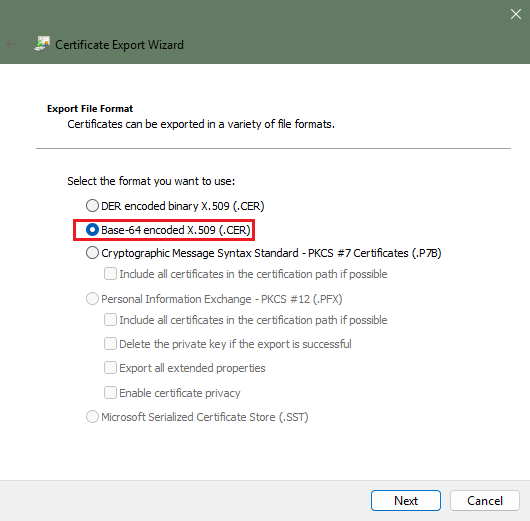
08. Select the Base-64 encoded X.509 (.CER) certificate format.
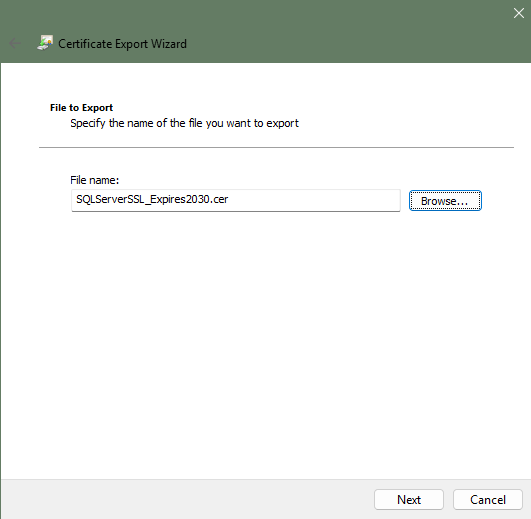
09. Specify the name of the certificate file and the location where you want to export this certificate file. Once the certificate file has been exported, this certificate can now be copied over to a client system that the erwin Mart Portal installed.
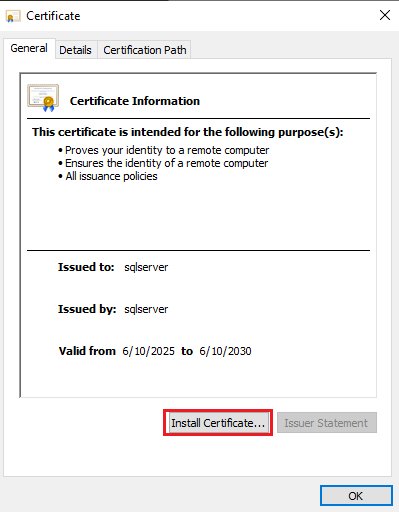
10. From the client system (that has the erwin Mart Portal installation), copy the certificate (i.e. SQLServerSSL_Expires2030.cer) to a dedicated folder. Double-click on the certificate to install it using the Certificate Import Wizard. There are other methods (Powershell, etc) available that can import the certificate but those methods are not covered in this article. Click on Install Certificate...
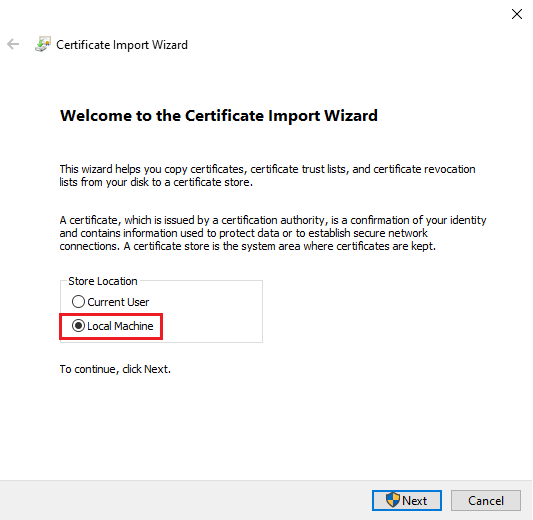
11. Select "Local Machine" then click Next.
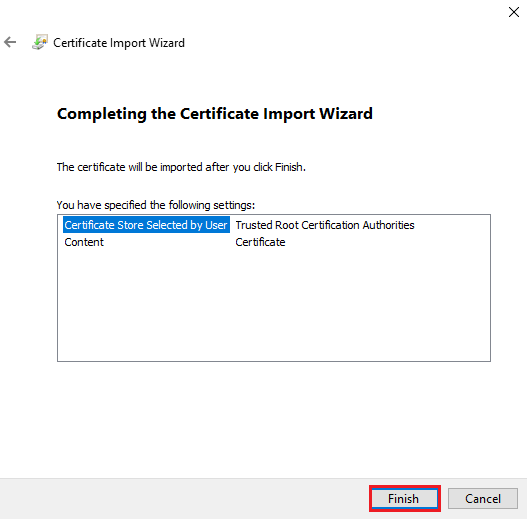
12. Select to "Place all certificates in the following store" option. Click on the Browse button and then locate "Trusted Root Certification Authorities" store. Click OK. Click Next. The final page will be "Completing the Certificate Import Wizard", click on the Finish button to begin the installation process. The wizard should eventually install the certificate to the store selected and return a message stating that the certificate has been installed successfully.

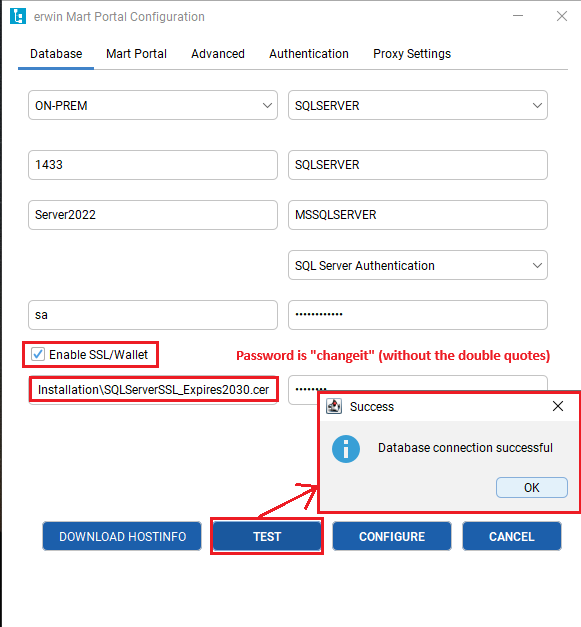
13. Launch the erwin Mart Portal Configuration utility tool. Fill in all the required fields. Under the Database tab, the "Enable SSL/Wallet" checkbox should be checked. Below that, please fill in the certificate file location path (including the name of the certificate). The password is "changeit" (all lowercase and please leave out the double-quotes). Finally, click on the TEST button to verify the SQL Server SSL wallet connection. If everything is correct, the "Database connection successful" should be the message returned.