To configure the various settings of Recovery Manager for Active Directory, you can use the Settings dialog box. In the Settings dialog box, you can define a TCP port for communications with the Backup Agent, Online Restore Agent, Offline Restore Agent and Management Agent, specify the default location for storing Active Directory® backups, select a default method for compare and restore operations, configure settings for creating unpacked backups, or set up e-mail notifications or diagnostic logging.
In the Recovery Manager Console, select the Recovery Manager for Active Directory console tree root.
On the Action menu, click Settings.
The Settings dialog box has the following tabs:
On this tab, you can specify the default location for storing Active Directory backups or select a default method for compare and restore operations.
This tab provides the following options:
Default backup location. Allows you to specify the path to the folder where to store backups. You can either type the path or click Browse to locate and select the folder.
Maximum number of items displayed per folder under the Active Directory node. Use this box to type the maximum number of objects (default 2000) that you want to be displayed for any single folder in the console tree under the Active Directory® node.
Default method for compare and restore operations. Allows you to select the default method to perform compare and restore operations in the Online Restore Wizard. For more information about the methods that you can select, see Using the agentless or agent-based method.
NOTE: By default, RMAD uses the agentless method to recover users. Agentless method does not allow for the recovery of passwords from backups, therefore, the password should be either explicitly set by the user during the recovery, or the password is left blank and the user is disabled after recovery. If you intend to use On Demand Recovery for Hybrid recovery, the user interface does not provide an option to set a password for the recovered user, so the user is restored without a password and is disabled. To recover the password, Agent-based recovery method should be used.
Change Auditor (CA)
Include Change Auditor "Who" data in reports. Includes information on users who modified certain Active Directory objects into the reports you can generate in the Online Restore Wizard. To use this option, you must have Change Auditor for Active Directory installed in the home Active Directory forest of RMAD.
Include subsequent changes from CA on deleted objects. When this option is selected, Recovery Manager for Active Directory restores the deleted object(s) and continuously restores the last change (if any) that was made to the object attributes after creating the backup, using data from the Change Auditor database.
Database. Allows you to specify the name of Change Auditor database.
To specify the CA database server, instance, port, and name, use the following format: <Server Name>\<Instance Name>,<Port>\<Database Name>. Example: testserver.domain.com\testinstance,1432\ChangeAuditorDB
For details about the Change Auditor-related options, see Integration with Change Auditor for Active Directory.
Default Active Directory connection
| Note |
You must reopen the Forest Recovery console after updating the Use Secure Socket Layer (SSL) to encrypt the connection setting for the changes to take effect. |
On this tab, you can specify some global (or default) settings to automatically unpack backups. By default, these settings will apply to all new Computer Collections.
This tab provides the following options:
Unpack each backup upon its creation - Specifies to unpack each backup upon its creation. This option will only apply to those Computer Collections whose properties are configured to use the global settings. In this option, you can specify the number of recent backup creation sessions (default 3) from which you want to keep unpacked backups for each domain in the Computer Collections.
Prompt me to keep backups unpacked by wizards - Specifies that the Online Restore Wizard and the Group Policy Restore Wizard will prompt you to keep unpacked backups. Use the Keep unpacked backups list to specify for how long you want RMAD to keep (default 7 days) the backups unpacked by the wizards.
Unpacked backups folder - Provides a space for you to specify the path to the folder (default C:\ProgramData\Quest\Recovery Manager for Active Directory\Unpacked) where you want RMAD to keep unpacked backups. Each unpacked backup will be saved in a separate subfolder. Type the folder path or click Browse to locate and select the folder.
Only one DC backup per domain is chosen for unpacking for each backup session.
Not Read-Only DCs are selected first.
-OR-
If there are no Not Read-Only DCs in the domain, all the DCs are supposed to be selected.
If several DCs are selected on the Step 2, DC with the Global Catalog role will be selected among them. If there are several DCs with the GC role, it is unpredictable which backup will be selected then.
The chosen backup (one per domain) is unpacked.
If there is limit for unpacked backups and it is exceeded, the specified number of the oldest backups are deleted. If individual settings are specified for a collection, backups for that particular collection are taken into account, otherwise backups of all collections that use the global settings are taken into account when comparing against the specified limit.
For more information on managing unpacked backups, see Unpacking backups.
On this tab, you can configure e-mail notification settings. Recovery Manager for Active Directory (RMAD) will use these settings to send notification e-mails about backup creation sessions.
This tab provides the following options:
Service Type Select SMTP Authentication or Exchange OAuth2 for Microsoft 365 Exchange Online.
SMTP Authentication
To set up email notifications for Exchange, specify the following for SMTP Authentication:
SMTP server. Provides a space for you to specify the SMTP server for outgoing messages.
SMTP port. Provides a space for you to specify the port number (default port for SMTP is 25) to connect to on your outgoing mail (SMTP) server.
From address. Provides a space for you to specify the return address for your e-mail notification messages. It is recommended that you specify the e-mail address of the RMAD administrator.
SMTP server requires authentication. When selected, specifies that you must log on to your outgoing mail server.
User. Provides a space for you to specify the account name used to log on to the SMTP server.
Password. Provides a space for you to specify the user password.
Use Secure Sockets Layer (SSL) to encrypt the connection. Allows you to use SSL when accessing the e-mail server.
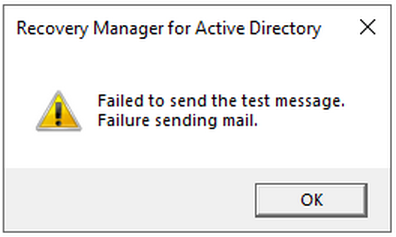
Disable SSL certificate validation (allows use of an untrusted SMTP server). Untrusted server means one that the client machine does not have a certificate installed for. For example, if the Exchange self-signed certificate is not installed on the RMAD server it will result in an error, as seen below, when sending a test message accessing the server.
Exchange OAuth2 Authentication
To set up email notifications for Microsoft 365 Exchange Online, you need to register Recovery Manager for Active Directory with Microsoft Entra ID. For steps to create and manage your Microsoft Entra ID application see Registering Recovery Manager for Microsoft 365 Exchange Online Email Notifications.
From address. Provides a space for you to specify the return address for your email notification messages. It is recommended that you specify the e-mail address of the RMAD administrator.
Application (client) ID. Provide the application (client) ID for the Microsoft Entra ID application created for Recovery Manager for Active Directory email notifications.
Directory (tenant) ID. Provide the directory (tenant) ID for the Microsoft Entra ID application created for Recovery Manager for Active Directory email notifications.
Certificate Thumbprint. Provide the certificate thumbprint for the Microsoft Entra ID application created for Recovery Manager for Active Directory email notifications.
U.S Government GCC High. Check this box if you are using an US Government GCC High account for Exchange Online OAuth2 notification.
Test Settings. Sends a test notification message to the address set in the “From” address text box. Use this button to verify that the specified e-mail notification settings are valid.
For more information, see Using e-mail notification.
