Content Backup Settings
A feature of StoragePoint is the added security of being able to back up the endpoints. The settings must be configured and the timer job must be run for the backup to take place. On the backup endpoint there will be a starting folder with the GUID of the Profile. Within that folder will be more folder structure, depending on whether foldering was enabled on the backup endpoint or not. BLOBs will use their GUID rather than any SharePoint naming conventions, even if those were used in externalization.
|
|
NOTE: If backup settings are enabled, and the backup has not been run, Unused BLOB Cleanup will not delete the unused BLOBs from the primary endpoint that meet the retention settings of the backup service. |
|
|
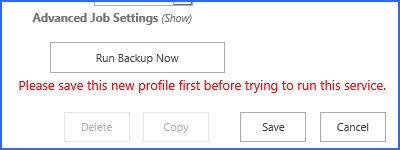
NOTE: If a new profile is being created, Save the profile before running any backup jobs. |
Click the arrow to expand the Backup Settings on the Storage Profile screen.
|
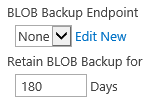
BLOB Backup Settings Select a backup endpoint from the dropdown. Only endpoints designated as backup will be visible in this dropdown. Selecting None (default) will not backup the primary endpoint. |
The Edit and New links can be used to create new endpoints for the backup. Enter a number of days in the Retain Backup For field to specify how long the BLOBS should remain on the backup endpoint. |
|---|---|
|
|
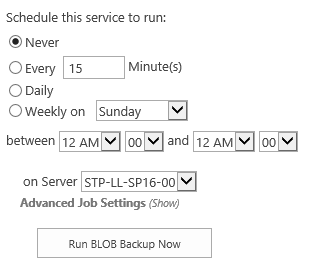
The backup service is a timer job that duplicates the BLOBS on the primary endpoint, to a backup endpoint. |
|
1.Select the Never, Every, Daily, or Weekly on option. a.For Every, enter the interval in minutes for the timer job to run. b.For Weekly, select the day of the week from the supplied dropdown. c.For Daily or Weekly, select the start window time from the between dropdowns and the end window time form the and dropdowns. 2.On the on Server dropdown list, select the WFE server on which to run the job. 3.Click the Show link next to the Advanced Job Settings to view notification settings. 4.Enter the Number of Processing Threads to use during job execution. It will default to one thread per processor core if no value is supplied. 5.Configure job roles. See Controller and Worker Configuration for more information 6.Under the Send Completion Notice: header, select whether the email notification should go out Always, or Only when errors occur. 7.In the To section: a.Check the Default Notifications Contacts box to have a completion email sent to the email address entered in General Settings. Note that for this feature to work, the Default Notification field on General Settings must contain a valid email address. b.In the Additional Contacts box, enter a semi- colon delimited list of other email addresses that should receive the notification. 8.Click Save to save the configured job schedule. If Run BLOB Backup Now is pushed, there will be a message to save the profile first. | |
Master Key Encryption
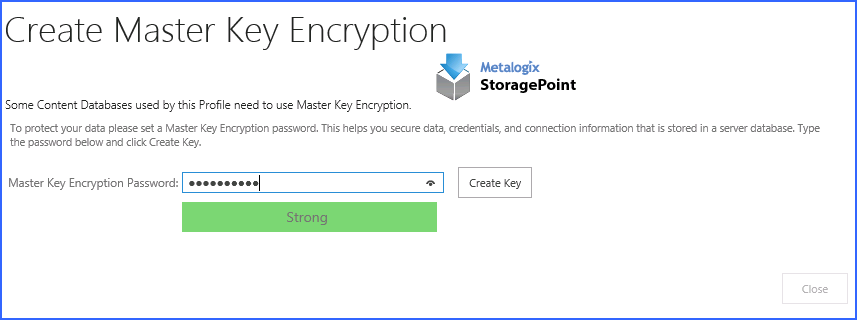
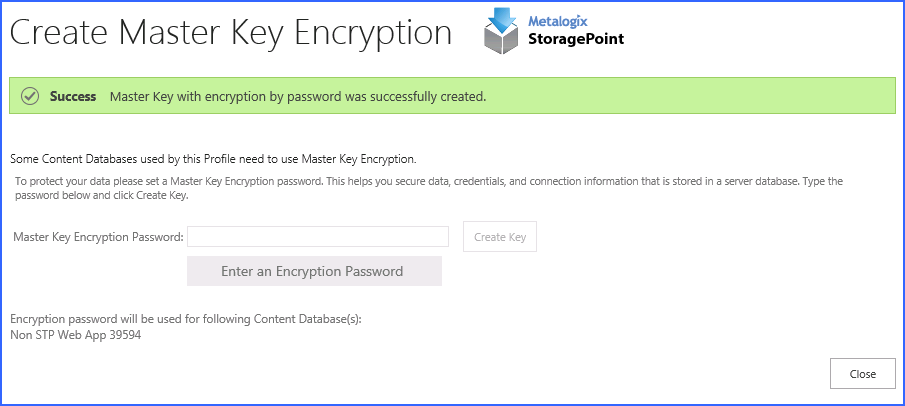
If the scope of the profile covers a content database and uses RBS, Master Key will be required for SQL server. The master key is used for building secure RBS SQL infrastructure (provides necessary certifications for secure RBS communication in content database and for adding digital signatures for RBS components). If a password is not provided during profile creation, a temporary default password will be used. For this reason, using the interface to create the password in StoragePoint allows the admin to set their own password. If the password is forgotten, please contact Quest Support for procedures on altering the password.
|
|
NOTE: The Master Key is used for protecting certificates or encrypted columns in a table - this is not encrypting externalized data. An administrator may need to enter the Master Key if the database is added to availability groups in SQL. |
Enter a password, and click Create Key.
Click Close. Note the name of the content database that is covered by this encryption key.
The page will be locked until the operation is complete. This operation can take several minutes.
If this page appears when saving an existing profile, note whether the profile has a librarian configuration. If so, the master key encryption is completed on the first save of the profile, rather than when the librarian configuration is saved.
Verify File Share and Content Database Permissions (OPTIONAL)
When using the File Share adapter, an additional check may be seen when saving the profile: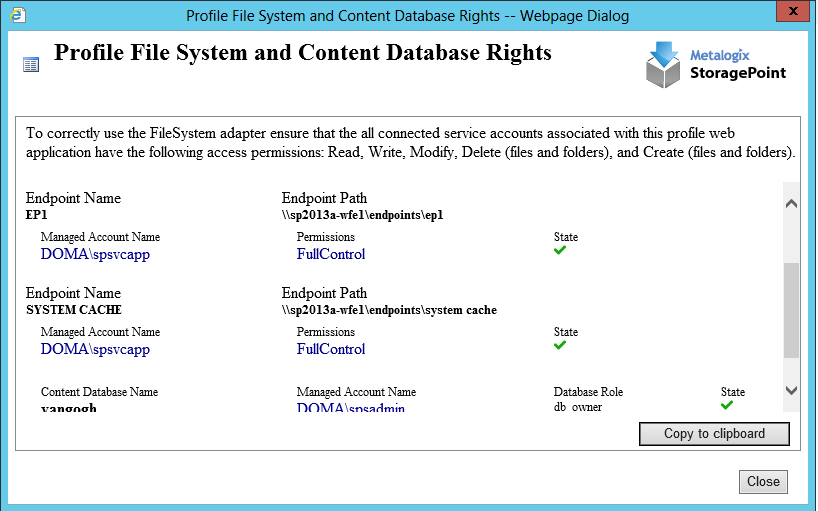
This screen displays when editing an existing profile if:
·the Externalize Content BLOBs setting is Yes;
·there is at least one FileSystem endpoint;
·and the Web Application in the scope of the profile has at least one connected SharePoint (IIS Web) Service Application account that cannot access one of the FileSystem endpoints.
·The Web Application is connected (through proxy) to at least one service application, i.e. User Profile Service.
This screen displays when creating a NEW profile or copying a profile if:
·there is at least one FileSystem endpoint;
·The Web Application is connected (through proxy) to at least one service application, i.e. User Profile Service;
·All service accounts associated with profile web application do not have file system access permissions (Read, Write, Modify, Delete, DeleteSubdirectoriesAndFiles, CreateDirectories, CreateFiles) on all FileSystem endpoints AND db_owner role on all content databases associated with the profile.
When a new Content Database Profile is created, the associated web application pool account registered on SQL server will get two additional Database Role memberships: Public and SPDataAccess.
This check can be run manually by clicking the Check File share and Content Database Rights button beneath the list of endpoints on the profile.
Correct any permission issues before externalizing data. Use the Copy to Clipboard button to note which accounts need permission.
The Storage Profiles page will be displayed with the newly-created storage profile showing up in the list.
Editing an Existing Storage Profile
Once a profile is saved, archiving, records and holds management can be added to the profile. Endpoint filters can also be modified for asynchronous operations.
Click the name of the storage profile to edit.
Make note of any notifications at the top of the page:
Do not change the Endpoint Selection mode on the profile that have a File Share Librarian configuration, which will be indicated in the Filter column.
To temporarily prevent externalization to an endpoint, switch the Online selection to No. This only affects this endpoint for this profile. It does not affect the endpoint's use on other profiles.
Make the necessary changes, including endpoint filters, noting that the profiles scope and name cannot be changed, nor can endpoints that are associated with a File Share Librarian configuration be removed.
When complete, click Save to apply the changes.
The Storage Profiles page will display.
It is recommended that an IISRESET and a SharePoint Timer Job reset be performed on each web front end if changes were made to the storage profile.


