The Desktop Authority Manager is a web based application for Network Administrators to centrally manage client's user and computer configurations. All configurations are defined within the Desktop Authority Manager. The Manager is also used to replicate and deploy settings to the clients during the logon, logoff, startup, shutdown and other specified events. The Manager also provides other tools to allow the Administrator to access and configure Global, Profile, Remote Management and Reports.
The minimum screen resolution for the Desktop Authority web console is 1024 x 768.
The Desktop Authority Manager is secured by user logins. Access to the different parts of the Manager is granted and/or denied based on the user's permissions granted in the Console Access Settings. This is granted based on roles, permissions and the user assigned to a role.
This is informational text that displays the username of the user who is currently logged into the system.
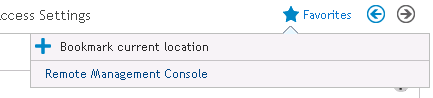
Displays a list of favorite pages within the Manager. Pages are made a favorite by clicking on the Bookmarks link and then Bookmark current location.
Figure 3: Desktop Authority Bookmarks
Click on Preferences to configure the Manager’s global settings.
Opens the help file. If Internet access is available, the online help file will be opened otherwise the help file stored locally will be opened.
Opens the online product feedback page. This page allows you to send feedback about your product experience. This is not the place to request technical support.
Click Logout to exit the Desktop Authority Manager.
The menu bar provides access to the main areas of Desktop Authority. This includes Client Configuration, Deployment Settings, Remote Management, Reporting and Control Access Settings.
Configure Computer and User profiles containing client configurations.
Configure the deployment of the Desktop Authority Client application, Software Distribution, Server Manager and System Configuration.
Configure and access Desktop Authority Remote Manager. Remote Management offers a simple way to remotely access multiple computers on the network for the purpose of remote control, restarting the computer or deploying or removing the Desktop Authority service.
Provides access to the Reporting tool. This tool is downloaded and run locally outside of the web browser.
This is Desktop Authority's Role Based Administration area. Console Access Settings provides roles to which users are assigned to. This limits their access to the system, based on what options the roles allow them to access.
The Navigation pane is available for several of the Menu bar options. For the Client Configuration object, the Navigation pane is used to select a specific Computer or User object to work with. The View pane changes based on the object selected in the Navigation pane.
The Navigation pane is also available for the Remote Management object. Here you will select the client computer to work with.
The View pane is used to set various configurations and is based on the currently selected object from the Menu bar and Submenu.
The Status bar shows a few miscellaneous items including a link to the Replication options, Registration, Getting Started page and Product Resources.
The Desktop Authority Manager is secured by user logins. Access to the different parts of the Manager is granted and/or denied based on the user's permissions granted in the Console Access Settings. This is granted based on roles, permissions and the user assigned to a role.
The User name/Password credentials used to login to the Manager are the user's Active Directory credentials.
Check the Use Windows Logon box to logon using current Windows session login credentials. Those are the credentials entered at the Window's logon prompt
Once logged in to the Manager, users will be limited to specific areas of the Manager based on their Roles defined in the Console Access Settings. There can be one or more Super Users defined for the system that has access to the entire console.
Selecting the option 'Use Windows logon" checkbox with the Internet Explorer web browser may cause a dialog box to be displayed requesting the user credentials regardless of the fact that you chose to logon using the current Windows logon credentials.
Figure 4: Windows security credentials
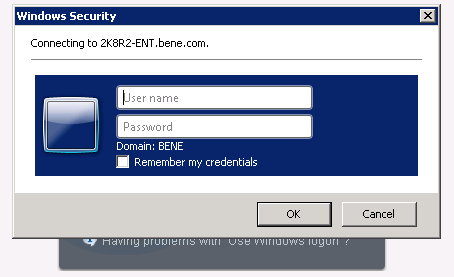
Internet Explorer must be configured to trust the site. Once this is done, the user credentials will not be prompted for upon each logon.
The following steps will help you to configure Internet Explorer.
https://[servername].[domainname].com
For example: https://2k8r2-ent.bene.com
Figure 5: Adding a computer to the Local Intranet zone
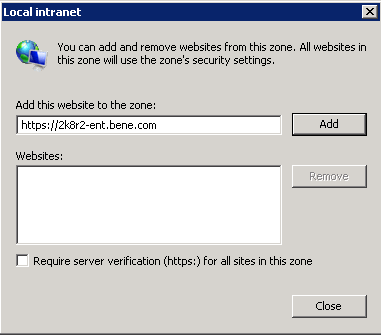
This configuration will add the trusted site to the local intranet zone. This must be done on every machine that will access the Desktop Authority Manager using the Use Windows logon option.
Selecting the option "Use Windows logon" checkbox when using the Firefox web browser may cause a dialog box to be displayed requesting credentials to be entered each time a login is attempted. However, the correct credentials are not accepted.
The first thing to note is how to enter the credentials. The username must be entered using the format “DomainName\Username” (without quotes). If entering only the username, it will not be authenticated on the domain.
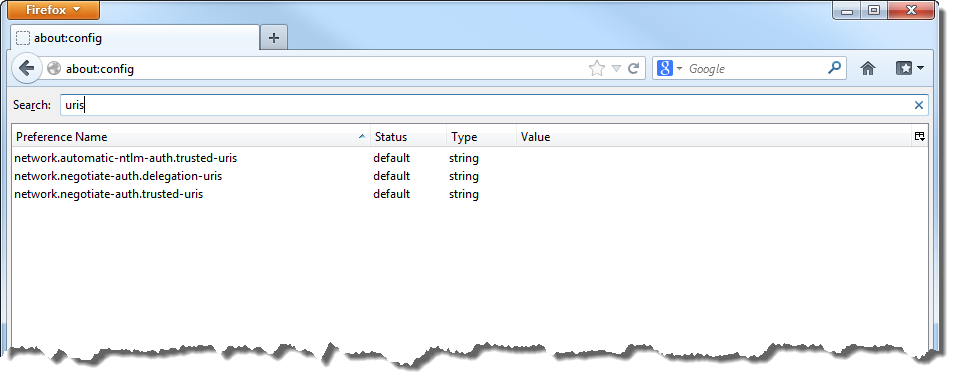
The Firefox web browser must be configured to allow NTLM authentication.
Figure 6: Firefox configuration warning
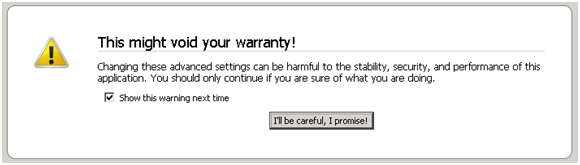
Figure 7: Firefox advanced configuration dialog
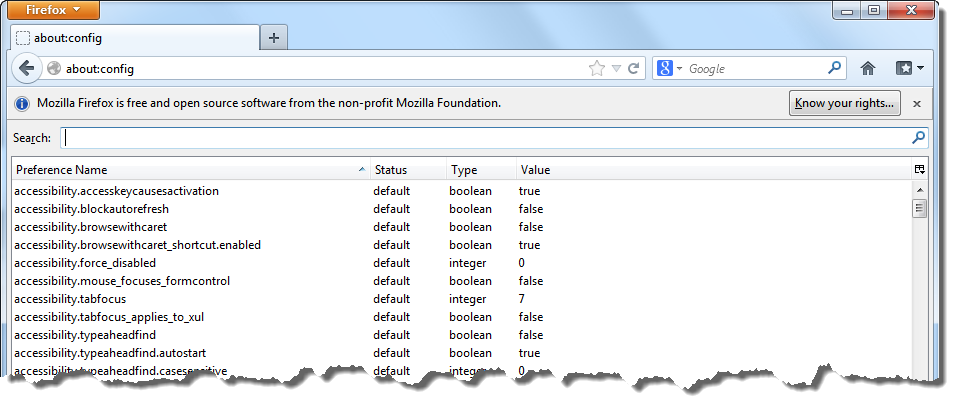
Figure 8: Firefox filtered configuration list
The Preferences dialog presents several options that are used to configure Desktop Authority Manager. Click Preferences on the Manager's System Menu.
Select the Language for the Desktop Authority Manager to use. Currently it is available in English and Russian.
Select the format the system will use to display all date and time fields.
The Session timeout value represents the amount of time the Desktop Authority Console session can remain active while not in use. Once the selected timeout value is reached, the user logged into the console will automatically be logged out. Select a timeout value from the session timeout drop list.
Select to display the server time or the local time in the console. Also select the default time zone for the Desktop Authority Manager. All times will be adjusted and shown in the selected zone.
Select the sort order of the Client Configuration Computer and User profiles. Select from by Category, Alphabetically, or by Execution Order.
The Desktop Authority gives the option of being displayed with different themes.
Each object configuration element has a description associated with it. Specify the default description for use on each new configuration element. Several predefined dynamic variables may be used in the description. They are currently limited to: $USERID, $FULLNAME, $WKSTA, $DATE and $TIME.
Entering Created by $Userid, $Date $Time provides a description of Created by Administrator, 5/10/2003 11:24 when a new element is added.
The default description is applied to all future configuration elements added to any profile object. Existing elements are not updated. The description may be overridden for each configuration element.
The Resource Browser displays a selection box of available shared, drives and/or folders. Select this box to set the default value for the Show hidden shares checkbox in the Resource Browser.
Select this option to shows Domains, Users and Groups, Computers and Domain Controllers Active Directory objects in the Resource Browser.
When a user is editing an element within an object, there is the possibility to navigate away from the unsaved element dialog. Select this box to show a confirmation message that the unsaved data will be lost if you leave the page. Unselect this box so no confirmation message will appear when this scenario happens.
When starting the Desktop Authority manager after an upgrade, there is a dialog box that can be displayed which shows a features list for the newly installed version. This notification can be turned off by unselecting this checkbox as well as selecting the "Do not show on startup" checkbox on the upgrade notification dialog.
Choose to show all objects within a profile or hide the unused objects, by default, within the profile.
|
|
Note: When unselected, a new profile will show only the Logging and Alerts profile objects. To see all of the objects for a profile, this box or the Profile Actions Show Unused must be selected . |
Select the box next to each listed item if you want to see a confirmation dialog box when the specified task/action occurs. You will be given the option to continue with the operation or cancel it at that time. Unselecting the box on this dialog means you will not be prompted for confirmation when these actions occur.
The Menu Bar provides access to the main functions of the Desktop Authority Manager. These include Client Configuration, Deployment Settings, Remote Management, Reporting and Console Access Settings.
Client Configuration is the heart of Desktop Authority. This is where the Computer and User object settings are configured.
The Client Deployment object provides access to Assign Script and GPO Deployment, both of which arm the domain user and computer with configurations for Desktop Authority to execute during client logon process
Use the Remote Management menu to Remotely Manage the selected computer in the Remote Management tree of the Navigation Pane.
The Reporting object provides predefined reports distributed with Desktop Authority as well as the ability to create custom reports. Reports can be run manually at any time or may be scheduled to run on a specific and/or recurring Date/Time.
Use the Console Access Settings menu to configure Super Users/Groups and define Global Roles that define the resource actions that are allowed by any member assigned under the role. Also, select to Change the Operations Master service Credentials from this menu.

