A scheduled task is created when you schedule a Space Manager activity such as report generation or script generation. When you schedule one of these activities, a Windows scheduled task is created. You can view and manage these tasks using Space Manager.
Scheduled tasks that are managed using the Scheduled Tasks window include:
When a scheduled task is executing, Space Manager runs in the background.
To manage scheduled tasks
Review the list of scheduled tasks. The grid displays the status of each task and the next scheduled run time.
Select a task and click one of the following toolbar buttons to perform the action. Or right-click a task and select from the menu.
 |
Click to modify the selected task's schedule. |
 |
Click to enable selected task. |
 |
Click to disable selected task. |
 |
Click to run selected task. |
 |
Click to run selected task interactively. |
 |
Click to delete selected task. |
 |
Click to refresh. |
Note: You can also manage tasks and view task properties using the Windows Task Scheduler.
Space Manager provides Reorganization reports to identify the benefits of reorganizing tables or indexes and to capture historical data on reorganization activity.
Space Manager provides Size and Growth reports for capacity and reorganization planning.
All reports can be viewed, printed, and exported. Space Manager allows you to easily export a report and then email it to colleagues. You can export a report to one of a number of different file formats, including PDF, Excel, or a text file.
Notes:
| Report | Description |
|---|---|
| Reorganization Reports |
There are two types of Reorganization reports you can generate.
|
| Size and Growth Reports |
There are three types of Size and Growth reports you can generate.
|
| Reorganization Candidates Reports |
There are two types of reports you can generate to identify Reorganization Candidates.
See Generate Reorganization Candidates Report for more information. |
There are two types of Reorganization reports you can generate.
To generate a Predicted Reorganization Benefit report
On the Select Objects page of the wizard, from the Selection Mode drop-down list, select a category to use for displaying objects.
Note: When using the Table selection mode, you can use incremental search to find objects. Only the first 20 search results are displayed in the drop-down list.
To select the objects you want to include in the report, use the left/right arrows to move selected objects to the right pane.
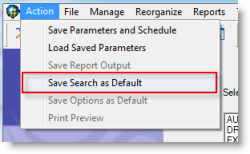
Tip: Select Action | Save Search as Default from the main menu to save the search criteria as your default search criteria.
When you have finished selecting objects, click Next.
On the Report Options page of the dialog, specify options to further define the result set. The Predicted Reorganization Benefit report uses data and statistics from the Space Manager repository.
Tip: Select Action | Save Options as Default from the main menu to save the specified options as your default report options (saves only the report options, not search criteria).
 . See Preview and Export Reports for more information.
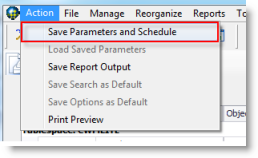
To save report parameters to use when generating subsequent reports or to schedule a report generation, select Action | Save Parameters and Schedule. See Save report parameters or schedule report generation.
To generate a Reorganization History report
On the Select Objects page of the wizard, from the Selection Mode drop-down list, select a category to use for displaying objects.
Note: When using the Table selection mode, you can use incremental search to find objects. Only the first 20 search results are displayed in the drop-down list.
To select the objects you want to track, use the left/right arrows to move selected objects to the right pane.
Tip: Select Action | Save Search as Default from the main menu to save the search criteria as your default search criteria.
On the Report Options page of the wizard, enter options to further define the result set. You can include dependent objects, show only the last reorganization for each object, and group the objects by Reorg date, Reorg ID, Tables and their dependencies, Target tablespace, or Owner.
Tip: Select Action | Save Options as Default from the main menu to save the specified options as your default report options (saves only the report options, not search criteria).
. See Preview and Export Reports for more information.
Tip: To view the details of an object's reorganization, you can right-click an object in the report window and select Details.
Launch the Reorg Manager from a report
You can launch the Reorg Manager from the report window.
| » | In the report, right-click the object you want to reorganize and select Reorg Manager. |
Save report parameters or schedule report generation
If you selected Action | Save Parameters and Schedule, in the Save and Schedule Process dialog, do one of the following:
To schedule report generation, enter a name for the scheduled task, select a database connection, and click Schedule. In the Schedule Task dialog, specify schedule options and provide your Windows user name and password.
Notes:
To open an existing report
On the Historical Reports page, select a report from the list and click Finish.
Note: Click Next to go to the Report Options page where you can modify report options before viewing the report.
To generate a report using saved parameters
Export a report
You can export a report to one of a number of different file formats, such as PDF or Excel. See Preview and Export Reports for more information.
Tips: