Changing Free/Busy Synchronization Job Settings
To view and edit the free/busy synchronization job settings, right-click the job and select Properties.:
Servers
This page lets you view and modify free/busy synchronization job server settings.
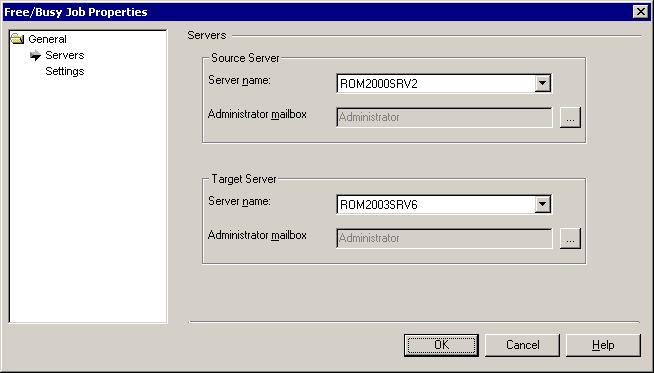
The Server name fields display the names of the source and target servers that you selected when setting up the free/busy synchronization job. You can change either server by selecting another server name from the list.
You can also change the administrator mailboxes the Free/Busy Synchronization Agent will use to access the free/busy data on source and target.
|

|
NOTE: The Free/Busy Synchronization Agent must have full access to the specified mailbox to get administrative access to the free/busy messages being synchronized. |
Settings
This page lets you edit the advanced settings for the free/busy synchronization job.
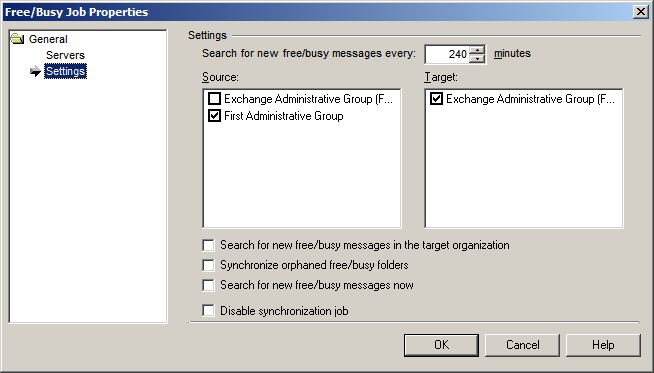
The Search for new free/busy messages every … minutes control displays the time interval at which the Free/Busy Synchronization Agent checks whether any new free/busy messages were created in the selected Administrative Group. You can adjust this interval according to your needs.
Source—Select the source administrative groups for which free/busy messages should be synchronized.
Target—If you want to synchronize the existing target free/busy messages with the source free/busy messages, select the target administrative groups for which free/busy messages should be synchronized.
Search for new free/busy messages in the target organization—If you want the Free/Busy Synchronization Agent to synchronize new free/busy messages created in the target administrative groups, select the target administrative group and the Search for new free/busy messages in the target organization check box. Note that if the target administrative group is selected and no source administrative groups are selected, the free/busy data will be synchronized from target to source only.
Synchronize orphaned free/busy folders—The LegacyExchangeDN attribute of some users might contain the DN of a non-existing administrative group. This can happen if the administrative group where the users were originally located was deleted or renamed. In this case, you may want to select this check box to make the agent synchronize the free/busy messages for such users.
Search for new free/busy messages now—Select this option to initiate a matching session for free/busy messages immediately.
Disable synchronization job—Select this option to temporary disable the free/busy synchronization job. You can enable it at any time by clearing this check box.
Changing the Settings for the Free/Busy Synchronization Agent
Server
This set of pages allows you to view or modify the general options of the server where the Free/Busy Synchronization Agent is installed.
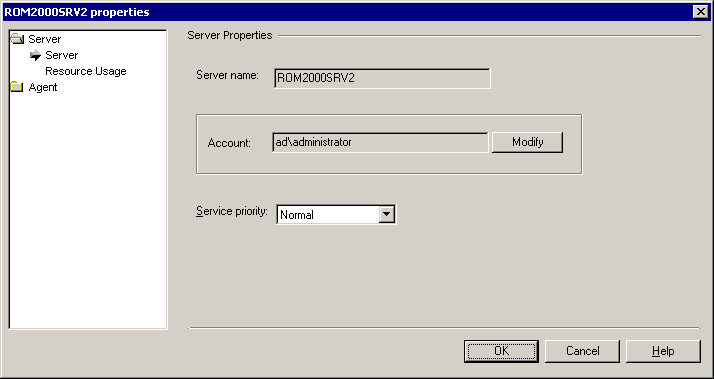
Server name—Displays the name of the server where the Free/Busy Synchronization Agent is installed.
Account—Displays the account used by the Free/Busy Synchronization Agent to perform the synchronization job. Click Modify to select another account.
Service priority—Displays the agent’s service priority.
Resource Usage
This page allows you to set the amount of disk space and memory that should not be used by the Free/Busy Synchronization Agent.
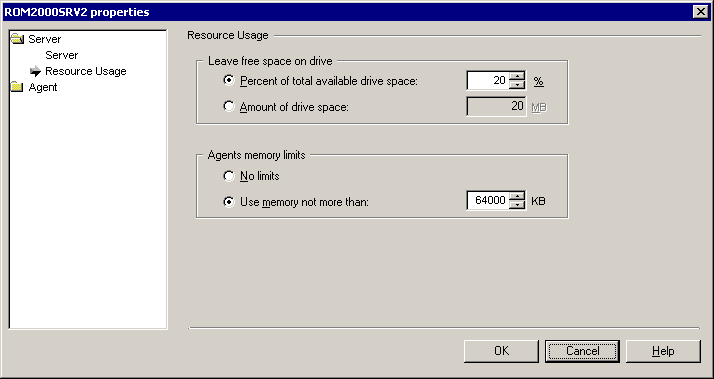
The Leave free space on drive option let you specify how much disk space should not be used by the agent:
- Percent of total available drive space ... %—The percentage of the available disk space to be kept free
- Amount of drive space ... MB—The amount of disk space in megabytes to be kept free
The Agents memory limits option let you limit the amount of memory used by the agent installed on this server. It is not recommended to change the default setting unless you are certain your environment requires a different setting.
- No limits—The memory that will be used by the agent installed on the server is not limited.
- Use memory not more than … KB—Specify the maximum amount of memory that the agent working on a server may use.
General
This set of pages helps you specify general options for the Free/Busy Synchronization Agent.

Compact the agent’s database—The Migration Manager agent stores its configuration and statistics in a separate database file. Select whether you want to not to compact the database, compact the database when possible, or compact the database at the specified interval.
Log warning if there is no corresponding mailbox in the target Administrative Group—Select this option to force the agent to write a warning into the log if there is no target mailbox corresponding to the source mailbox whose free/busy messages are being processed.
Logging
The Free/Busy Synchronization Agent’s logs can be used to analyze and troubleshoot the free/busy synchronization process. Agent logs are stored on the server on which the agent is installed in the QMMEx$ServerName$\FreeBusy Synchronization Agent folder. The archived log files are stored in the QMMEx$ServerName$\FreeBusy Synchronization Agent\LOGS folder.
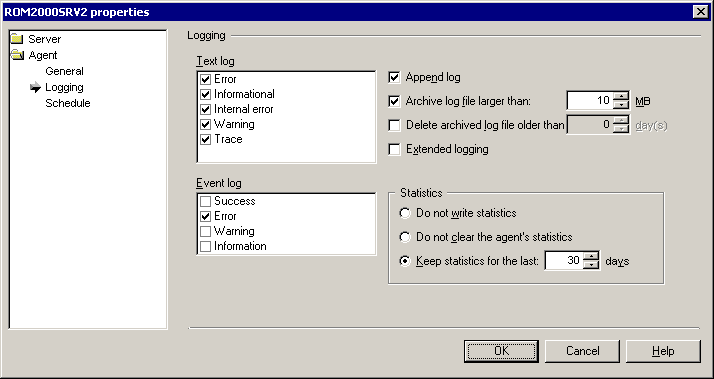
Text log—Select which events should be written to the text log file. It is recommended not to clear any of the events included in the log file by default.
Event log—Select which events should be added to the Exchange server application log file.
Append log—Select whether the log file should be appended or overwritten during each session.
Archive log file larger than … MB—Select to archive the log file if its size exceeds the specified value.
Delete archived log older than ... days—Select if you want the archived log files to be deleted automatically. Specify the number of days after which the log files will be deleted.
Extended logging—Select to include extended logging if this is required for troubleshooting.
Also select what should be done with statistics information:
Do not write statistics—No statistics information will be accumulated.
Do not clear the agent’s statistics—Agent’s statistics will be accumulated.
Keep statistics for the last ... days—Specify the number of days for which statistics information will be kept.
Schedule
Specify the scheduling options for the agent.
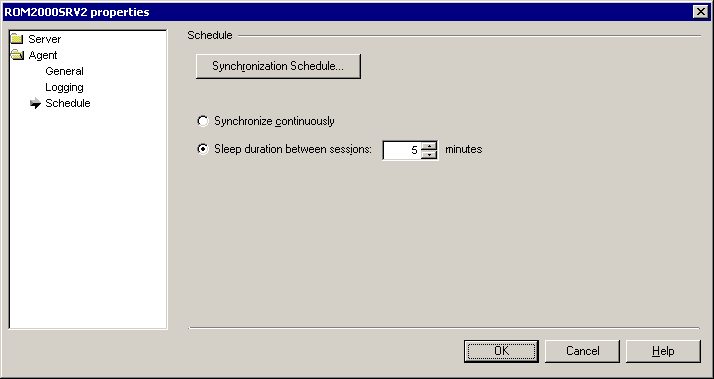
Synchronization Schedule—Click to open a dialog where you can select the times when the agent is allowed to run. You can select off-peak hours to make sure the agent does not put stress on the server.
Also select whether or not the agent should pause for a sleep period after each synchronization session:
Synchronize continuously—The agent will keep looking for unsynchronized mail throughout the allowed working hours.
Sleep duration between sessions … minutes—The agent will stop for the specified interval between synchronization sessions.
Tracking the Migration Progress
To view a progress of calendar or mailbox synchronization by Migration Agent for Exchange use the Statistics dashboard in the Migration Manager for Exchange console. The dashboard is available at the synchronization job level and at the collection level.
Select the node for which you want to view the migration progress in the navigation tree and click the Statistics toolbar button. In the opened pane you can review the overall migration progress (only for mailbox synchronization jobs or collections) and detailed statistics for each processed mailbox including the following fields:
Display name – The Name property of a user who owns a mailbox.
Discovered items - Quantity of items to be processed. During migration, Migration Agent for Exchange processes a specific set of folders in a mailbox as described in the Calendar Synchronization Job and Mailbox Synchronization Job. Note that the discovered item count may not equal to a mailbox item count you see in the Exchange Management Console, using the Get-MailboxStatistics cmdlet, etc.
Status - Current synchronization stage of a mailbox. For details on possible statuses for calendar and mailbox synchronization, see the corresponding topics below.
Progress - Current synchronization progress of a mailbox. It is calculated as the ratio of number of items already processed by the agent to the total number of discovered items. Note that this number can also decrease when for example a new message arrives to the mailbox causing number of discovered items to increase.
Skipped items - Number of mailbox items skipped according to the filter settings.
Failed items - Number of mailbox items failed to be migrated.
Most recent error - Error message of the last appeared error (if any) in the current or previous migration sessions. After the error is fixed, the fields gets cleared.
Last processed time - Timestamp that indicates when last processing of a mailbox was completed. The time zone is the same as used in console.
Last processed ago - Time interval that indicates how much time passed since last processing of a mailbox was completed. Note that this parameter is not refreshed automatically. To update its value, use the corresponding button above the grid. It is also updated when you open the Statistics pane.
|
|
TIP: You can group the data in the statistics table hierarchically as necessary. For that, drag the names of the columns you need to the area above the table. To sort the data by a particular parameter, click the corresponding column name. You can also specify filter for each column you need by clicking the  button below the column name. button below the column name. |
Note that you can also obtain synchronization statistics using PowerShell cmdlets. For details, see Configuring Migration Using PowerShell.
Calendar synchronization statuses
The calendars involved in the migration can have the following statuses:
|
|
Note: If mailbox has not been processed for 24 hours (1440 minutes) its status automatically changes back to Syncing. You can alter that period of time by adjusting the ReadyToSwitchHoldingPeriod parameter with the Set-MMExProjectOptions cmdlet. For more information, see Configuring Migration Using PowerShell. |
- Failed
A critical error(s) occurred during calendar synchronization. Error description is displayed in the Most recent error field.
Mailbox migration statuses
The mailboxes involved in the migration can have the following statuses:
- New
A mailbox is added to a collection and is not processed by the agent instance yet.
- Provisioning — Only for migration to Microsoft Office 365
A license is being assigned to a user whose mailbox is to be migrated in Microsoft Office 365 at this moment.
- In progress
Agent started processing of a mailbox, but it has not been completed and therefore will be continued in subsequent migration sessions.
- Processing now
Agent is synchronizing mail data of the mailbox at this moment.
- Ready to switch
Mailbox does not contain changes required to be synchronized so far and is ready to be switched.
|
|
Note: If mailbox has not been processed for 24 hours (1440 minutes) its status automatically changes back to In progress. You can alter that period of time by adjusting the ReadyToSwitchHoldingPeriod parameter with the Set-MMExProjectOptions cmdlet. For more information, see Configuring Migration Using PowerShell. |
- Switched (sync pending)
Mailbox has been switched and agent continues synchronizing most recent changes happened after latest sync until the mailbox status changes to Completed according to migration project settings.
- Completed
Processing of the mailbox is completed and the mailbox is not involved in the synchronization process anymore.
- Deleting
Mailbox was deleted from a collection and now waits for the agent to finalize its deletion and to remove it from the collection.
- Failed
A critical error(s) occurred during mailbox synchronization. Error description is displayed in the Most recent error field.
Creating Batches of Synchronization Jobs
The Import Job Wizard helps automate the creation of mailbox, public folder and calendar synchronization jobs. The wizard is useful if you have planned the migration in advance and know which Exchange server pairs are going to be involved in the migration.
Before you use the wizard, prepare a *.csv file with the job parameters using your preferred text editor or spreadsheet application. When the file is ready, load it with the Import Job Wizard by right-clicking the Synchronization Jobs node and selecting Import Jobs from File.
Job File Format
The job file should specify one job per line in the following format:
<Job Type>,<Source Server Name>,<Target Server Name>,<Source Administrator Mailbox LEDN>,<Target Administrator Mailbox LEDN>
| <Job Type> |
One of the following:
- Mail
- Calendar
- PublicFolder
|
| <Source Server Name> |
Name of the source Exchange server |
| <Target Server Name> |
Name of the target Exchange server |
| <Source Administrator Mailbox LEDN> |
Legacy Exchange distinguished name of the administrator's mailbox in the source organization |
| <Target Administrator Mailbox LEDN> |
Legacy Exchange distinguished name of the administrator's mailbox in the target organization |
Public Folder Synchronization Job Specifics
The <Source Administrator Mailbox LEDN> and <Target Administrator Mailbox LEDN> parameters are required only for public folder synchronization jobs. They are ignored if specified for the other job types. Make sure that the mailboxes they specify have been added to the migration project before you create the jobs with the Import Job Wizard. This can be done during enumeration or manually using the Add Recipients to Database dialog box.
Legacy Calendar Synchronization Job Specifics
Legacy calendar synchronization jobs created by the Import Job Wizard always use the synchronization agent running on the source Exchange server.
Example
PublicFolder,SrcServer,TrgServer,/o=Kosmodrom/ou=Exchange Administrative Group (FYDIBOHF23SPDLT)/cn=Recipients/cn=Strelka,/o=MythOrg/ou=Exchange Administrative Group (FYDIBOHF23SPDLT)/cn=Recipients/cn=pfAdmin
Mail,SrcServer,TrgServer
Calendar ,SrcServer ,TrgServer
