When an agent connects to the Foglight Management Server, it is provided with a set of properties that it uses to configure its correct running state. For more information about working with agent properties, see Creating agent instances.
You can configure the following settings for this agent:
|
• |
Host: availablePagingSpace, runQueueLength, contextSwitches |
|
• |
CPU: totalHz, percentUserTime |
|
• |
Memory: capacity, consumed, pageInRate, pageOutRate, and utilization |
|
• |
|
• |
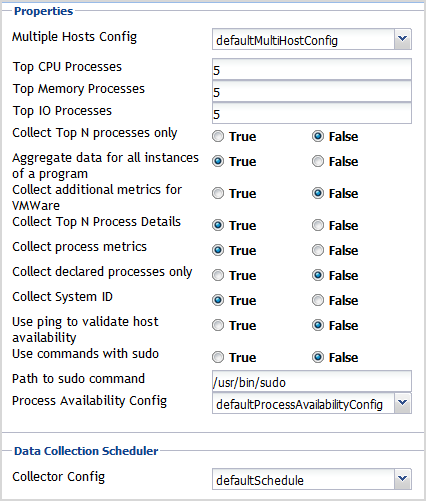
Use ping to validate host availability: Default value = False. When set to True, the agent is configured to use ping to detect if the monitored host is unavailable. If the agent fails to make a connection to the monitored host, and this property is set to True, the agent sends a ping command to the host. If the host does not respond, the Host.monitored observation is set to UNAVAILABLE (for more details, see Host availability alerting). |
|
NOTE: When the Use ping to validate host availability property is enabled on a UNIX® platform, the sudoer file needs to configured to allow the ICMP process to run with NOPASSWD. For details, see Configuring secure launcher permissions using sudo. |
|
• |
Solaris: Execute the “/usr/bin/ps -e -o uid,pid,ppid,vsz,rss,time,pcpu,sid,s,user,comm,args” command. Then you will get the following process details. |
|
• |
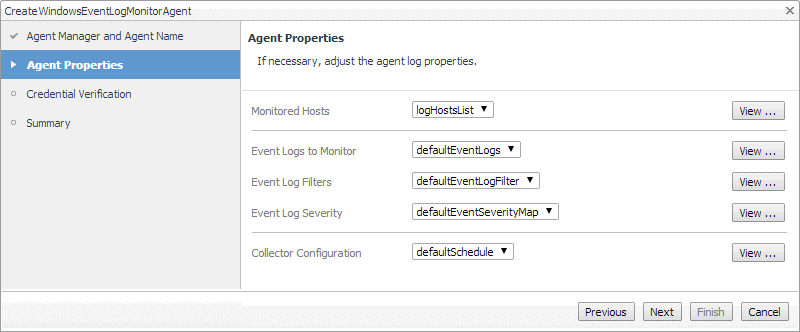
Collector Config: defines how quickly the agent collects data. Both Windows and Linux® provide a defaultSchedule configuration. Users can modify, clone, and delete configurations, as necessary. |
To this effect, the sudo configuration file (/etc/sudoers) must be configured so that password prompts are not required for a number of executables. The commands requiring elevated privileges differ by platform. The following commands must be configured for this version of Foglight for Infrastructure.
|
Used to read IO statistics from the /proc filesystem. | ||
|
/sbin/ethtool or /usr/sbin/ethtool (depending on distribution) /sbin/mii-tool or /usr/sbin/mii-tool (depending on distribution) |
Used to determine the network card bandwidth; ethtool is favoured if it is found. |
The following is an example of how to configure the /etc/sudoers file to allow the user foglight to execute Linux® commands without being prompted for a password:
In addition, the requiretty flag must not be set in /etc/sudoers for the user, since Foglight for Infrastructure agents use non-interactive shells.
The following is an example of how to unset the requiretty flag for a single user named foglight, so that this user can run sudo commands remotely:
|
NOTE: If requiretty flag is set, sudo can run only when the user is logged in to a real tty. When this flag is set, sudo can only be run from a login session and not via other means, such as cron or cgi-bin scripts. This flag is off (unset) by default. |
Depending on the user’s sudo and syslog.conf configuration, sudo use may result in excess logging. To minimize the amount of log messages, ensure that sudo does not make use of the LOG_INPUT or LOG_OUTPUT tags for the commands that the UnixAgent runs. Depending on the existing monitored hosts’ configuration, any lines added to the /etc/sudoers file for Foglight monitoring may have to include NOLOG_OUTPUT or NOLOG_INPUT to override the default configuration. For example, for a user named foglight connecting to a monitored host, the following lines are required:
The last argument in this syntax depends on the type and location of the tool, ethtool or mii-tool, used to determine the network card bandwidth. If you are unsure which tool your system uses, you can specify all of them:
/bin/cat, /sbin/ethtool, /usr/sbin/ethtool, /sbin/mii-tool, /usr/sbin/mii-tool
Start by ensuring that Foglight for Infrastructure is installed on the Management Server, and that the agent package is deployed. For installation instructions, see the Foglight for Infrastructure Release Notes.
Next, configure the File Log Monitor and Windows Event Log Monitor agents for data collection. For more information, see Configuring monitoring agents, Configuring agent properties, and Configuring connections to remote Windows platforms.
When your monitoring agent instances are configured and are collecting data, navigate to the Log Monitor dashboard. This dashboard allows you to look at individual log records, and observe their growth rate over the selected time range. For more information, see Investigating log records.
To create an agent instance, activate it, and start its data collection, use the appropriate wizard (Create FileLogMonitorAgent or Create WindowsEventLogMonitorAgent), accessible from the Log Monitor dashboard.
|
2 |
|
• |
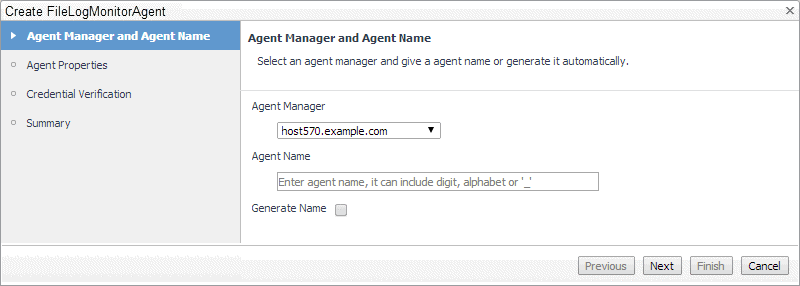
To create a Quest File Log Monitor Agent instance, on the Log Monitor dashboard, in the top-right corner, click File Log Monitor to launch the Create FileLogMonitorAgent wizard. |
|
• |
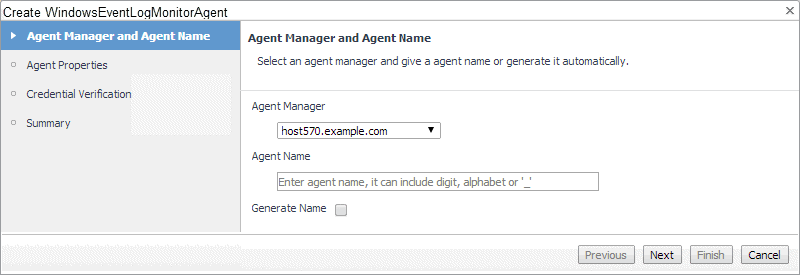
To create a Quest Windows Event Log Monitor Agent instance, on the Log Monitor dashboard, in the top-right corner, click Windows Event Log Monitor to launch the Create WindowsEventLogMonitorAgent wizard. |
|
a |
On the Agent Manager and Agent Name page in the wizard, click Agent Manager, and from the list that appears, select a host running an Agent Manager instance that you want to use to manage the agent instance that you are about to create. |
|
b |
Specify the name you want to assign to this agent instance. In the Agent Name box, type the agent name. Optionally, select the Generate Name check box to have the wizard generate the name automatically. |
|
c |
Click Next. |
|
a |
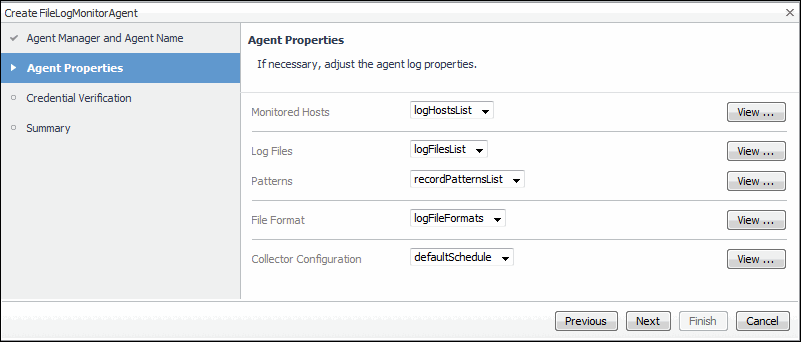
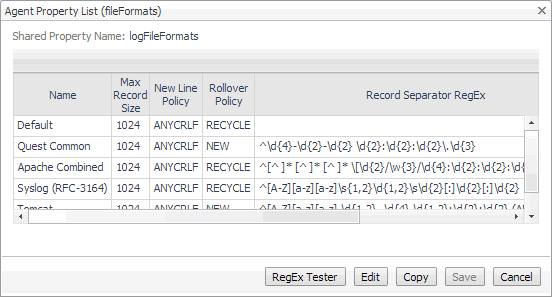
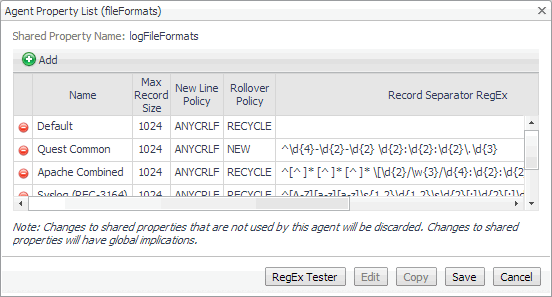
To view or edit a property, click View on the right of the list property name. |
|
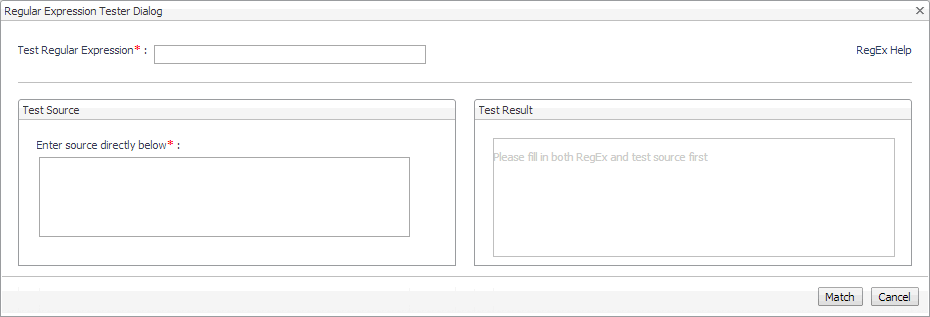
TIP: The agent supports PCRE (Perl Compatible Regular Expressions). For details about the PCRE syntax, visit http://perldoc.perl.org/perlre.html. |
|
c |
|
d |
|
5 |
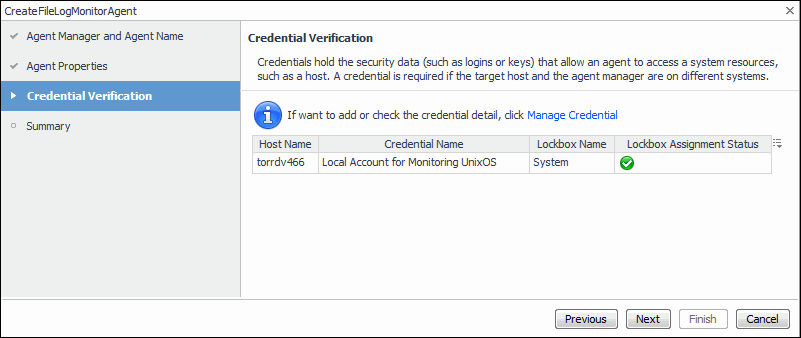
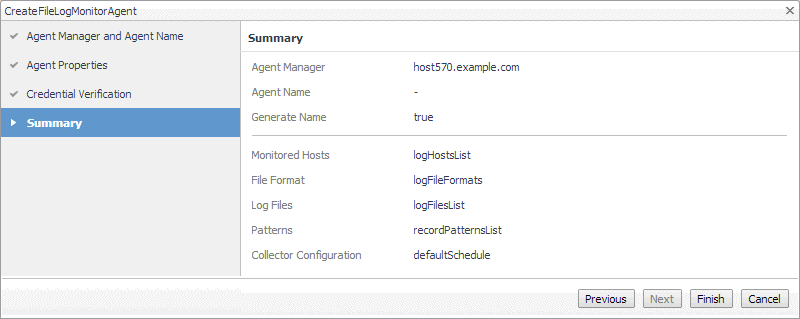
Review the information on the Credential Verification page, and make any changes, if required. |
|
• |
If the page indicates that the Agent Manager does not have the credentials needed to access the monitored hosts, click Manage Credentials, and create a new credential, as required. For more information, see “Controlling System Access with Credentials” in the Administration and Configuration Help. |

|
6 |
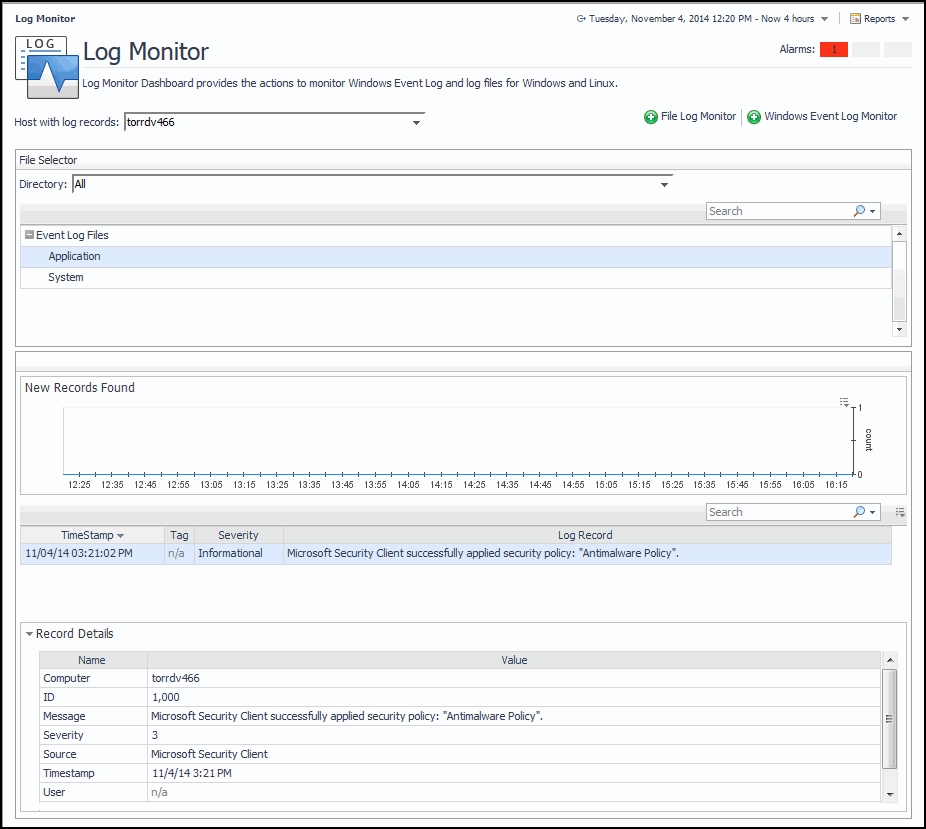
To access this dashboard, from the navigation panel, choose Dashboards > Log Monitor.
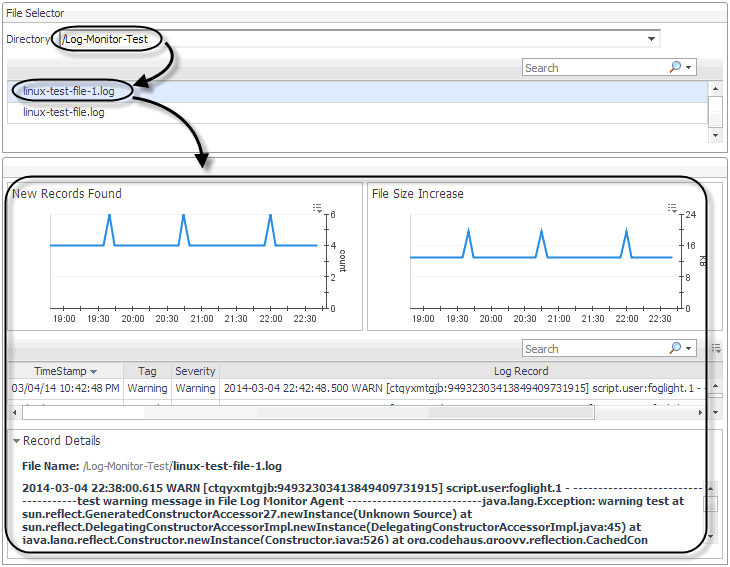
Start by choosing the host containing the log files whose records you want to review, using the File Selector view. From here, for file logs, you can select the directory and the log file name.
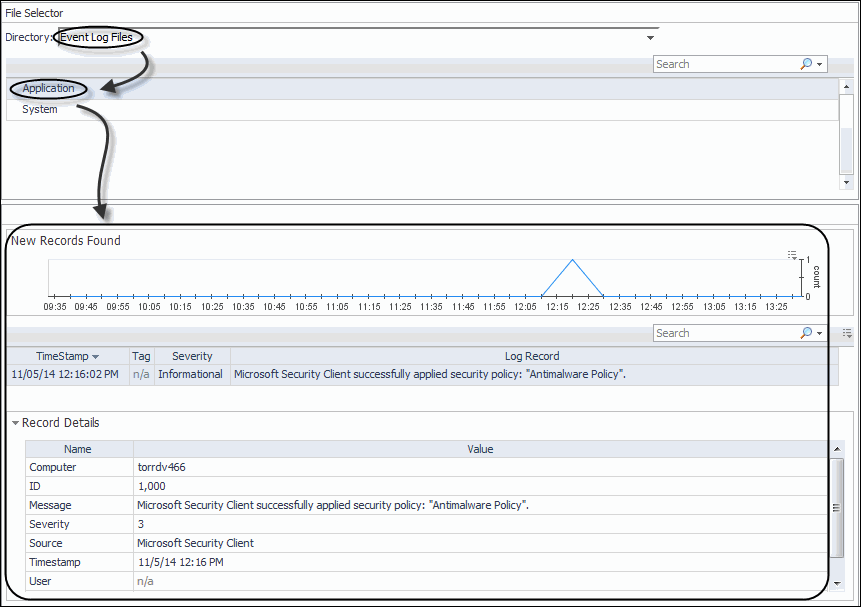
For Windows Event Logs, select Event Log Files, and choose the name of the Windows Event Log (for example, Application).
For complete information about the data appearing in these views, see Foglight Log Monitor views.