Icon Attributes
How Do I Set an Icon Attribute?
|
|
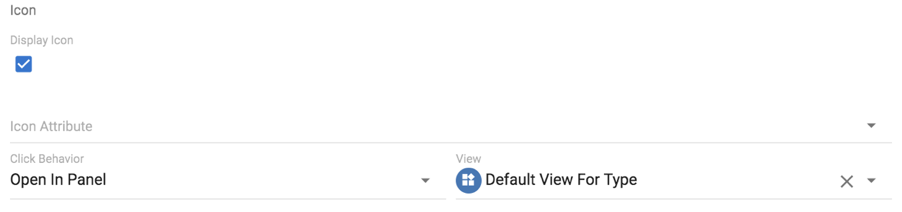
On the erwin EDGE Platform you’re able to set Icon Attributes which give you the ability to display an Icon of an Object Type's Attribute |
1. To select an Icon Attribute type the name of your Object Type in the ‘Icon Attribute’ field, then select the Attribute of that Object Type for the Icon you wish to display.
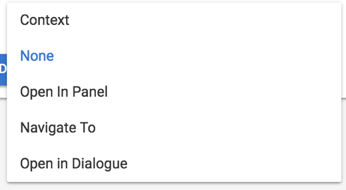
a. You can now choose whether the Icon has a Click Behaviour. There are 5 options:
i. Context:
ii. None: Nothing will happen when the Attribute is clicked
iii. Open In Panel: A side panel will pop out
iv. Navigate To: Redirected to a new page displaying the set view
v. Open In Dialogue: The set view pops up in a box in the centre of the screen
b. Open In Panel, Navigate To & Open In Dialogue require you to set a View to navigate to. Clicking in the ‘View’ field allows you to select a View by searching by name, select from a list or create a new view. The most common choice is ‘Default View For Type’
2. Once you have filled in all the necessary information you can continue with editing your view.
How Do I Add an Action Button to a View
Actions are added to a View to provide additional functionality. In EA Agile there are the following Actions:
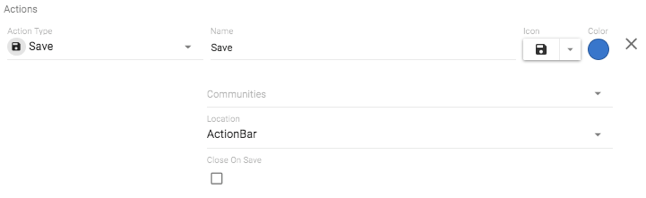
Save - Save the current state of your object
Delete - Delete the current object
Duplicate - Duplicate the current object
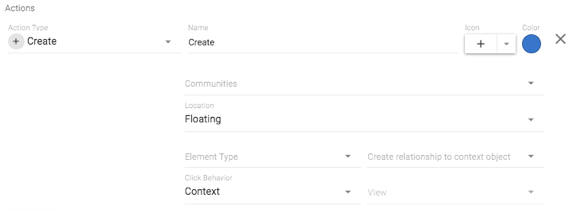
Create - Create an object of any type with or without a relationship to the Object of the View you have placed the action in
Create Diagram - Create a diagram
Update - Add a button to update the value of an attribute to a pre-defined value
Download - Download a CSV file containing all instances of the Object Type displayed in the view
Import - Import a CSV file to populate your current view
Filter - Add a search bar and on-the-fly filtering
Attachments - Attach files to an object
View - Navigate to another EA Agile View
ItemDisplayStyle - Add options to display attributes in different styles
Report - Download a business-friendly report of only objects and columns displayed in your view
1. When configuring a view click on the blue ‘Add Action’ button under Actions
2. This will bring up a set of options for you to configure your Action Button
3. Click on ‘Action Type’ and select your Action
4. For all Actions you must set the following:
Name
Icon
Color
Communities (For more on Communities click here)
Location
5. Some Action Types requires additional information specific to their type
6. To add another Action Button simply click ‘Add Action’ and repeat Steps 2 – 5
7. Once finished continue, with configuring your view or click ‘Save’ in the bottom right of the screen
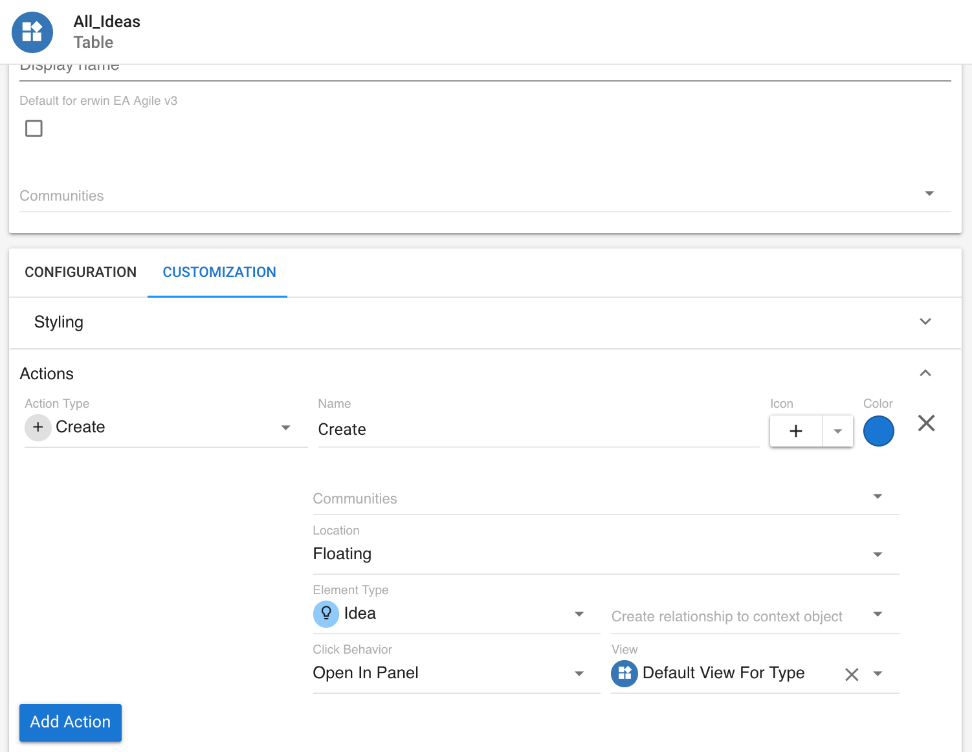
How Do I Add a Create Button to a View
1. Follow steps 1 – 4 of ‘How Do I Add an Action Button Within a View’ & Select ‘Create’
2. Select the Element Type you wish to create & choose if you want to create a relationship to context object
3. You can now choose whether it has a Click Behaviour. There are 5 options:
Context:
None: Nothing will happen when the Property is clicked
Open In Panel: A side panel will pop out
Navigate To: Redirected to a new page displaying the set view
Open In Dialogue: The set view pops up in a box in the centre of the screen
Open In Panel, Navigate To & Open In Dialogue require you to set a View to navigate to. Clicking in the ‘View’ field allows you to select a View by searching by name, select from a list or create a new view.
The most common choice is ‘Default View For Type’
4. To add another Create Button simply click ‘Add Action’ and repeat Steps 1 – 5
5. Once finished continue with configuring your view or click ‘Save’ in the bottom right of the screen
How Do I Add an Item Action to a View?
|
|
Item Actions are Actions that apply to Object Instances and are only available on Collection Views |
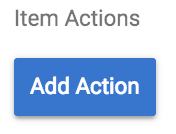
1. When configuring a view click on the blue ‘Add Action’ button under Item Action
2. This will bring up a blank form for you to configure your Item Action
3. Click on ‘Action Type’ and select your Action
Choose from the following: Delete, Duplicate, Create, Update, View
4. For all Actions you must set the following:
Name
Icon
Color
Communities (For more on Communities click here)
5. Create, Update & View require additional information specific to their type
6. To add another Item Action simply click ‘Add Action’ and repeat Steps 2 – 5
7. Once finished continue with configuring your view or click ‘Save’ in the bottom right of the screen
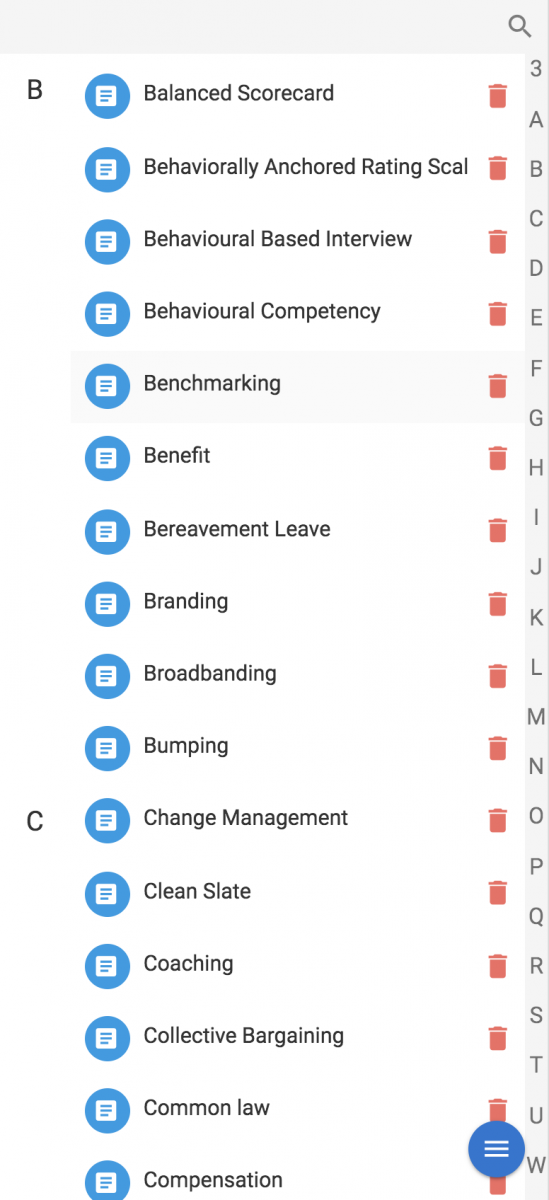
An example of the 'Delete' Item Action used within a List View
Minimal Display Attributes
|
|
Within the Kanban, Details & Table view, view configurers can allow users to set different levels of display for attribute chips |
An example of a Table with full display attributes
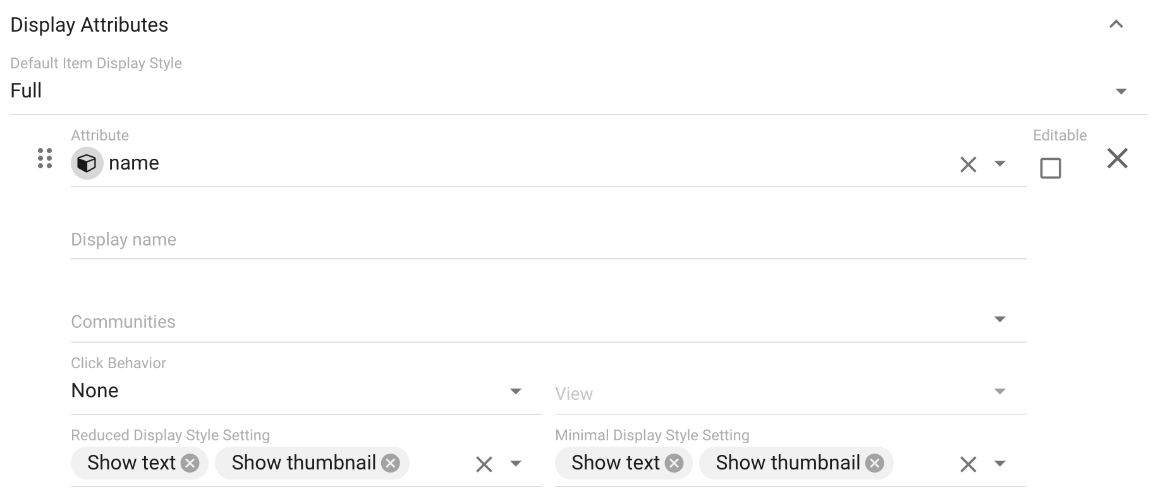
An example of the same Table with minimal display attributes
1. When you are configuring a view within the 'Display Attributes' you will see Style Settings at the bottom of each Display Attribute
If you don't wish to make the Style Setting configurable by the regular user choose your Settings then set the 'Default Item Display Style'
2. Once you've set all of your styles you will need to add an 'Item Display Style' action. To know more see Actions.
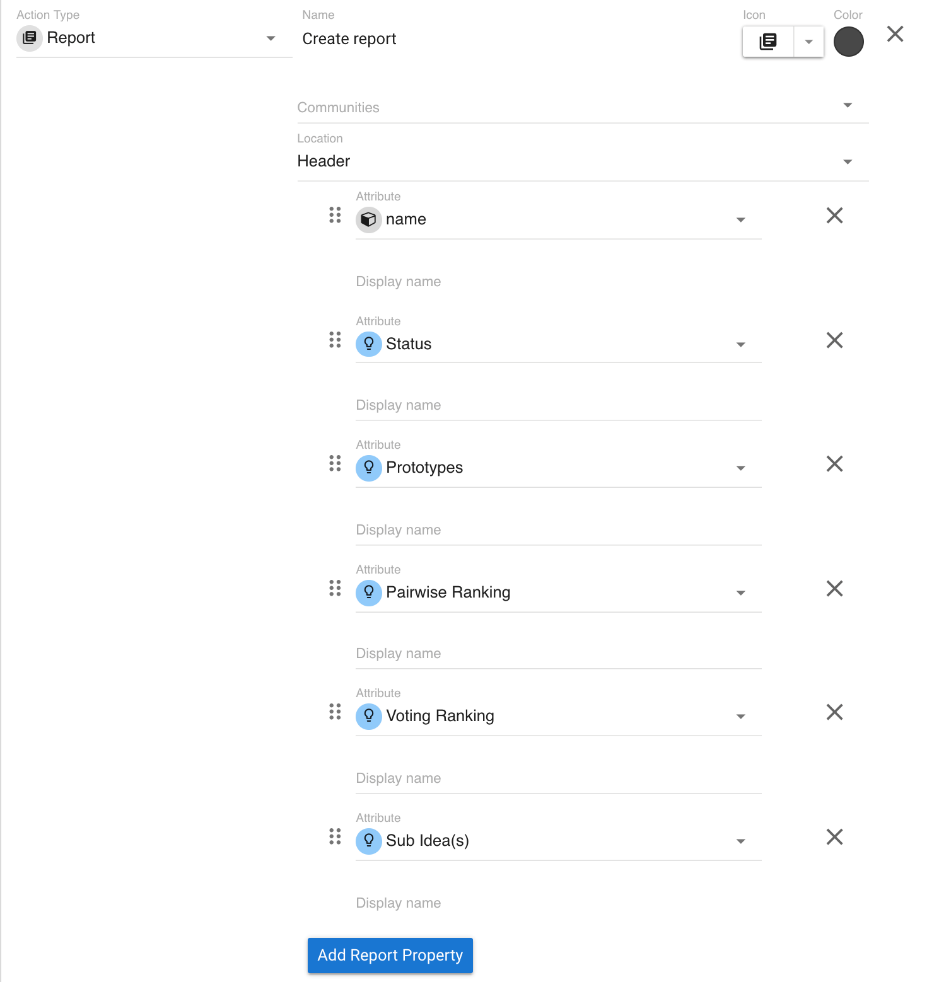
Export as Report
|
|
Within Collection Views, users can add an 'export as report' action which creates a business-friendly report available for download. The report differs from a standard CSV download by only returning attributes predetermined by the user either by what they have displayed in the View or what has been specified in the settings. Reports also display related objects Names rather than ID. Please note that these cannot be re-imported like a standard CSV. |
To add the Export as Report action to your view please follow these steps.
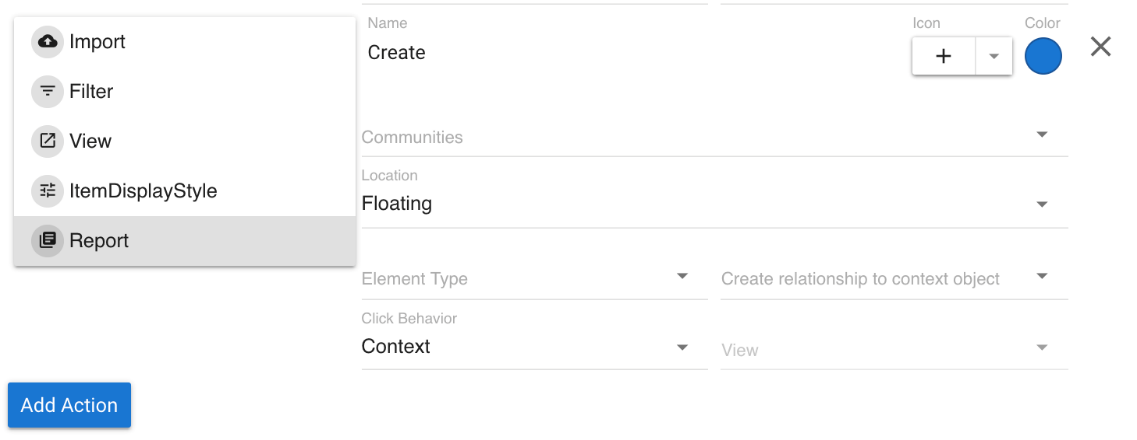
1. Under 'Customization' open the 'Actions' accordion and click 'Add Action'
2. Select 'Report'
3. Choose a name and location for your Action. By default, all of your Display Attributes configured for the view are added to the report. You can remove or add Report Attributes without affecting the Display Attributes of your view.
4. Click 'Save' and your Action will be added to the View