
Run SQL Preview
SQL Preview allows you to preview the result set of an individual SQL statement when adding or editing a SQL transaction.
To run SQL Preview
- In the SQL Statement tab, click
.
- Select a connection from the drop-down list.
- In the Maximum Returned field, enter the maximum number of rows to preview, or select the All option to preview all rows.
- Click OK. The SQL Preview window opens.
- Review the information.
- Click Close.
Latency
Latency is delay added to the execution of a transaction to control of how fast transactions are submitted to the system-under-test. It is used to either make the transaction execution rate more like real-world executions or to control the transaction rate. This delay can be added to the beginning and/or end of a transaction execution.
You can modify latency values for a transaction by editing the transaction in the Transactions tab of the New/Edit Job wizard. In addition, you can specify latency values at the time you add transactions/scenarios to a test using the Transactions tab.
Benchmark Factory allows you to set default latency values for the transactions you add.
To modify latency values
- Open the New Job wizard for a new job or the Edit Job wizard for an existing job.
- Select the test (or the step) under Workload that contains the transactions.
- Select the Test Options tab. Then select the Transactions tab.
- Select the transaction or scenario for which you want modify latency and click Edit.
- In the dialog that opens, select the Latency tab. For a scenario, to modify latency for individual transactions, select a transaction and click Edit, and then select the Latency tab.
-
Modify latency options. To specify no latency, select No Delay. To add latency, select one of the other options. Review the following for additional information:
No Delay Select to specify no latency. Set Transaction Rate Select to set a transaction rate by specifying the interval between successive transactions arriving at the server.
Interarrival Time—Select one of the following:
- Absolute—Select to specify a fixed interarrival time. Then enter a value.
-
Distribution models—To use a distribution model for determining interarrival time, select a model and enter the requested value.
Real-World Delays Use this option to simulate real-world processing by inserting a delay before and/or after each transaction execution.
For each delay type, you can insert a fixed time by selecting Absolute, or you can select one of the distribution models for specifying time.
Keying Time—Inserts a delay before execution to simulate the amount of time spent performing data entry.
Think Time—Inserts a delay after execution to simulate the amount of time "to think" about the results of the previous transaction.
- Click OK to save your changes and close the dialog.
- Then click Save/Close in the wizard to save your changes.
Why Use Latency?
Real-World Delays: Add Keying Time and Think Time to create a workload that accurately simulates real-world users, as opposed to a workload that submits transactions as fast as possible. Using real-world delays allows for easier interpretation of the results. If you do not add delay, it might be difficult to equate N virtual users running with no delay to an accurate number of real users.
Interarrival Time: Specify Interarrival Time to create a workload in which transactions arrive at the system-under-test at a specific interval. This method allows you to set the timing relationship between executing transactions and is commonly used when replaying a captured workload.
Stagger User Startup
When running a load test, you have the option of staggering user startup. This allows you to adjust startup loads if, for example, you are having issues with overloading of servers when all of the users attempt to start at the same time.
To stagger user startup
- In the Edit/New Job Wizard, select a test under Workload.
- Select the Timing tab (under Test Options tab).
- In the User Startup options, select the desired parameters.
- Start all users as quickly as possible: Starts all users immediately after a test begins.
- Start all users at even intervals for: Sets the amount of time in which to start all users at even intervals. The interval duration is equal to this value divided by the number of users.
- Start a new user every: Starts a new user, then waits the entered number of seconds before starting the next user.
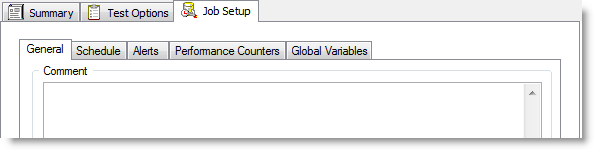
Job Setup Options
Use the Job Setup tab of the New Job wizard or Edit Job wizard to schedule a job, set up email notifications (alerts), add performance counters, and manage global variables.
To specify Job Setup options
- In the New/Edit Job wizard, after configuring the workload, select the Job Setup tab.
-
Use this tab to specify job-level options, such as the job schedule, alerts, or performance counters. Review the following for more information:
General tab Enter a comment or specify error-handling behavior. Schedule tab See Schedule a Job. Alerts tab See Alerts - Job Setup. Performance Counters tab See Performance Counters Tab. Global Variables tab See Global Variables Tab.