The Administration view shows a list of existing agent instances and a set of agent management commands at the top of the list. Use it to verify that your agents are collecting data from the monitored environment.
The following commands are available:
|
• |
Add: Starts a workflow for creating new agent instances. For more information, see Creating Rapid Recovery Agent. |
|
• |
Refresh: Refreshes the list of agent instances and their states. |
|
• |
Activate: Activates one or more selected agent instances. Activating an agent instance starts the agent process on the machine on which the agent is installed. |
|
• |
Deactivate: Deactivates one or more selected agent instances. Deactivating an agent stops the agent process on the machine on which the agent is installed. |
|
• |
Start Data Collection: Starts the data collection for one or more selected agent instances. Starting an agent’s data collection causes the agent to begin monitoring the Rapid Recovery Core and to send the collected metrics back to the Management Server. |
|
• |
Stop Data Collection: Stops the data collection for one or more selected agent instances. Stopping an agent’s data collection causes the agent to stop monitoring the Rapid Recovery Core. |
|
• |
Edit Properties: Starts a workflow for editing the properties of one or more selected agent instances. Each agent comes with a set of properties that it uses to configure its correct running state. Editing agent properties . |
|
• |
Remove: Deletes the selected agent instance. |
|
• |
Update Agent: Updates the agent package to the latest version. |
|
IMPORTANT: Updating the agent package using this command generates the previously existing credentials. However, if you update the agent package by re-deploying its .gar file through the Agent Status page, the credentials need to be re-created. To do that, select an agent instance, click Edit Properties, and configure the required credentials on the Credentials tab of the Edit Tab Manager dialog box. |
|
3 |
On the navigation panel, under Homes, click Protection. |
|
5 |
On the menu bar, click the Administration tab. |
|
6 |
|
7 |
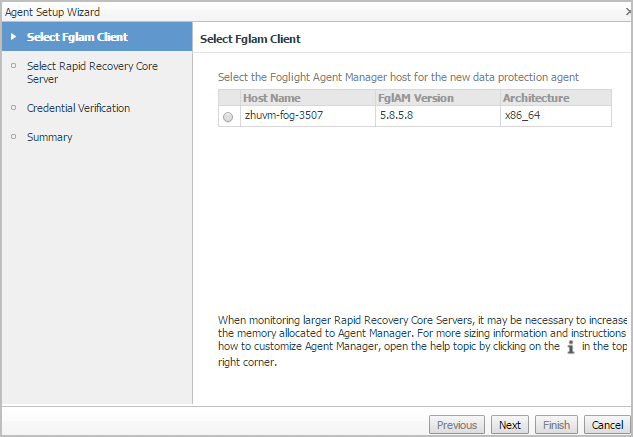
In the Select Fglam Client step, select the agent manager on which the new agent is to be deployed, and then click Next. |
|
8 |
In the Select Rapid Recovery Core Server step, specify the following values, as needed, then click Next. |
|
• |
Rapid Recovery Core Server: The name or IP address of the computer on Rapid Recovery Core Server is running. |
|
• |
Port: The HTTP port number used by the Rapid Recovery Core Server. |
|
9 |
In the Credential Verification step, perform either of the following: |
|
1 |
Select Add Rapid Recovery Core server to a new credential, then the Create New Credential view appears on the right. Specify the credential related information, and then click Next. |
|
2 |
Select Add Rapid Recovery Core server to an existing credential, then the Selected Existing Credential view appears on the right. Select an existing credential, and then click Next. |
|
10 |
In the Summary step, confirm the agent information, and then click Finish. |
|
3 |
On the navigation panel, under Homes, click Protection. |
|
5 |
On the menu bar, click the Administration tab. |
|
6 |
