Overview
Evolve includes a built-in Workflow capability which provides three useful processes:
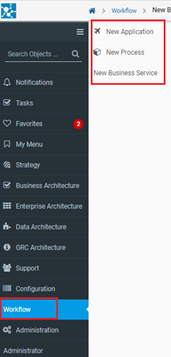
1.A new Separate module for Workflow execution – new module, workflow is added to the Erwin Evolve site, where you can create new applications, process, and business services..
2.A review and approval process for data changes - meaning that when users create objects, delete objects or edit any data in Evolve, those changes are not submitted to the repository until they have been approved.
3.An object validation request process - where users can request for an object to be validated by a nominated set of users, and when all users approve the data, properties are set on the object to record the validation.
4.A review process for Site pages - where you can share a page with a Role and every user in the Role must confirm they have reviewed the content.
Each of these processes are supported by Task and Notification mechanisms. Tasks are created for every workflow that's initiated and users are alerted to them with notifications in the Site menu when they log in, prompting them to take action.
In addition, users of your Site can Follow objects governed by workflows so they are notified of any workflow-related activity affecting those objects.
Workflow can be configured to use SMTP, which enables alerts to be sent to users via email when Tasks are created and completed. The emails, which are customizable, include details of the Task and the latest activity, as well as direct links back to your Site for users to follow.
What do you want to do?
Set up the Review and Approval Workflow
Set up the Object Validation Workflow
Set up the Review Page Workflow
Review and approve, or reject, data changes
Confirm you have reviewed an Object Page
See who has reviewed a page you shared
Enable Workflow for your Evolve Server
Before you can use the Workflow feature you must configure your server to use it.
When you enable Workflow, it is at the server level - so any Sites you have can use it once it is enabled.
To enable Workflow
1.Start Evolve Designer.
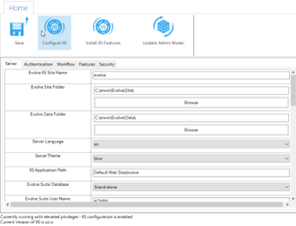
2.On the Evolve Designer Models launcher dialog, click the Configure Evolve Server button.
The Evolve Server Configuration dialog opens.
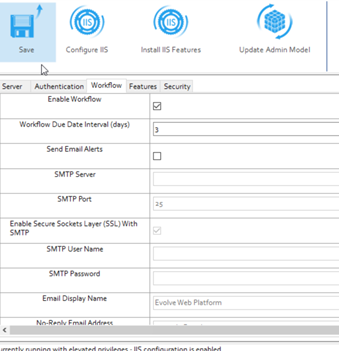
3.Under Workflow, select the Enable Workflow check box.
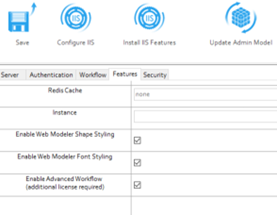
4.Under Features, select the Enable Advance Workflow check box.
|
|
Ensure that you have Advanced Workflow license and System Manager as a Power Level to view the Administration menu. |
5.Click Save.
6.Click Configure IIS and perform full deployment.
The Review and Approval workflow enables you to manage data quality by forcing changes to your model to be approved before they are committed to the repository.
The process covers all changes made to existing data, including the creation of new objects or the deletion of existing objects, as well as changes to associations data.
The workflow does not cover the following:
Questionnaires
Social features - Comments, Ratings and Favorites
Who Approves What?
The Review and Approval Workflow has two levels, which can be combined in your Site:
Page level
Object Instance level
Page Level Review and Approval
Page Level Review and Approval works by linking a Role to Index Pages and Object Pages in your Site.
Any changes to the data made via these pages, whether creating new objects, editing existing objects or deleting objects, must be reviewed and approved by members of the Role before those changes are applied.
Role members can approve or reject all, or merely some, of the proposed changes.
See how the Page level process works in detail
These steps assume there are no Object Instance level Approvers which would take precedence over the Page level approval process.
The Page Level process works as follows:
1.A User (who is not a member of the Approver Role) uses one of the associated Pages to create, edit or delete an object.
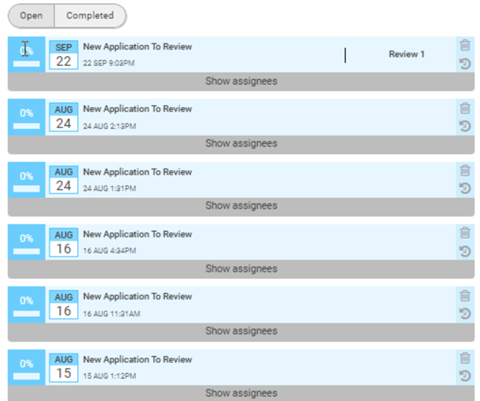
2.All members of the Approver Role linked to that Page are assigned a new Task informing them of the changes and prompting them to review them
- If Evolve Workflow is configured to use SMTP, an email is sent to the Role members notifying them of the Task, including a direct link to the Task in the Site.
- The User is also able to view their change request - and can even delete it, discarding their changes, as long as it has not already been approved.
- If the change request relates to the deletion of an object, that object is highlighted with a strike-through wherever it appears in the Site and the UI makes it clear the object is 'marked for deletion'. It cannot be edited while it is in this state.
3.Any one of the Approver Role members reviews the changes and either approves or rejects them
- The Approver can accept some of the changes and reject others.
- The Task is cleared when one of the Approver Role members approves or rejects the changes.
- The Approver can enter comments explaining their decision which the User can see.
4.The approved changes are submitted to the repository and any rejected changes are discarded.
5.The Task is marked as 'Completed'.
6.A notification is sent to the person who made the changes informing them whether they have been approved or rejected.
oIf Evolve Workflow is configured to use SMTP, the notification is sent via email as well.
oThe User can also see the outcome of the Task, including any comments, by viewing the Task in the Site.
Object Instance Level Review and Approval
Object Instance Review and Approval works by linking a Role or User to a specific object instance in your model. If another user edits or deletes the object, then it must be approved before the change is committed to the repository.
See how the Object Instance level process works in detail:
1.A User (who is not an Approver for the object) edits or deletes a governed object.
2.All Approvers linked to that object, whether individual Users or in a Role, are assigned a new Task informing them of the changes and prompting them to review them.
- If Evolve Workflow is configured to use SMTP, an email is sent to the Approvers notifying them of the Task, including a direct link to the Task in the Site.
- The User who made the change is also able to view their change request - and can even delete it, discarding their changes, as long as it has not already been approved.
- If the change request relates to the deletion of an object, that object is highlighted with a strike-through wherever it appears in the Site and the UI makes it clear the object is 'marked for deletion'. It cannot be edited while it is in this state.
3.Any one of the Approvers reviews the changes and either approves or rejects them.
- The Approver can accept some of the changes and reject others.
- The Task is cleared when one of the Approver Role members approves or rejects the changes.
- The Approver can enter comments explaining their decision which the User can see.
|
|
Reviewers can only download and view the attachment, which is attached by the user. They cannot delete the attachment file. |
4.The approved changes are submitted to the repository and any rejected changes are discarded
5.The Task is marked as 'Completed'.
6.A notification is sent to the person who made the changes informing them whether they have been approved or rejected.
oIf Evolve Workflow is configured to use SMTP, the notification is sent via email as well.
oThe User can also see the outcome of the Task, including any comments, by viewing the Task in the Site.
Precedence
If you combine Page level approval with Object Instance level approval, there is an order of precedence to determine who must approve what.
The rules are detailed as follows:
If an object has both levels of approval, then the Object Instance level takes precedence.
If a user who is in a Page level approval Role edits an object on one of their governed pages, but the object has Object Instance level approvers (Users or Roles) - then the Object Instance approvers take precedence.
What do you want to do?
Set up Approver Roles and Users, and assign them to the pages or objects they must approve
Setup Approval Workflow Roles and Users
This page explains how to set up approvers for the Page level and Object Instance level Review and Approval workflows.
|
|
These instructions assume you have already enabled Workflow in Evolve. |
Set up Page level Approver Roles
To ensure consistent data governance, you should ensure you assign Approval Roles to all pages on your Site where the data you want to govern can be changed - for example on Object Pages, Index Pages using Tables, and so on.
To specify which Roles approve which pages:
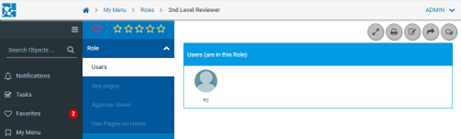
1.In your Evolve Site, browse to the Roles administration page.
2.Click the Role you want to edit.
The Role page is displayed.
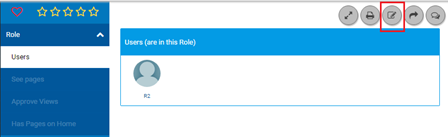
3.Click the Edit button.
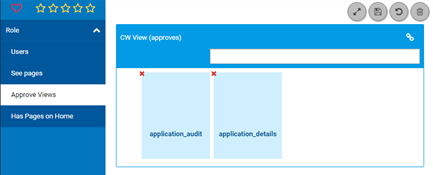
4.In the page sub-menu, click Approve Views.
5.The page lists all the pages the Role is the Approver for
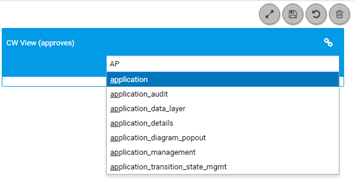
6.Click the Associate button at the top-right of the CW View (approves) box.
7.Click inside the text box, or start typing the name of the page you want Role members to approve.
8.Select the page from the list
The page appears in the box.
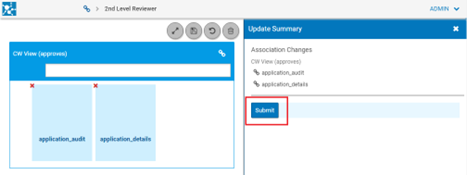
9.Click the Save button.
10.In the pop-out Changes window, click the Submit changes button.
The page is added to the list of pages Role members approve.
|
|
You can also configure Approver Roles using the grid on the built-in Governance Administration Page. To use this method, select a page, click the Edit button and then link the page to Roles using the CW Role (is approved by) association. |
Set up Object Instance level Approvers
Both Users and Roles can be assigned as Approvers at Object Instance level.
The simplest way to assign Users or Roles to object instances is using Object Explorer or Model Explorer.
You can do this by selecting an object and associating it to a CW User or CW Role, or by selecting a CW User or CW Role and associating it to an object.
|
|
You must have opted to Show the Evolve Object Types using the Show/Hide Object Types function in Evolve Designer in order to be able to see the CW User and CW Role objects in your model. |
When assigning Object Instance Approvers:
Associate objects to Roles using 'Any Object (is approved by role) CW Role' or 'CW Role (role approves) Any Object' depending on whether your focus is the object or the Role.
Associate objects to Users using 'Any Object (is approved by user) CW User' or 'CW User (user approves) Any Object' depending on whether your focus is the object or the User.