The Object Validation workflow enables users to request that an object be validated by one or more nominated users (Reviewers)..
Each reviewer then receives a Task prompting them to review the object, and then either approve it for validation or reject the request.
The workflow remains active until all users have responded to their tasks. If all users approve the validation request, the object is marked as validated.
The validation is recorded using three Property Types of the object, one for recording if it is validated or not, one to record the date/time of the validation, and one to record the names of the users who approved it. You can use the standard Validated and Validated Date Property Types for the first two of these.
See how the Object Validation process works in detail
The Object Validation process works as follows:
1.A User views an Object Page on the Site and decides they would like to have that object approved for validation.
2.The User clicks the Create Task button on the page and chooses one or more Users they would like to validate the content. They can optionally enter a message or a comment about the object which the nominated Users can view.
3.Each Reviewer is assigned a new Task asking them to review the object data and either Approve or Reject it.
- The workflow remains open until all nominated Users have either Approved or Rejected the object.
- When a nominated User responds to their Task, the User who requested the validation is sent a notification informing them of the response.
- The object is only considered validated if all Users Approve it.
- When the Task is completed, the User who requested the validation is sent a final summary notification including all the response outcomes.
4.If all Reviewers Approve the validation request, the object is marked as validated, the date/time of the approval is logged, and the names of all the Users who approved it are recorded. All this data is captured on the object itself.
What do you want to do?
Set up the Object Validation workflow on your Site
Request an object be validated
Set Up the Object Validation Workflow
This page explains how to configure your Site to use the Object Validation workflow.
|
|
These instructions assume you have already enabled Workflow in Evolve. |
Required Metadata
In order to use the Object Validation workflow, you must choose which Object Types from your Model you want the process to be applied to.
The workflow can work with the standard validation properties on objects, or with your own custom properties you may want to use - but the meta data must be identical on each Object Type.
Users will not be able to request object validation on any Object Page where the Object Type is not configured correctly.
The Object Validation workflow requires two Property Types on each Object Type, plus an optional third property:
A Check Box property - which is set to True when the object is approved for validation
A Date/Time property - which is set with the date/time when the Task is completed and the validation request is approved
A Multi-Line Text property (optional)- which is used to list the names of the Users who were requested to validate the object.
|
|
If you create custom Property Types to use, they must have matching Scriptnames for each Object Type. |
Configure Site to Enable Object Validation
To configure your Site to enable Object Validation:
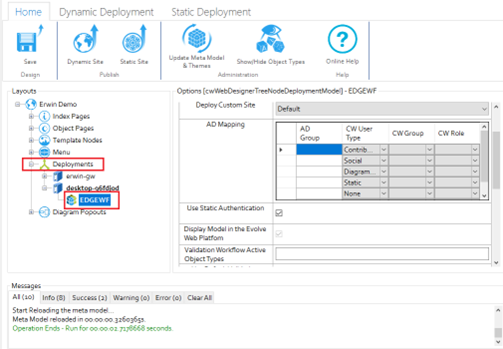
1.In Evolve Designer, select the Deployments > Model node.
2.Complete each of the following settings:
|
Setting |
Description |
|
Validation Workflow Active Object Types |
Enter the Scriptnames of each Object Type you want to enable the Object Validation workflow for. Separate using commas. |
|
Use Default Validation Property Types |
Select this option if you want to use the standard Validated and Validated Date properties for the Workflow Validated and Workflow Timestamp properties below. Choosing this option completes the next two fields automatically. |
|
Validation Workflow Validated Property Type |
If you want to use a custom property to record if the object is validated or not, enter the Scriptname of the Check Box Property Type you want to use. |
|
Validation Workflow Timestamp Property Type |
If you want to use a custom property to record the validated date, enter the Scriptname of the Date/Time Property Type you want to use. |
|
Validation Workflow Validated By Property Type |
Optional If you want to record the names of the users who validated the object, enter the Scriptname of the Multi-Line Text Property Type you want to use for this purpose. |
3.Save and Publish your Site.
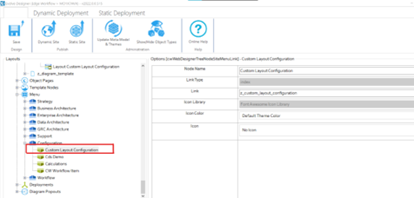
To update meta model for models already configured for Advanced Workflow:
1.Start Evolve Designer.
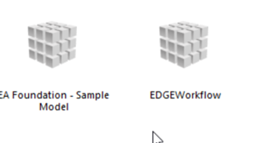
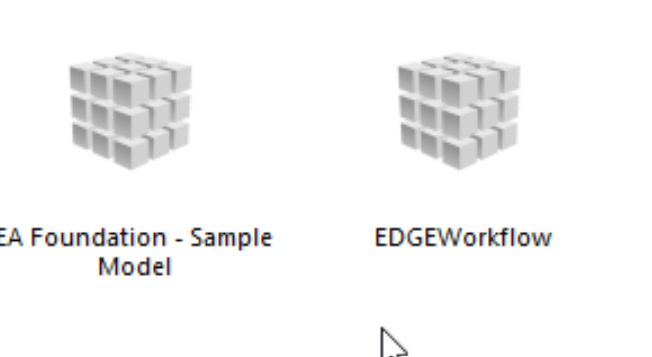
2.Click a model. For example, EDGEWorkflow.
3.Click Erwin Demo.
An Evolve Designer window opens.
You will receive the below error message when you click on 'Update Meta Model & Themes'. To fix this error, you need to first update meta model.
To update meta model:
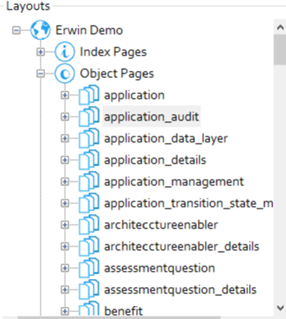
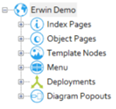
1.Expand Erwin Demo > Object Pages.
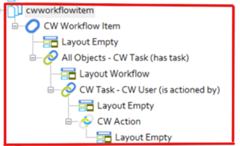
2.Right-click cwworkflowitem and click Delete.
3.Click Update Meta Model & Themes.
4.Click Save.
5.Click Dynamic Site.
Deleting an index page without unlinking it from the menu leads to an error. To fix this error, follow below steps:
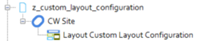
To delete “z-custom-layout-configuration” index page and unlink from menu:
1.Expand Erwin Demo > Index Pages.
2.Right-click z-custom-layout-configuration and click Delete.
3.Expand Menu > Configuration.
4.Right-click Custom Layout Configuration and click Delete.
5.Click Save.
6.Click Dynamic Site.
Evolve Workflow Configuration
Workflow configuration is now a part of Administration, alongside Pool/Swimlane Configuration and it enables you to create and customize workflows.
|
|
Workflow configuration is available to Subscribed users only. For access, contact Sales & Support. |
|
|
You must have Administrator rights to create or configure workflows. |
To create a workflow:
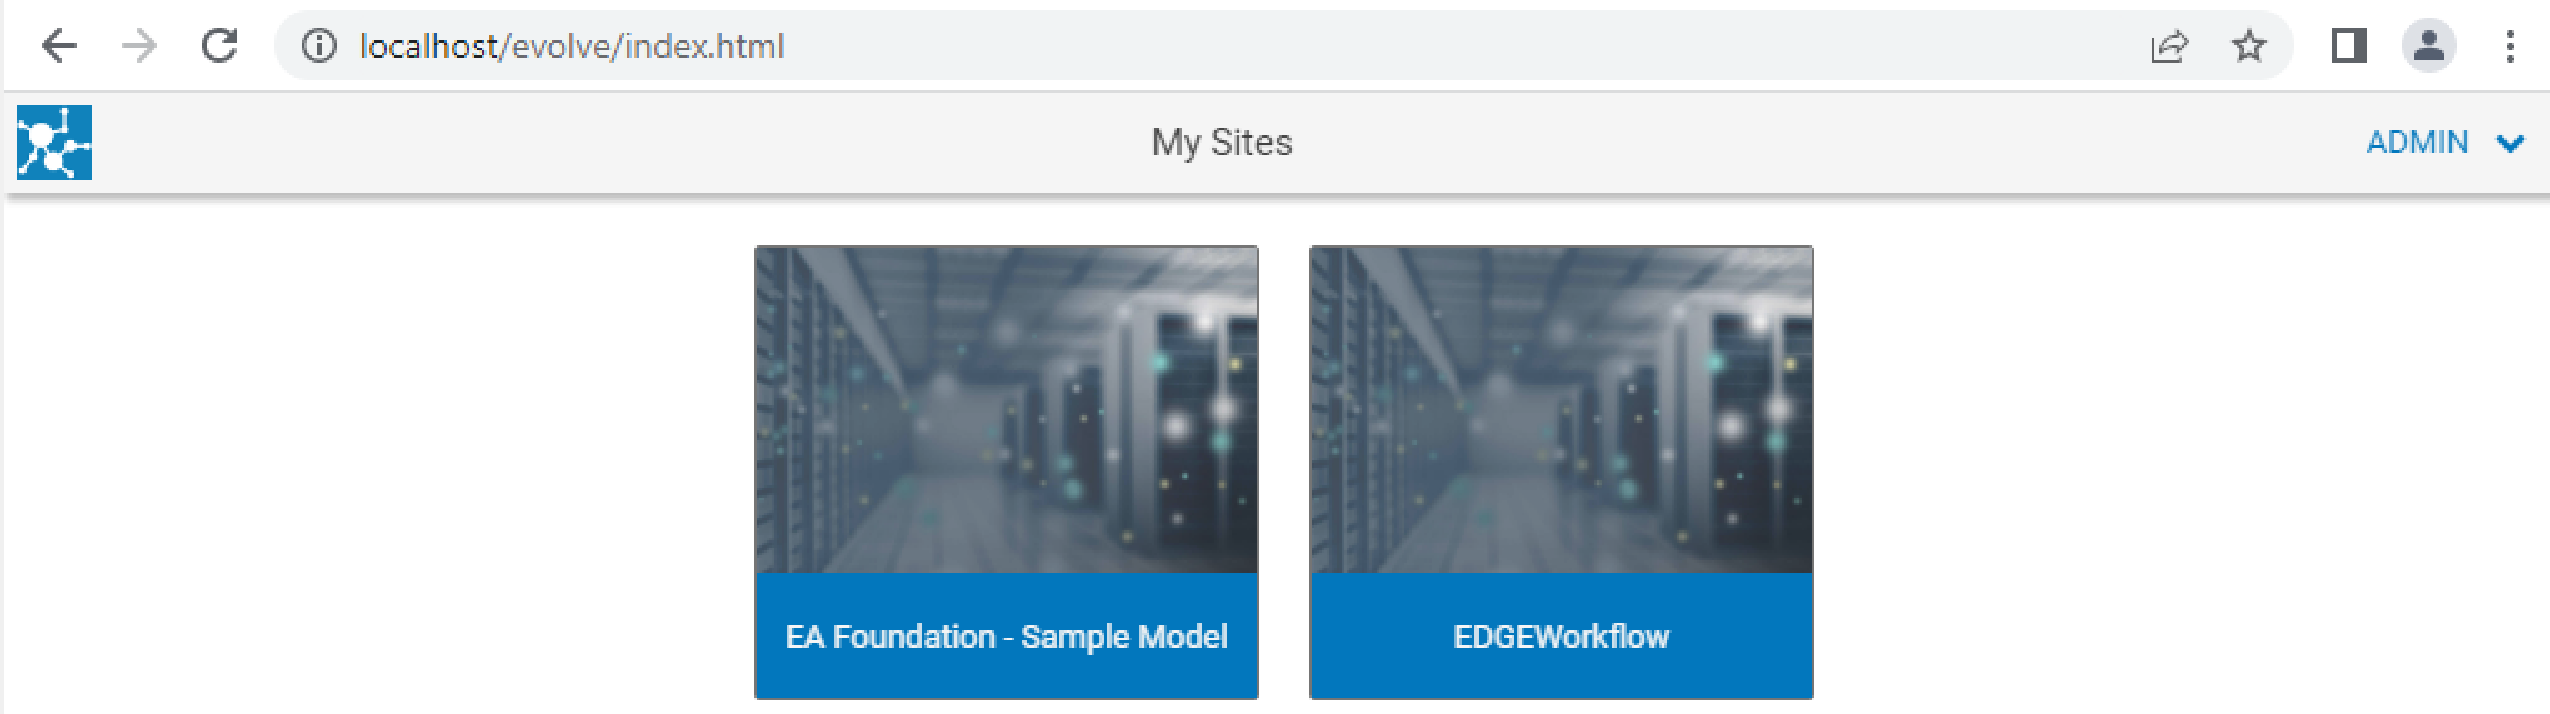
1.Open the browser and login to erwin Evolve Web.
2.Click a model. For example, EDGEWorkflow.
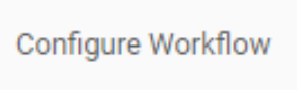
3.Click Administration.
1.Click Configure Workflow.
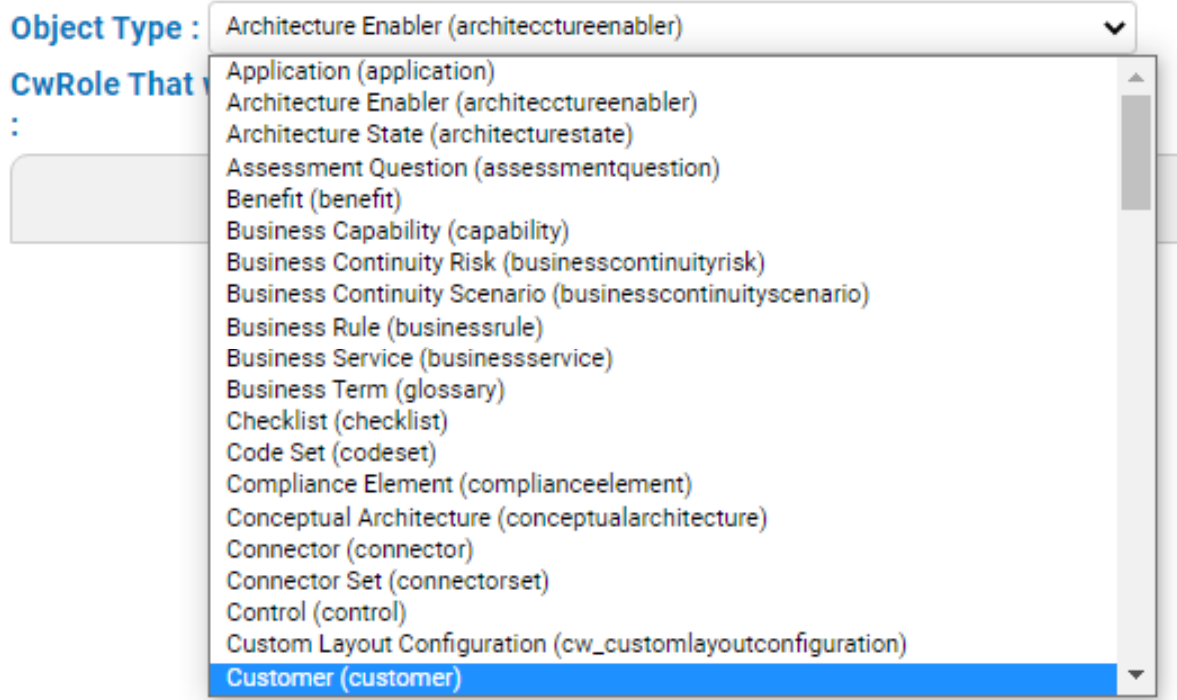
1.Click the Object Type drop-down list box and select the required object type.
|
|
CwRole is used by Workflow Engine, which can be triggered directly from the erwin Evolve home page. |
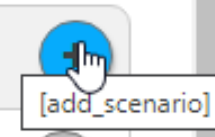
Add scenario
When you click add_scenario, a scenario is created and a request is sent for approvals.
|
|
Users with Administrator rights can create multiple Scenarios. |
To add Scenarios:
1.Click the add_scenario icon.
2.In the Name box, specify the name of the Scenario.
3.In the Order box, specify the order of the Scenario.
|
|
Use up or down arrow to change the order of the Scenario. |
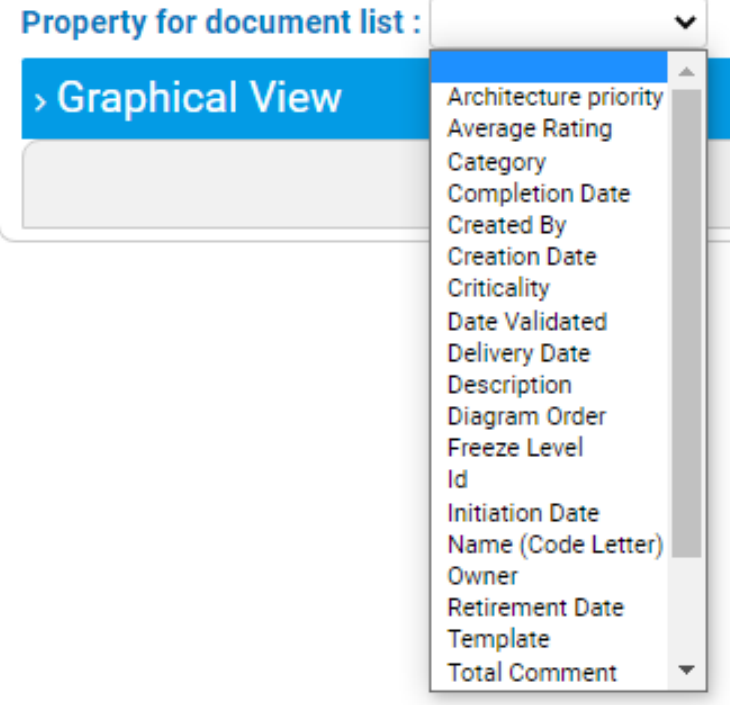
4.Click the Property for document list drop-down list box and select the required option.
Graphical View
You can view the workflow process in a graphical format in the Graphical View section.
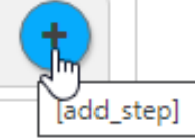
To add step via the Graphical View:
1.Click the add_step icon.
2.In the Name box, specify the name of the step.
3.In the Order box, specify the order of the step.
|
|
Use up or down arrow to change the order of the step. |
|
|
To restrict the reviewer from unintentionally modifying the document, you can configure the document to be read-only before sending it for review. Select the Document Section in ReadOnly check box. |
Input Configuration
You can create custom approval form with fields, such as Name, Email and Description.
To add form_input:
1.Click the add_form_input icon.
2.Complete each of the following settings:
|
Section |
Property |
Description |
Additional Information |
|
Input Configuration |
label |
Specifies the label of input |
|
|
Order |
Specifies the order of input |
| |
|
Type |
Specifies the type of input |
property: Indicates an input type objectType: Indicates a custom form’s object type association: Indicates a relationship between two objects message: Indicates a generic message of input request-name: Indicates the name of workflow creator | |
|
Scriptname |
Specifies the script name of the property |
Available when Type is set to property. Click the Scriptname drop-down list box and select the required option. | |
|
Object Type |
Specifies the input object type |
Available when Type is set to objectType. Click the Object Type drop-down list box and select the required option. | |
|
Scriptname to use in other property value |
Specifies the scriptname of the object Type or request name |
Available when Type is set to objectType or request-name | |
|
Association Type |
Specifies the association type of input |
Available when Type is set to association. Click the Association Type drop-down list box and select the required option. | |
|
Informative Message |
Specifies an informative message about input |
Available when Type is set to message | |
|
Read Only |
Specifies whether the input is read-only |
Available when type is set to property, objectType, association or request-name | |
|
Mandatory |
Specifies whether the input is mandatory |
Available when Type is set to property, objectType, association or request-name | |
|
Hidden |
Specifies whether the input is hidden |
Available when type is set to property, objectType, association or request-name | |
|
Value |
Specifies a value of the input type |
Available when type is set to property, objectType, association or request-name | |
|
Filter |
Specifies the Filter option to filter input value |
1.Click Add New 2.Click the Property drop-down list box and select the required option 3.Click the Operator drop-down list box and select the required option 4.Use Value or drop-down list to specify the property value | |
|
Step Mapping Configuration |
Label |
Specifies the label of the step mapping |
|
|
Order |
Specifies the order of the step mapping |
| |
|
Step Name |
Specifies the name of the step |
| |
|
Read Only |
Specifies whether the step is read only |
| |
|
Hidden |
Specifies whether the step is hidden for all users |
| |
|
Mandatory |
Specifies whether the step is mandatory |
| |
|
CW User |
Specifies the casewise user of mapping |
| |
|
Mapped to the creator of the workflow |
Specifies whether the creator of the workflow is mapped |
| |
|
Cw Role |
Specifies the role of casewise user |
Available only when Mapped to the creator of the workflow is not selected and while configuring Review 1 and Review 2 | |
|
Filter |
Specifies the Filter option to filter the value for custom form types |
1.Click Add Filter 2.Click Property drop-down list and select the required option 3.Click Operator drop-down list and select the required option 4.Use Value or drop-down list to specify the property value | |
|
Add Buttons and Next Steps |
Label |
Specifies the name of buttons and steps |
|
|
Order |
Specifies the order of buttons and steps |
| |
|
Step Name |
Specifies the name of the step |
| |
|
Enable Notification |
Specifies the notification of new task |
| |
|
Create the Final Object |
Specifies whether the created object is final |
To create the final object, user must be contributor or diagrammer. | |
|
Ignore Mandatory Fields |
Specifies whether the mandatory fields can be ignored |
| |
|
Filter |
Specifies the Filter option to filter the value for custom form types |
1.Click Add Filter 2.Click Property drop-down list and select the required option 3.Click Operator drop-down list and select the required option 4.Use Value or drop-down list to specify the property value | |
|
Notification Title & Notification message |
Specifies the title and message of notification |
Available only when you select the Enable Notification check box or the Create the Final Object check box |
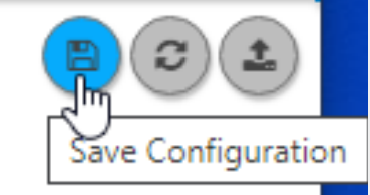
To save the workflow configuration, click the Save Configuration icon.
|
|
The Save icon saves JSON configuration into erwin Evolve Web Platform. |
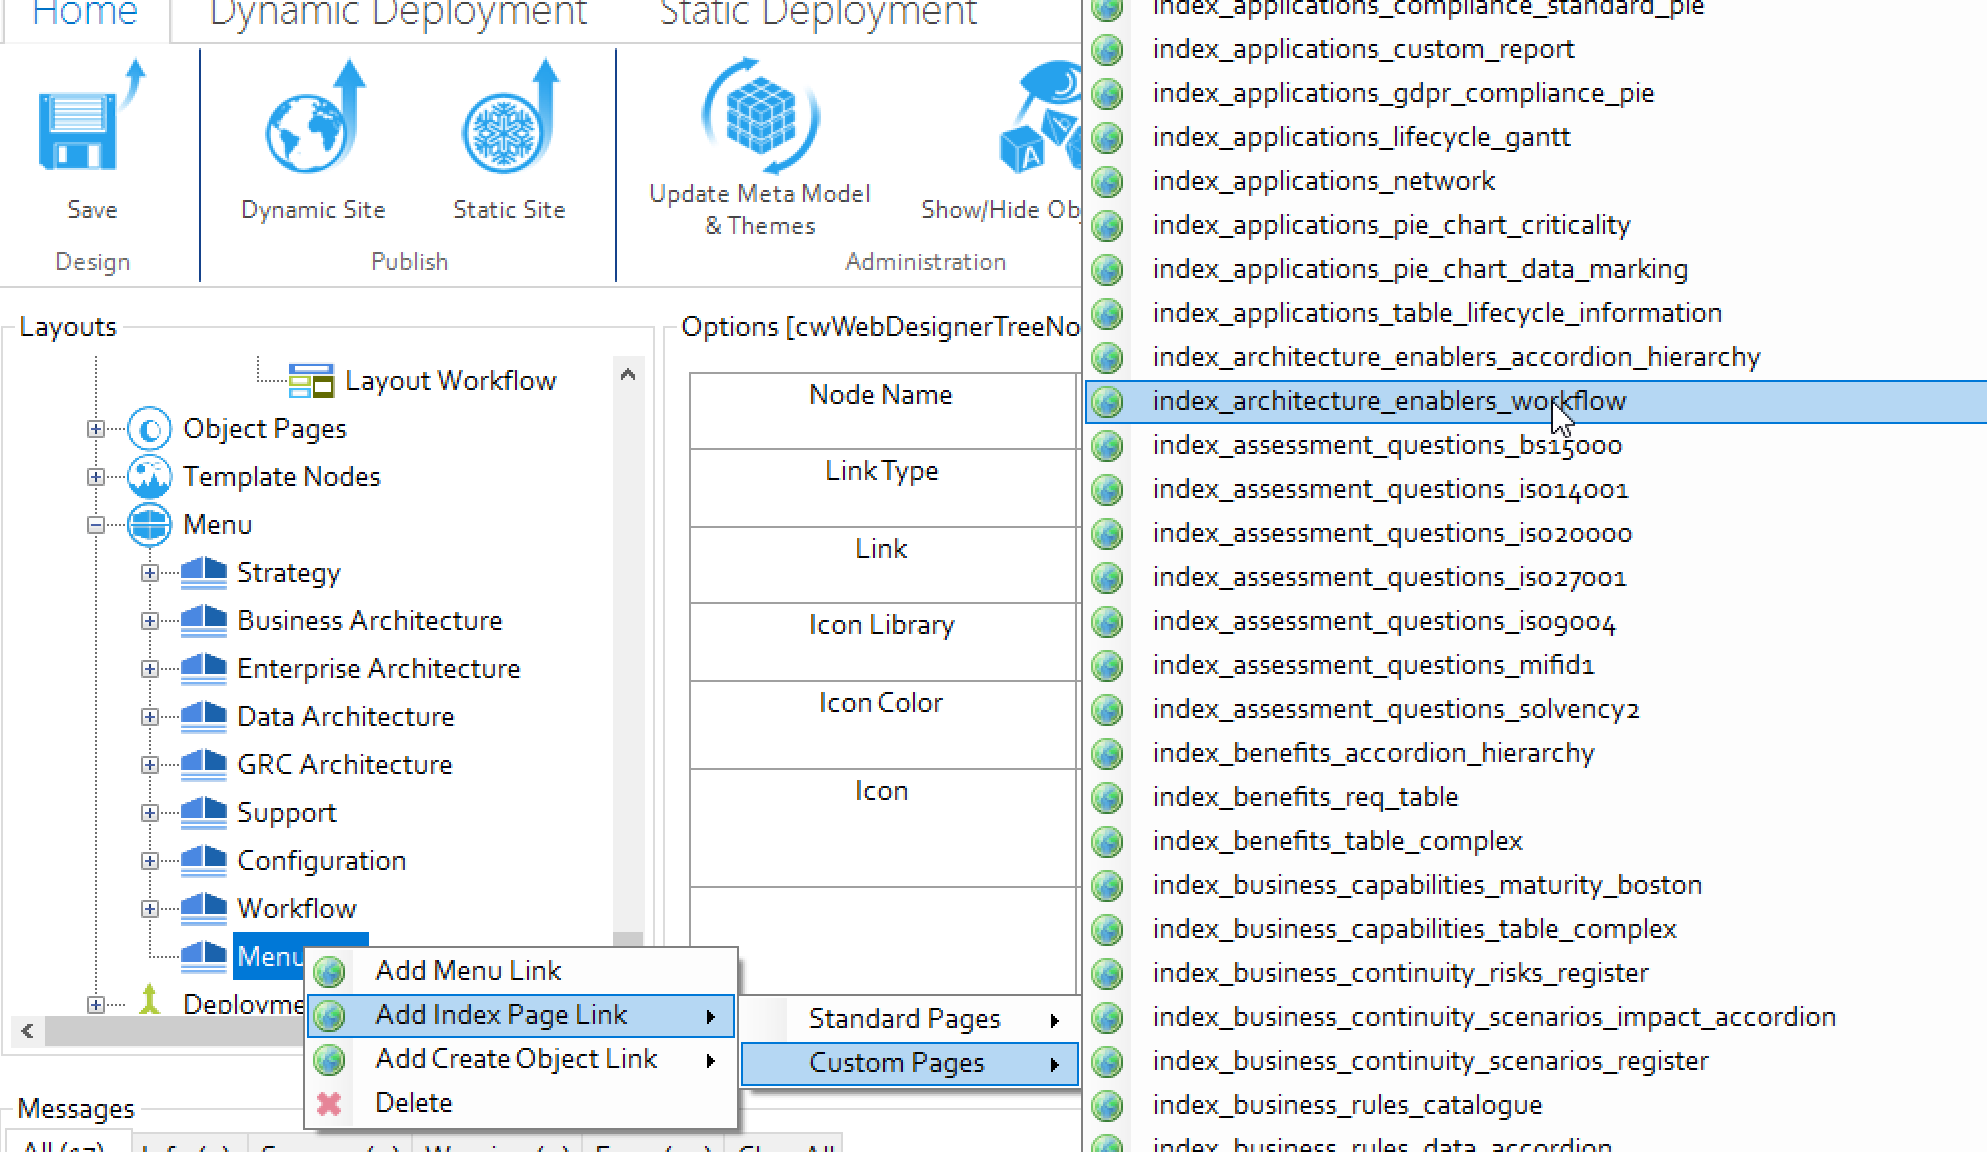
To add an index page in Evolve Web Platform for the workflow:
1.Start Evolve Designer.
2.Click a model. For example, EDGEWorkflow.
3.Click Erwin Demo.
An Evolve Designer window opens.
4.Expand Erwin Demo.
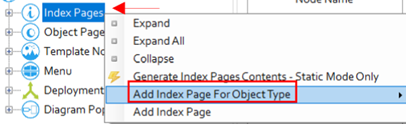
5.Right-click the Index pages node and click Add Index Page For Object Type.
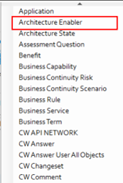
6.Select the required object type for which you want to configure workflow. For example, Architecture Enabler.
An index page (index_architecture_enablers) will be added at the end of index pages.
7.Click index_ architecture_enablers.
8.In the Page Name box, change the page name if you want. For example, index_ architecture_enablers _workflow.
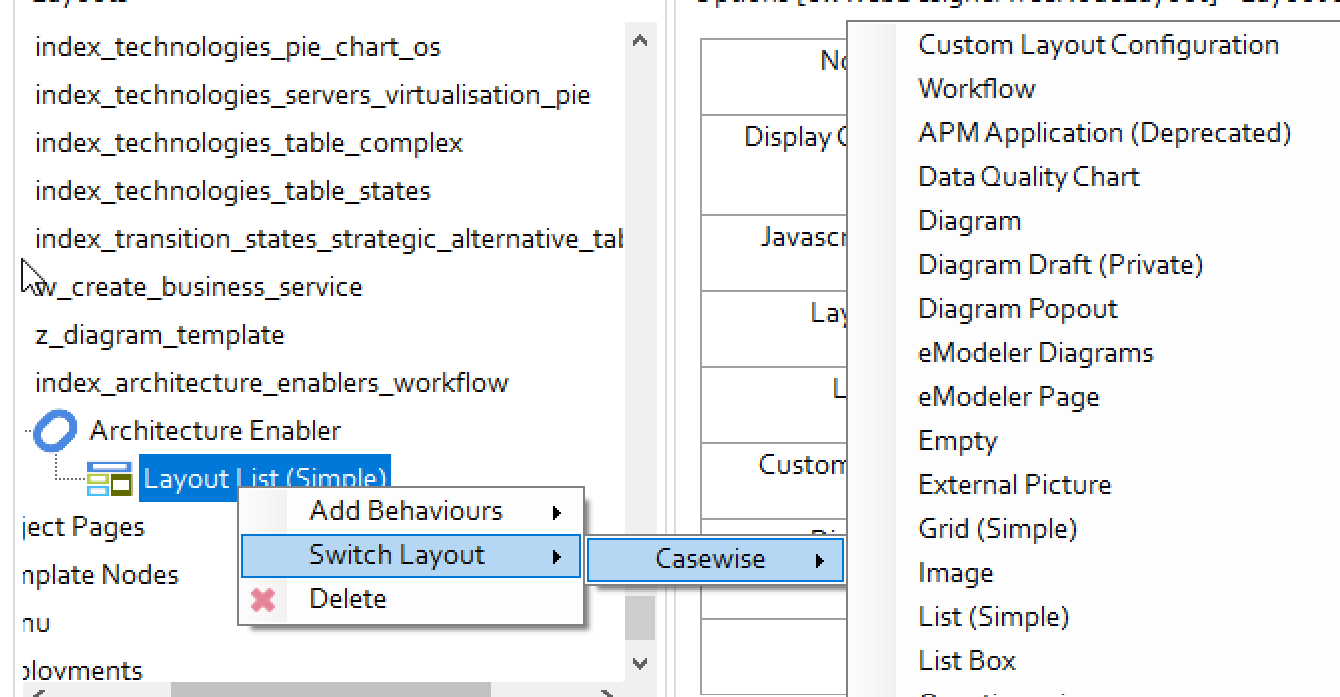
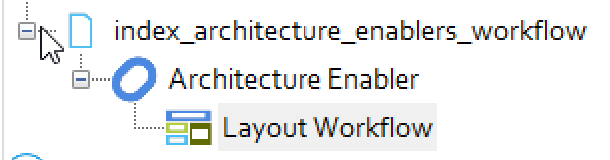
9.Expand index_architecture_enablers _workflow > Architecture Enabler.
10.Right-click Layout List (Simple) and then, select Switch Layout > Casewise > Workflow.
The Layout List (Simple) nodes changes to Layout Workflow.
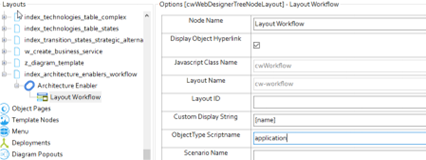
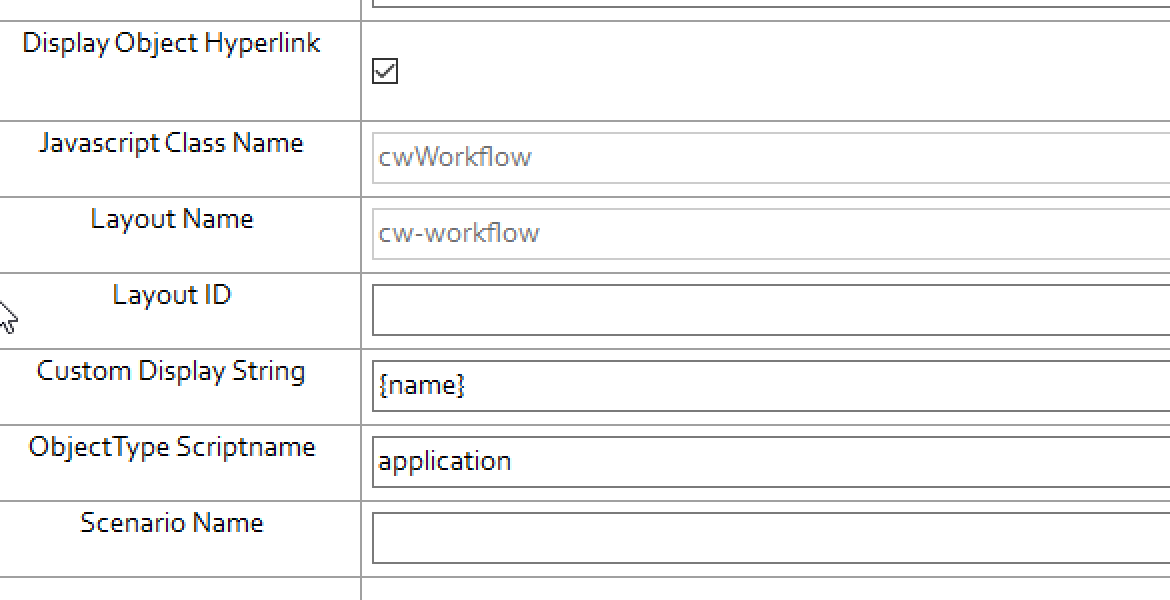
11.Click the Layout Workflow node.
12.In the ObjectType Scriptname box, specify the script name of the object type. For example, application.
|
|
Ensure that ObjectType Scriptname is in lowercase. |
13.In the Scenario Name box, specify the name of the application that you use while configuring workflow in your erwin Evolve site.
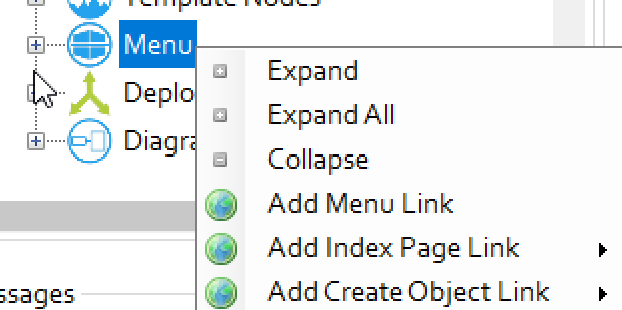
14.Right-click on the Menu node and click Add Menu Link.
15.Expand Menu node.
16.Right-click Menu Link and select Add Index Page Link > Custom Pages.
17.Select the index page that you created. For example, index_architecture_enablers_workflow.
18.Click Save.
19.Click Dynamic Site.
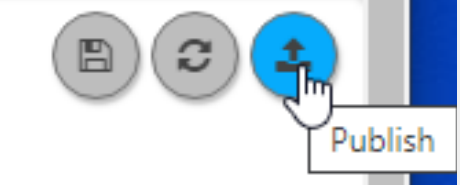
To publish the workflow to the server, click the Publish icon.
|
|
The publish icon publishes the workflow to the server. |
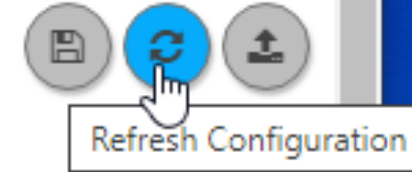
To refresh the workflow configuration, click the Refresh Configuration icon.
|
|
The Refresh icon discards the workflow's saved changes and reloads it from the server. |
The Page Review Workflow is part of the Share functionality in Evolve.
If Workflow is enabled, a user can choose to share the page with a Role. All members of the Role are then assigned Tasks prompting them to review the page - or object - and they must confirm they have reviewed it before the Task is considered complete.
In addition, the user who shared the page is also assigned a Task - with the Task marked as 'Requested' - and this allows them to view which users have reviewed the page.
Only once all members of the Role have confirmed they have reviewed the page is the Task marked as 'Completed'.
What do you want to do?