After upgrade of Recovery Manager for Active Directory (RMAD) it is recommended to upgrade the Secure Storage agent on the Secure Storage server to the same version.
With a hardened Secure Storage server, RMAD does not automatically upgrade the agent and this must be completed with console (physical) access to the server.
| NOTE |
The Secure Storage server agent will continue to function when its version does not match the version of the RMAD console but any new functionality may not be available. |
In the Recovery Manager for Active Directory console, click the Secure Storage node.
In the Secure Storage Servers pane, select the Secure Storage server. The current version of the agent installed will be displayed.
If the agent installed does not match the version of your RMAD installation, right-click the Secure Storage server that you want to manually export the setup package.
Click Export setup.
Copy the package, SecureStorageAgent.zip, to the existing Secure Storage server. This requires console (physical) access to the Secure Storage server.
Extract the package on the Secure Storage server and double-click the SecureStorageAgent.msi file to upgrade the agent.
A warning will be displayed. IMPORTANT PLEASE READ: This server is about to be hardened and all network connections to this server will be lost including Remote Desktop. Ensure you have physical access to this server and have an available method to access such as console access or serial access. Select YES to acknowledge you understand and are prepared for the Secure Storage server to be installed and hardened. Recovery Manager for Active Directory cannot undo this operation without physical access to the server.
NOTE: For quiet installation both the /qn switch and FORCE=true can be specified when launching the msi file from the command line.
The Storage Agent is installed and the server is hardened automatically. For more information on hardening, see Hardening a Secure Storage server above.
| IMPORTANT |
During upgrade the Secure Storage server may be unhardened for a short period of time (seconds). |
To prevent temporary unhardening and before installing the new agent on the Secure Storage server, perform the following steps:
On the Secure Storage server, open a command prompt.
To retrieve the id for the current Quest Secure Storage agent, type and run: wmic product where "Name like 'Quest Secure Storage Agent'" get Name, Version, IdentifyingNumber
Using the returned id, type and execute the following: msiexec /x {Identifying Number} AUTO_UNHARDENING=FALSE
By default the Recovery Manager console uses its own set of TLS keys to communicate with the Secure Storage server. To set up a Secure Storage server to be available on multiple Recovery Manager consoles you must use the same set of TLS keys on each console.
Add Secure Storage server in primary console. Refer to Adding a Secure Storage server
Open or create a recovery project in Forest Recovery Console.
On the menu bar, select Tools | Fault Tolerance.
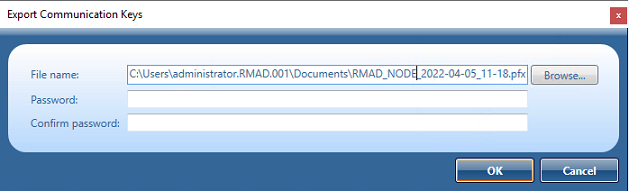
Click Export communication keys….
In File name:, the communication key file defaults to a location and file name, for example: C:\Users\administrator.RMAD.001\Documents\RMAD_NODE_2022-04-05_11-18.pfx
Enter and confirm a password to protect the file.
Click OK to save the key file.
IMPORTANT: Ensure communication keys and access credentials are kept secret and protected.
Then, launch the other instance of Forest Recovery Console.
On the menu bar, select Tools | Fault Tolerance | Import secure communication keys…. Browse and select the Secure Communication Keys file saved in step 7 and click Open.
Open the other instance of the Recovery Manager console.
In the Recovery Manager for Active Directory console, click the Secure Storage node.
In the Secure Storage Servers pane, click Add Server.
Type the DNS name or IP address of original existing Secure Storage server.
In the Agent port field, type port number used when Secure Storage server was first created.
From the Agent installation method drop-down list, select Manual (recommended).
Click OK.
After the Recovery Manager console connects to the existing Secure Storage agent running on the existing Secure Storage server, all backups will appear in the console for viewing.
| WARNING |
It is not recommended to use Recovery Manager consoles that are in different forests because if one of the forests is breached it may affect the backups of the other forest. |
The Secure Storage server is used to store critical backups. A server can have multiple volumes available for storage of backup files. Recovery Manager for AD provides the ability to configure which volumes are allowed to store backups, the order of the volumes to be used or you can allow RMAD to determine which volume to use automatically.
If no policy is set for allowed volumes, the Secure Storage server will use the first volume found. The system drive with the operating system will only be selected if it is the only available volume on the server.
Ensure your Secure Storage server has sufficient space for storing of backup files. The amount of space used on each volume is displayed for the Secure Storage server and the available free space. Recommendation is to monitor available free space and ensure that there is space available for backups. If a volume is running out of free space, a warning icon will be displayed in the Properties dialog.
To configure the policy for allowed volumes on Secure Storage server
During the installation of the Secure Storage agent on the Secure Storage server, a PowerShell® module was installed and is located in the agent installation folder.
On the Secure Storage server, run Windows PowerShell®. The module will automatically be imported.
To configure backup retention policy, run the cmdlet Set-RMADStorageServerAllowedVolumes. For further details on Set-RMADStorageServerAllowedVolumes see the Management Shell Guide supplied with this release of the product.
To get the current policy for allowed volumes on Secure Storage server
During the installation of the Secure Storage agent on the Secure Storage server, a PowerShell® module was installed and is located in the agent installation folder.
On the Secure Storage server, run the PowerShell® console. The module will automatically be imported.
To configure backup retention policy, run the cmdlet Get-RMADStorageServerAllowedVolumes. For further details on Get-RMADStorageServerAllowedVolumes see the Management Shell Guide supplied with this release of the product..
After a Secure Storage server has been added, backups can be copied to the Secure Storage server. To enable and configure backups on the Secure Storage server you must enable backups for each Computer Collection separately. For more information on configuring backups on a Secure Storage server refer to Secure Storage server backups.
To view backups on Secure Storage server
In the Recovery Manager for Active Directory console, expand the Secure Storage node.
Select the Secure Storage server to view available backups on the server.
All backups will be listed in the Backups on the Secure Storage Servers pane.
Backups are displayed with information about the backup on the server including name of the domain controller, the domain, the date of the backup, the size of the backup, the OS version of the system backed up, status of any integrity check done on the backup, and the path of the location of the backup.