
Celerra & VNX FileMovers
Configuring Celerra & VNX FileMovers for use with Archive Manager for Files
The archiving of files on the Celerra & VNX FileMovers is achieved by putting them offline using HTTP commands sent to the FileMover API. Be default, only the Control Station can access the Celerra & VNX FileMovers API. Therefore the server_http command must be used to allow other IP addresses to access it. It is necessary to activate HTTP commands sending from the Archive Manager server to the Celerra & VNX FileMovers using the following server_http command:
|
server_http <data mover> -append dhsm -hosts <Archive Manager_server_IP>
Respond should look as follows <data mover> : DHSM FACILITY CONFIGURATION
ACCESS CONTROL Allowed IPs : <Archive Manager_server_IP>
[This configures CELERRA & VNX FILEMOVERS API security and then restarts the API service so that the changes take effect.] |
Further you need to specify the authentication and a user. There are three types of authentication (none, basic, digest), but supported types for Archive Manager are these:
·none
·digest
In case you choose a digest type of authentication, you have to assign a user for DHSM commands. The user must exist or it should be created and assigned to the DHSM feature.
|
Specifying authentication: server_http <data mover> -modify dhsm -authentication <authentication type>
Creating a user: /nas/sbin/server_user <data mover> add md5 passwd <User name>
Assigning the user to the DHSM feature: server_http <data mover> -modify dhsm users <User name>
Respond should look as follows Authentication : digest ,Realm : DHSM_Authorization Allowed user : user1 (or valid)
[<User_name> is the name of the account (A Celerra or VNX account) that Archive Manager for Files needs to use for authentication. This user is a Data Mover user, not a domain user. A prompt for a "User ID" and "Group ID" may also occur. A suitable number is 1000 for both, unless this is in use elsewhere. The number must be unique and does not need to have "root" privileges. If prompted for a "Home Directory" just press Enter to continue and leave the entry blank.] |
DHSM command must be allowed on the selected file system. This is done in the following way:
|
fs_dhsm -modify <file_system> -state enabled
Respond should look as follows <file_system>: state = enabled
[This command activates DHSM for the file system. If the DHSM in not activated, the next command will not establish he connection between Archive Manager and the Celerra & VNX FileMovers and the Celerra & VNX FileMovers will not be accepted in the Archive Manager for Files.] |
As mentioned above the archiving of files on Celerra & VNX FileMovers is based on putting them offline. Then an URL pointing to the file in the archive is specified for each file. When VNX or Celerra is used with Archive Manager for Files this URL is the address of a .NET ASPX web page. The page ensures retrieving of the original file from the archive. Thats why a non-CGI HTTP connection must be configured to the web page. It could be done in Celerra & VNX FileMovers administration console as follows:
|
fs_dhsm -connection <file_system> -create -type http -secondary http://<Archive Manager_server>/HsmDownload -read_policy_override full -cgi n
Respond should look as follows <file_system>:
cid = 0 type = HTTP secondary = http://<Archive Manager_server>/HsmDownload read policy override = full options = cgi=n
[This command creates a Celerra & VNX FileMovers connection on the file system. This uses a Web server <Archive Manager_server> and specifies that files offlined via this connection could be retrieved from the virtual directory /HsmDownload in the hierarchical name space published by the web server. This command only has to be done once; it remains persistent across Data Mover boots.] |
If the web page is configured to require authentication, the above command line must be enhanced by user and password parameters, e.g.:
|
fs_dhsm -connection <file_system> -create -type http -secondary http://<Archive Manager _server>/HsmDownload -read_policy_override full -cgi n -user <user_name> -password <password> |
As a last step of the configuration, it is necessary to activate DHSM feature:
|
server_http <data mover> -service DHSM start Respond should look as follows DHSM FACILITY CONFIGURATION Service Name : EMC File Mover service Active : True |
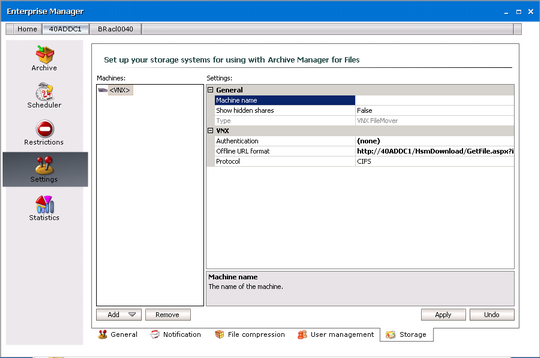
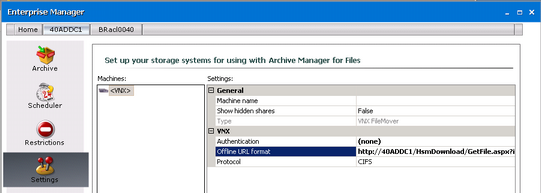
After completing the above steps, the Celerra & VNX FileMovers can be added to Archive Manager for Files using the Archive Manager for Files (see the next section How to include a VNX or Celerra file server). The meaning of the properties of the FileMover (see the figure below) is the following:
|
Machine name |
- |
The network name of the Celerra or VNX FileMover machine. |
|
Show hidden shares |
- |
It makes hidden shares accessible and archivable for Archive Manager. By default is this option off (False). |
|
Offline URL format |
- |
The format of offline URLs of archived files. The URL format must contain string %ID%, which will be replaced by ID of the archived file. The URL must point to connection set up in above steps. |
|
Protocol |
- |
The type of the Celerra or VNX FileMover file system. |
|
Authentication |
- |
If the Celerra or VNX FileMover requires authenticated requests (depends on your Celerra or VNX configuration), specify the name and password of the user. |
How to include a VNX or Celerra file server
To include a VNX or Celerra file server, you need to include it on the Storage tab. Before including it you have to give rights to the desired user for the Storage tab. However, after a standard installation, this tab is visible for the administrator without a need to specify the rights.
To include VNX or Celerra file server, follow these steps:
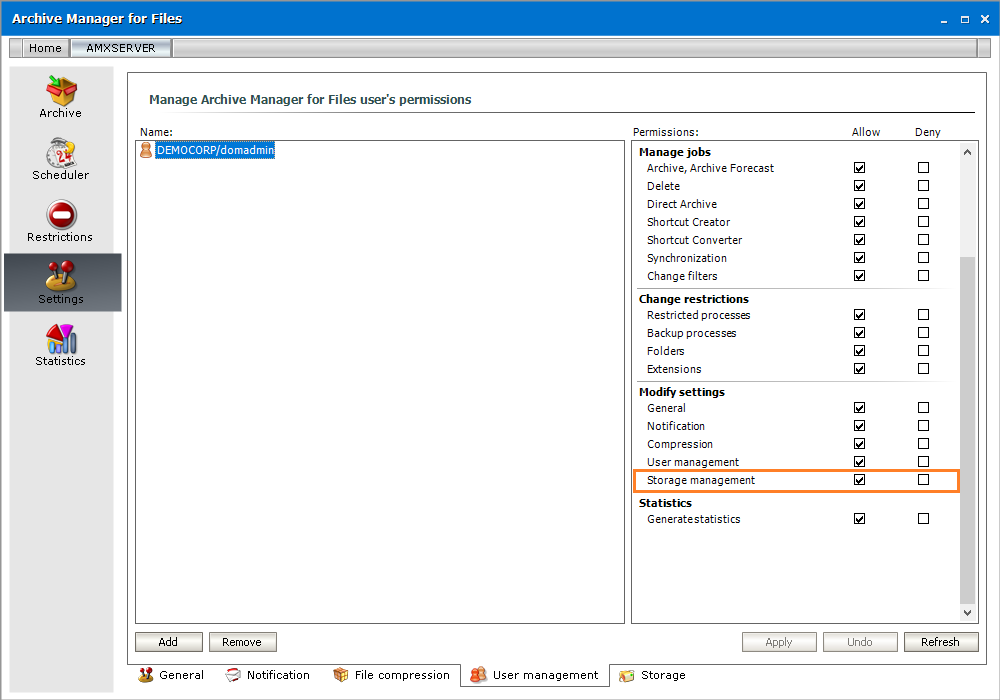
1.Click on the Settings tab.
2.Click on the User management tab.
3.In the left pane select the user for which you want to activate Storage tab. Make sure to select the Storage management check box.
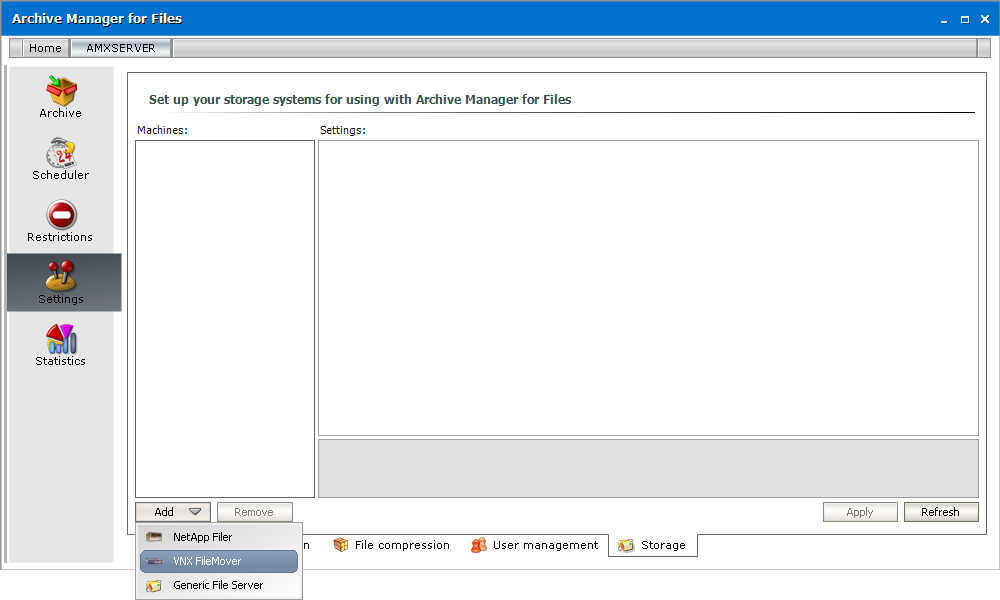
4.After allowing Storage management on the User management tab you may include a Celerra file-server on the Storage tab. So, click on the Storage tab.
5.Click on the Add button and then click VNX FileMover.
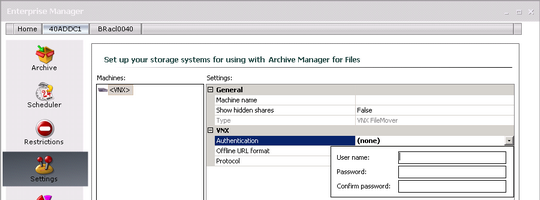
6.If the Celerra or VNX FileMover requires authenticated requests (depends on your VNX or Celerra configuration), specify the name and password of the user. Click on the Authentication box. Then click on the down arrow. In the respective text boxes enter the name of the appropriate use (User name) and password (Password and Confirm password text boxes).
7.Click on the Offline URL format to specify the format of offline URLs of archived files. The URL format must contain string %ID% which will be replaced by the ID of the archived file. The URL must point to the connection set up at VNX or Celerra configuration (see Configuring Celerra & VNX FileMovers for use with Archive Manager for Files).
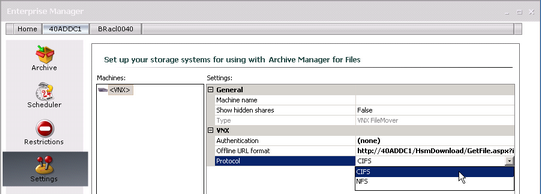
8.Click on the Protocol box. Then click on the down arrow to choose the desired protocol, i.e. the type of the Celerra or VNX FileMover file system.
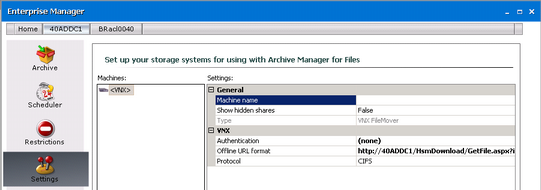
9.Click on the Machine name box and enter the network name of the Celerra or VNX FileMover machine.
Finally click Apply.
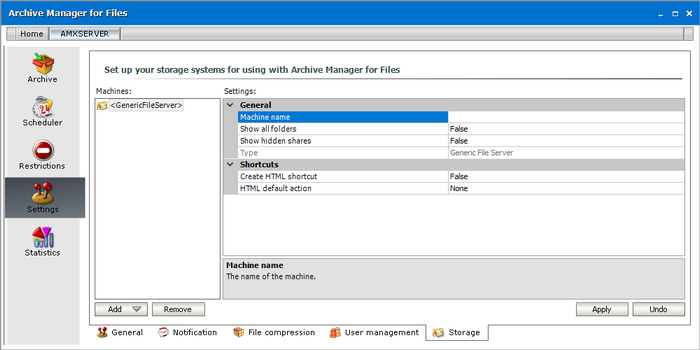
Generic File Server
Archive Manager for Files can archive or backup files from a computer where it is not installed when you add the computer as a Generic File Server in the Storage tab. This tab is visible to the administrator. For all other users you must grant additional rights to the Storage tab.
Steps to grant access rights to other users:
1.Click the Settings tab and then click the User management tab at the bottom of the pane.
2.Select the user in the left pane. From the permissions list in the right pane, select Allow for the Storage management permission.
Steps to add a Generic File Server:
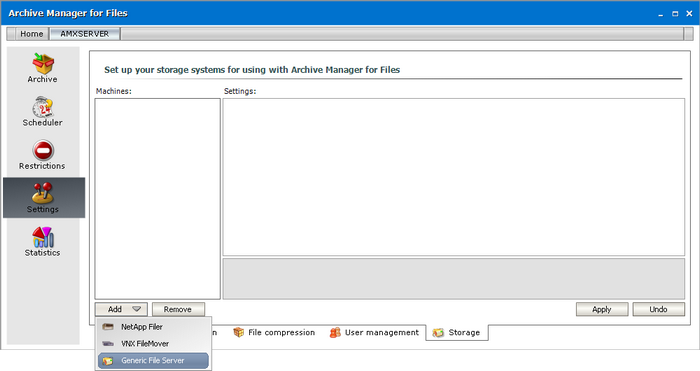
1.Click the Settings tab and then click the Storage tab the bottom of the pane.
2.Click Add and then select Generic File Server from the down-drop menu.
3.Select Machine name and enter the name of a computer that you want to add as a generic file server.
|
|
NOTE: The Microsoft Distributed File System (DFS) logically groups shares on multiple servers. If you add a DFS you must enter the FQDN name of the host server for stand-alone DFS namespaces, or the domain name for domain-based namespaces that have multiple host servers for high availability. |

4.Specify the properties of the generic file server as described below:
a.Show all folders - Select True from the drop down box to displays all folders (including hidden system folders) unless specific folders are restricted through the Restrictions > Folders tab. The default value is False.
|
|
NOTE: Whether you use a DFS share or a standalone file server, you can restrict one or more folders through the Restrictions > Folders tab. For example, assume that AMFGEN.democorp.com\SystemFolder is a hidden folder. Then the following behavior should be expected:
|
b.Show hidden shares - Select True from the drop down box to ensure hidden shares can be archived. The default value is False.
c.Create HTML shortcut - Select True from the drop down box to allow the creation of HTML shortcuts on the remote computer when file are archived on that computer. The default value is False. If the value is False, the archived file will be copied to the pre-defined HSM Store and no HTML shortcut will be created.
d.HTML default action - Sets the default action when opening the HTML shortcut. Choose from None, Open file or Retrieve.
5.Click Apply.
Scheduler
This tab is used for configuring purposes, in other words the administrator may schedule jobs that would automatically archive different folders/disks with predefined settings and retention. Jobs, of course, need to be created up-front, and only then they can be assigned to folders/disks. Should you wish to archive files for instance with regard to their extension, create filters and apply them to folders/disks. All those specifications can be defined on the Jobs and Filters tabs as described further.