How Do I Create a Details View?
|
|
Before starting you must read and follow the instructions in the New View help page. |
|
|
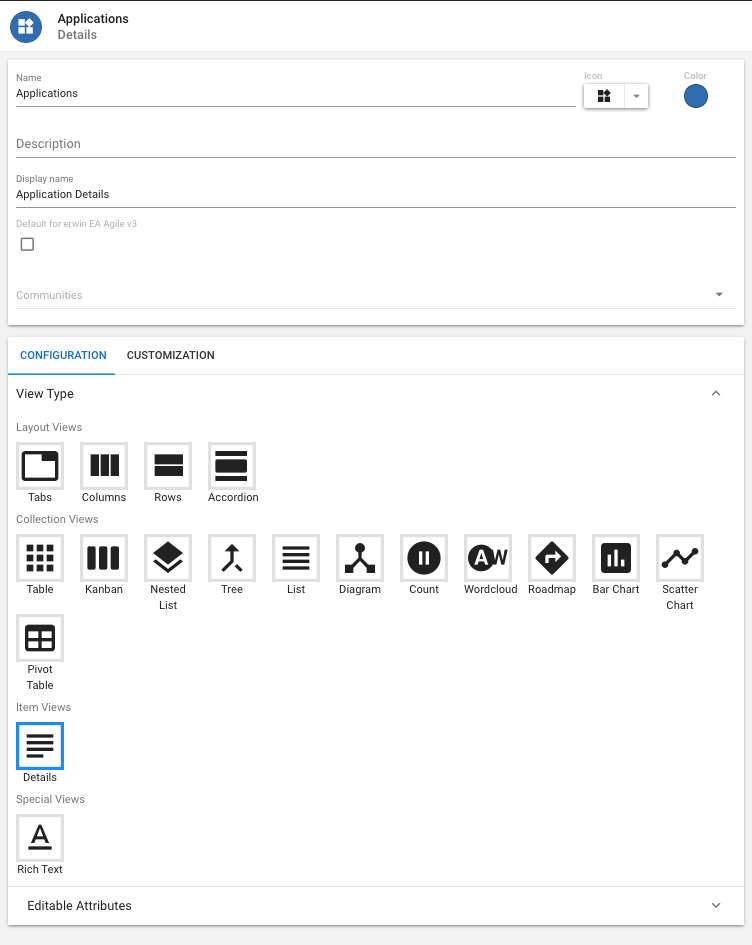
A Details View allows you to display Attributes of an Object Type Instance. This type of view is commonly used for Object Type views, when first accessing the Platform you may need to edit the default view to display the Attributes you wish; this is done by creating or editing a Details View. |
1. Select ‘Details’ from Item Views.
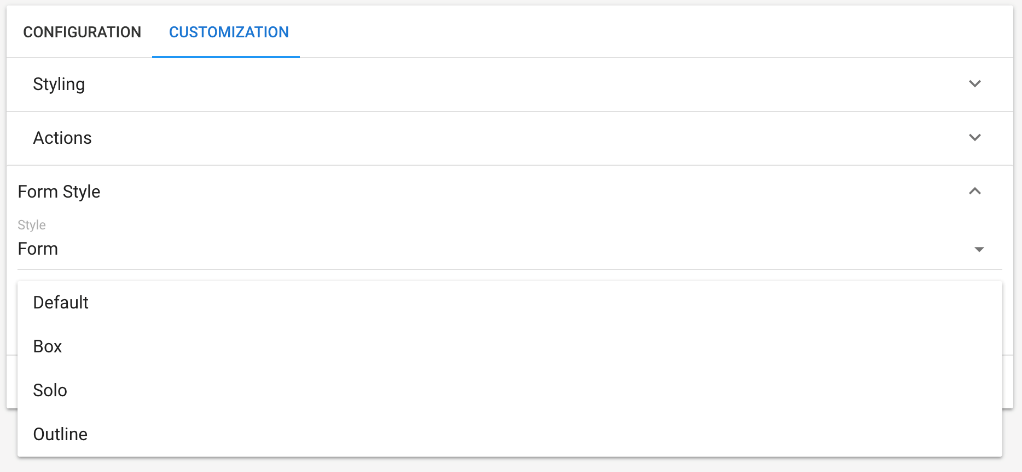
2. There are two style options available for Details View, ‘Form’ & ‘Accordion’. Select which style you’d like for your view. (Examples of each can be found at the end of this page). By default your style is set to form. To change go to the view Customization tab and select 'Form Style'
3. You now need to select your Display Attributes. These are the Attributes you want to have in your Details View
a. Generic Attributes are Properties that are in all Object Types.
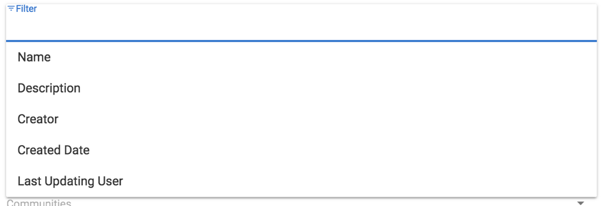
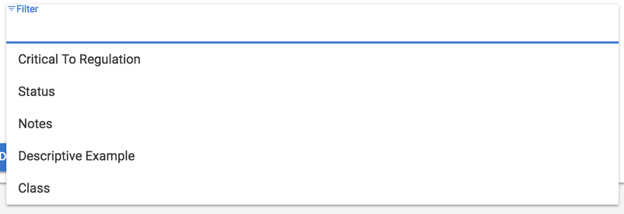
b. If you want to display Attributes that are only of the Object Type you’re creating your display view for. You can either select the Object Type manually or search for a specific term
c. This will bring a list of Object Type specific Attributes. Below the example is for Business Terms
4. To allow users to change the Attribute there is a check box labelled ‘Editable’. Unselecting this box will lock the attribute
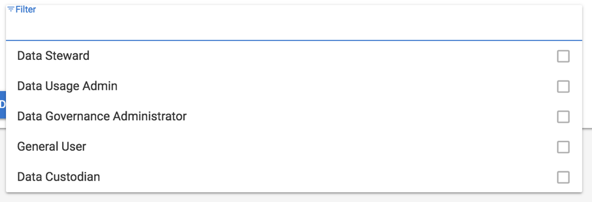
5. To restrict the Attribute to a Community, click the ‘Communities’ field. If you wish the Property to be viewed by all leave this field blank
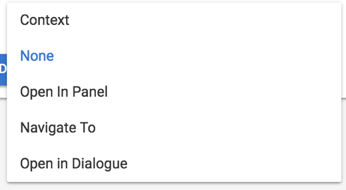
6. You can now choose whether the Attribute has a Click Behaviour. There are 5 options:
i.Context:
ii.None: Nothing will happen when the Attribute is clicked
iii.Open In Panel: A side panel will pop out
i❖.Navigate To: Redirected to a new page displaying the set view
❖.Open In Dialogue: The set view pops up in a box in the centre of the screen
vi. Open In Panel, Navigate To & Open In Dialogue require you to set a View to navigate to. Clicking in the ‘View’ field allows you to select a View by searching by name, select from a list or create a new view. The most common choice is ‘Default View For Type’.
7. Selecting a Tooltip Attribute allows users to select which attribute to display on hover, by default, this is set to name
8. To add additional Attributes, click ‘Add Display Property’ and repeat from Step 3
9. Once you have added all the Attributes you wish to display click ‘Save’
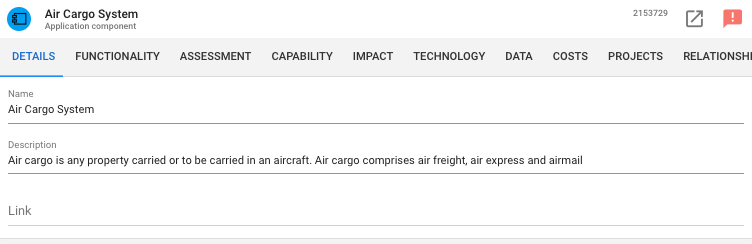
Form style 'Details View'
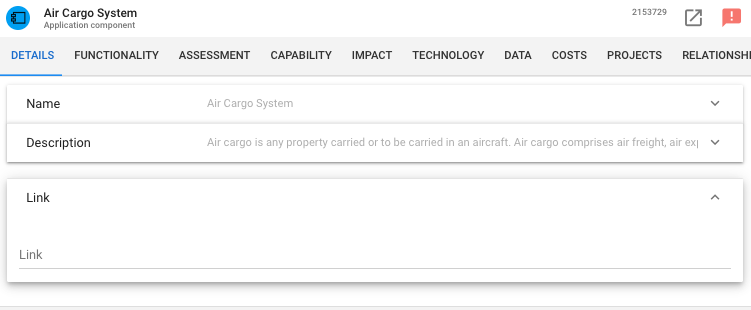
Accordion style 'Details View'
Input Style
|
|
In Details Views you can select from 4 different Input Styles; Default, Box, Solo & Outline. |
Default
Box
Solo
Outline
To choose a style for your Details View simply go the 'Customisation' Tab and then 'Form Style'.
How Do I Create a Rich Text View?
|
|
Before starting you must read and follow the instructions in the New View help page. |
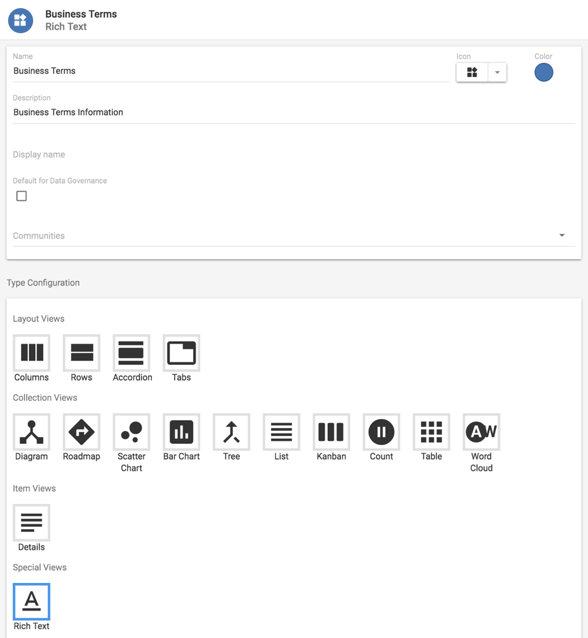
1. Select ‘Rich Text’ from Item Views.
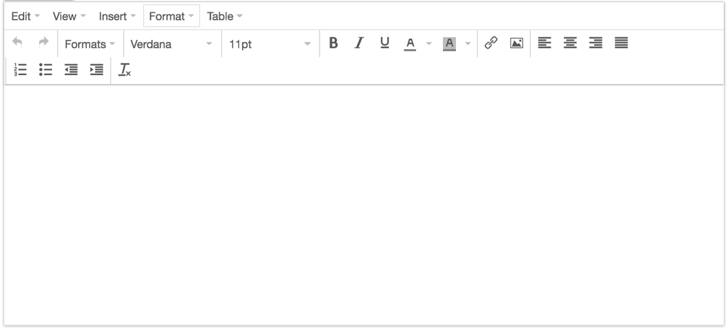
2. You will then be provided with a Rich Text Editor allowing you to format your text as well as insert pictures, links and tables.
3. Once you have finished click Save.
Conditional Views
How Do I Create a Conditional View?
|
|
Conditional Views are Views which can be set to only appear once a certain criterion is met. e.g. If a Business Term is marked as 'Confidential' an extra tab will appear. |
To implement a Conditional View is incredibly simple, all that is required is;
Create the view you wish to display, then Create a filter based on the criteria required
1.Create & Configure the View you wish to appear as your Conditional View
2.In a Layout View add the View you wish to appear as normal
3. Click on the 'Display Condition' input and select either a pre-defined filter or create one using the '+' button.
Layout