Alert settings define whether an alert is sent to an alert database when the rule is matched. Use the Alert tab in the rule's properties to configure the corresponding settings:
Also, you can supply alert name and description, initial state, comment and alert code.
In addition to predefined fields, your alerts can include any named fields that InTrust can calculate based on the events it captures. The following are examples of such fields:
To use such a field as a variable, enclose it in percent signs (and omit whitespace); for example, %Who% or %WhereFrom%. There are numerous named fields defined for InTrust, and the set of such fields can vary from environment to environment.
Some of these fields are available from the field selection menu in the alert editor.
You can include relevant IT Security Search query URLs in alerts triggered by your rules. When the alert-handling user opens such a URL, they get the event that triggered the alert and also the context for that event: similar events shortly before and after the event. If you want to include such URLs in alerts, create a custom field for the query in the alert editor and use the IT Security Search Query URL command to set the field's value.

If InTrust doesn't know where IT Security Search is located at the time that you click this item, you will be prompted for the IT Security Search URL. Make sure you get the address right. If you need to change it later, you have to edit the ITSearchAddress organization parameter. For details, see Organization Parameter Editor.
A response action defines what measures are taken if certain rules are matched. Response actions can do the following:
Click the Response Actions tab in a rule's properties to configure the corresponding settings.
Response actions can follow one another. When you provide several response actions, they are executed in the order they are arranged.
For all response action types except “Execute Task”, you can specify whether the action is executed by the server or by the agent. To do it, open the response action’s properties dialog box and click the General tab. To configure settings that are specific to each response action, click the Settings tab. These settings are described below.
If a response action setting relies on an external value, you can specify a predefined keyword that represents the value. These keywords are resolved when the rule is matched, the resulting event data is used to resolve the keywords, and the response action uses the values.
As a response action, InTrust can run one of the scripts available in the Configuration | Scripts container in InTrust Manager. The supported scripting languages are PowerShell, ECMAScript, JScript and VBScript.
|
NOTE: To execute PowerShell scripts, InTrust runs the 64-bit version of PowerShell, because this is the version mainly in use today. |
InTrust provides several predefined scripts. These scripts assist in administrative tasks, such as adding a user to a group or changing the type of an account. If necessary, you can create your own scripts from scratch or as a modified copy of an predefined script.
To configure a response action that involves script execution
Each script has parameters that can be customized so that the script fits a particular situation. By specifying these parameters you define how the script is applied and what it is applied to. For example, the parameters for the AddUserToGroup script include Computer, Group, Protocol and User.
To edit a parameter
For details about setting up scripts for use in response actions, see InTrust Script Objects in InTrust Customization Kit.
To configure a response action that involves sending an SNMP trap
Address
This is the network address of the recipient of the trap.
Community
This is the SNMP community that will receive the SNMP trap.
Trap type
This is a one of the standard trap types as defined in RFC 1157.
Specific type
This is a specific trap type.
Parameters
This is a list of OIDs and values that you consider relevant and need to include in the trap.
You can specify keywords for all the listed settings except the OIDs and value types in the list of parameters. Make sure that the value for which you want to use a keyword is the correct type. Otherwise, the SNMP trap is not sent.
|
|
Note: InTrust supports only SNMPv1 for this type of response action. |
To configure a response action that executes a command file
The folder in which the command file will be executed
The path to the command file
Trap type
This is a one of the standard trap types as defined in RFC 1157.
Any parameters that the command file requires
Whether command file execution will be synchronous—that is, whether InTrust should wait for the end of command file execution before proceeding to the next response action in line (provided one is present)
You can specify alert and event field names for the first three settings. Make sure that the field names you specify make sense as value settings.
Audit policy enforcement may be an appropriate response action in many situations. For example, if an abnormal event occurs in your network, it may indicate that you are overlooking related events with your current audit policy. This response action enables you to automatically apply an audit policy that is most suitable under the circumstances.
To configure a response action that enforces a specified audit policy
Use current settings (meaning, preserve the settings that are in effect during rule matching)
Audit
Do not audit
Notification settings, located on the Notification tab of a rule's properties, define:
Recipient is a role you assign to users to let them receive notification messages (usually, these are persons in charge for security issues resolution). To get a list of recipients, you can expand the Notifications node in InTrust Manager.
Add message templates, and select the type of each message.
You can add predefined fields to the text of the message template. These fields are replaced by corresponding data when a message is created. The recipientss specified by the policy receive these messages.
In addition to predefined fields, your message templates can include any named fields that InTrust can calculate based on the events it captures. The following are examples of such fields:
To use such a field as a variable, enclose it in percent signs (and omit whitespace); for example, %Who% or %WhereFrom%. There are numerous named fields defined for InTrust, and the set of such fields can vary from environment to environment.
Some of these fields are available from the field selection menu in the message template editor.
You can include relevant IT Security Search query URLs in notification messages that your recipients get. When a recipient opens such a URL, they get the event that triggered the alert and also the context for that event: similar events shortly before and after it. To include such links in notification messages, use the IT Security Search Query URL command in the message template editor.
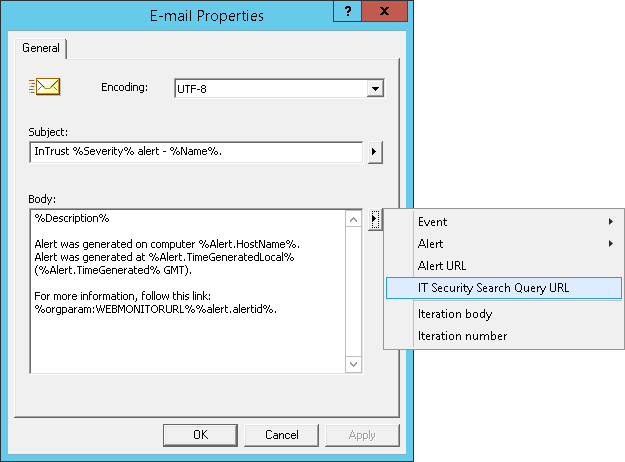
If InTrust doesn't know where IT Security Search is located at the time that you click this item, you will be prompted for the IT Security Search URL. Make sure you get the address right. If you need to change it later, you have to edit the ITSearchAddress organization parameter. For details, see Organization Parameter Editor.
The Knowledge Base tab in the properties of a rule contains the articles explaining the situation in which the rule is triggered, and possible reasons of the problem. Each rule is shipped with a Vendor Knowledge Base Article; to add your company's expertise to the rule, use the Custom Knowledge Base Article field.
|
|
Note: If the role-based administration feature is enabled, a user can edit the Knowledge Base (for example, add a Custom Knowledge Base Article to a rule) only if the user account has the Modify permission on that rule. This can be done on the Security tab. For details, refer to the Role-Based Administration of InTrust topic. |

