
Section 7: Configure Integration for Notes BTCal in Exchange or Office 365
The last step before installing BTCal, involves configuring Exchange to send messages from Exchange to Domino. For detailed instructions on the necessary changes, click on or scroll to the environment that matches your own:
7.1 Office 365 (O365)
7.1 Office 365 (O365)
7.1 Office 365 (O365)
The administrator performing the configuration must have access to the following:
-
The Exchange Management Console or the Exchange Azure Management Console (depending upon the environment)
-
The customer tenant with an administrative level tenant account
|
|
|

Perform the following steps from the O365 client tenant interface:
-
Log into the customer’s O365 tenant. Go to the Exchange Administration section - https://login.microsoftonline.com/
-
Navigate to the Mail Flow section in the Exchange Online Administration Center (Admin Center)
If using PowerShell, execute the following commands to connect to O365:
|
PowerShell |
|
$Cred = Get-Credential “admin@tenant.onmicrosoft.com” $Session = New-PSSession -ConfigurationName Microsoft.Exchange -ConnectionUri https://ps.outlook.com/powershell/ -Credential $Cred -Authentication Basic –AllowRedirection Import-PSSession $Session Import-Module msonline Connect-MsolService -Credential $Cred |
7.1.1 Create a New Remote Domain
Create a new Remote domain to define message transfer settings between O365 and domains outside the internal Exchange organization.
|
|
It is advised to create a new remote domain, apart from the default "*", to allow for specific mail format parameters with domino SMTP while not disturbing internet mail formatting. |
Create a new Remote Domain with the following settings:
|
Field |
Value | |
|
Name |
domino.domain.com | |
|
Domain Name (as specified in the pre-install reqs) |
domino.domain.com | |
|
Be sure to allow internal out of office replies. | ||
|
User Rich Text Format |
Never | |
If using PowerShell to create a new Remote Domain, from the Windows PowerShell console using the Azure PowerShell Module, execute the following two PowerShell commands:
|
PowerShell |
|
New-RemoteDomain -Name domino.btm.com -DomainName domino.btm.com Set-RemoteDomain –Identity domino.btm.com -AllowedOOFType InternalLegacy -DeliveryReportEnabled $true –IsInternal $true –TrustedMailInboundEnabled $true -TNEFEnabled $false |
7.1.2 Create a New Accepted Domain
If you are using the tenant.onmicrosoft.com domain for routing Domino to O365 mail, skip to the next step.
Accepted domains are the SMTP name spaces (also known as address spaces) configured in an O365 organization to receive email messages.
To create a new Accepted domain, follow these steps:
-
Log into the Windows Coexistence Server and open the Office 365 Admin Center
-
In the Office 365 Admin Center, in the left pane, click Organization Configuration/Hub Transport, and then click the Accepted Domains tab
-
If the exch.contoso.com domain does not exist, in the right pane, click the New Accepted Domain option
-
If it does not exist, specify the following details in the new window:
-
In the Name field, enter the other domain name and add a comment that represents Domino Users; for example, Exchange Sub-Domain (Inbound from Domino)
-
Accepted Domain: Specify the domain name. For example: exch.contoso.com
The new accepted domain should now appear for incoming traffic from Domino that will be delivered to the new Exchange users. This accepted domain was set up to be authoritative for the domain. This domain will accept email addressed to the exch.contoso.com domain and deliver to Exchange users with a matching Proxy Address.
-
If using PowerShell to create a new Accepted Domain, from the Windows PowerShell console using the Azure PowerShell Module, execute the Powershell commands shown below; click New when complete.
|
PowerShell |
|
New-AcceptedDomain -DomainName exch.<CustomerSMTPDomain> -DomainType Authoritative -Name exch.<CustomerSMTPDomain> |
7.1.3 Create a Send Connector
Create and configure a send connector from Exchange to Domino. This connector defines the path to route the Domino mail from O365 for AD objects where the user’s mailbox is still in Domino.
|
|
This is one area in the coexistence process that can vary from customer to customer depending on what other type of routing they will be doing from O365, such as to internet or to other domains. |
-
Open the O365 Admin Center
-
Navigate to the Send Connectors, and then select New Send Connector
-
Configure the new Send Connector with the following settings:
|
Field |
Value |
|
From |
Office 365 |
|
To |
<Your organization’s mail server> |
|
Name |
“ToDomino” |
|
What do you want to do after the connector is saved? |
|
|
When do you want to use this connector? |
Only when email messages are sent to these domains |
|
Click the plus sign (+) and add the Remote Domain Names (e.g. <Domino.domain.com>) | |
|
How do you want to route email messages? |
<Enter the IP or DNS as defined in the Administrator Pre-Install Checklist> |
|
How should Office 365 connect to your server(s)? |
|
|
Validate Connector |
Enter a valid Domino SMTP address |
|
Save and Close | |
Now that the SMTP Send Connector has been successfully created, O365 can connect to the Domino Coexistence server for contacts in O365 that don’t have a mailbox. Keep in mind that a mail-enabled object or mail-enabled contact with a target address of domino.domain.com will be required to route mail.
7.1.4 Create a Receive Connector
Create and configure the Receive Connector in the Office 365 Admin Center. A Receive Connector must be configured to allow messages from Domino to enter the Exchange Server 2007 environment.
-
Start the Office 365 Admin Center for Domino from the Start menu as illustrated below
-
Select Hub Transport from Server Configuration in the left pane, and then click New Receive Connector
-
Similar to the Send Connector configuration, configure these two items as follows:
-
In the Name field, enter hub server name and add a comment that this is a connection to Domino users; for example: Receive from Domino
-
Leave the Intended use field as Custom
-
-
Accept the defaults. This will allow O365 to listen on all IP addresses assigned to it
-
Specify the IP address of the Domino Coexistence Server, but first delete the range and add the address
Be sure to check the IP address of the Domino Coexistence Server before specifying it.
-
Click Next to receive a summary of your receive connector setup
-
Click Next again
-
Click New to create the connector
-
Click Finish
-
The next step will be to configure the security and permissions for using this connector; right-click on the Receive from Domino connector that was just created and select Properties
-
Select the Authentication tab. Deselect Transport Layer Security (TLS) and select Externally Secured
-
Select the Permission Groups tab and select the following permission groups. These will be set for Domino connections
-
Select Apply
-
Click OK to save the receive connector security settings. This will complete the connector setup
If using PowerShell to create a new Receive Connector, from the Windows PowerShell console, execute the following Powershell commands:
|
PowerShell |
|
New-ReceiveConnector -Name 'Inbound from Domino' -Usage Custom -Bindings 0.0.0.0:25 -RemoteIPRanges <IP Address of Domino COEX servers (i.e. 10.1.1.1,10.1.1.2)> -PermissionGroups AnonymousUsers,ExchangeServers,ExchangeLegacyServers,Partners -AuthMechanism ExternalAuthoritative -LiveCredentialEnabled $False |
This concludes all the settings required for routing SMTP mail to and from the O365 environment with the Domino Coexistence server. If an on-premises Exchange server is not being configured, skip to the License Key section.
7.2 On-Premises Exchange
7.2 On-Premises Exchange
This section will cover namespace design, shared namespace, and configuring SMTP connectors in Exchange. Depending on the namespace or address book design you use, SMTP connectivity is configured differently, and has slightly different prerequisites. This section will focus strictly on Binary Tree’s best practices and most common scenarios for clients. In the real world, there may be slight differences to this configuration.
The following assumptions have been made about and applied to configuring BTCal in on-premises Exchange:
-
The person performing the configuration has access to the Exchange admin center and Exchange Management Shell
-
The account used to perform the configuration is a member of the Organization Management role group
-
Unless specifically described in this document, any default configuration values will be used
7.2.1 Create a New Remote Domain
Create a new Remote domain to define message transfer settings between Exchange and domains outside the internal Exchange organization.
|
|
It is advised to create a new remote domain, apart from the default "*", to allow for specific mail format parameters with domino SMTP while not disturbing internet mail formatting. |
A new Remote Domain can only be added via PowerShell. Within the Exchange admin center, there is no option to add a new Remote Domain.
From the Exchange Management Shell console, execute the following two PowerShell commands:
|
PowerShell |
|
New-RemoteDomain -Name domino.<CustomerSMTPDomain> -DomainName domino.<CustomerSMTPDomain> Set-RemoteDomain –Identity domino.<CustomerSMTPDomain>) -AllowedOOFType InternalLegacy -DeliveryReportEnabled $true –IsInternal $true –TrustedMailInboundEnabled $true -TrustMailOutboundEnabled $true -TNEFEnabled $false |
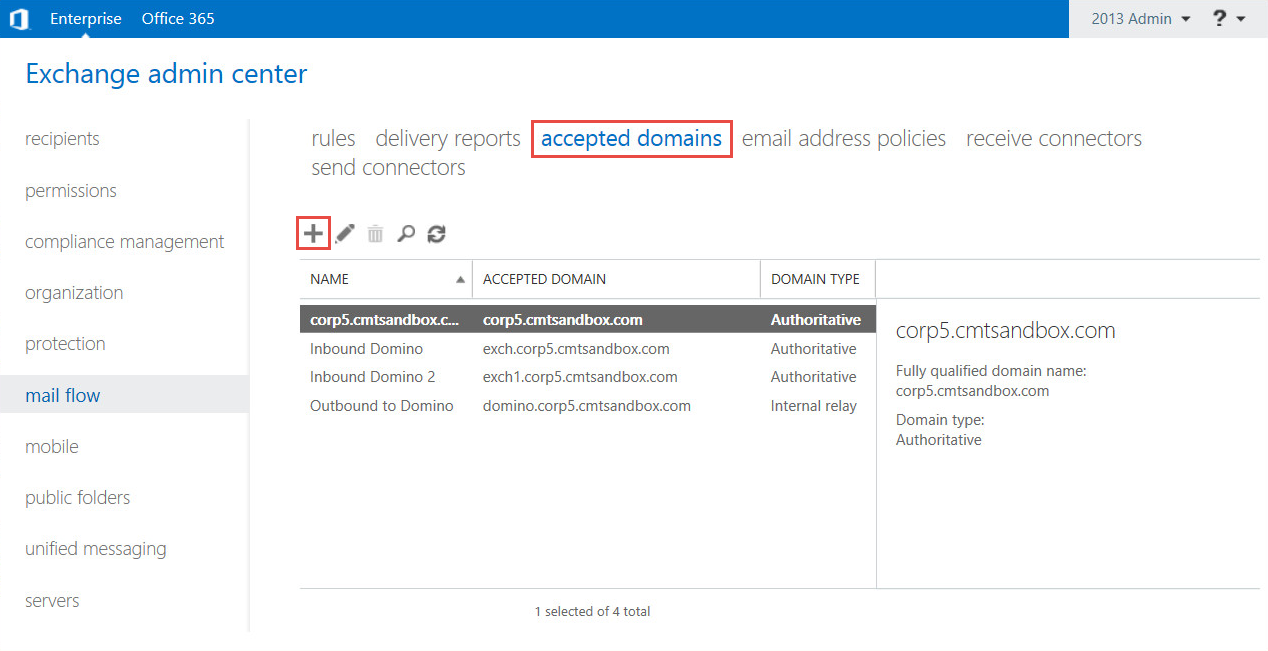
7.2.2 Create a New Accepted Domain
Accepted domains are the SMTP name spaces (also known as address spaces) configured in an Exchange organization to receive email messages.
To create a new Accepted domain, follow these steps:
-
Log into the Windows Coexistence Server, open Internet Explorer and navigate to the Exchange admin center
-
On the left-hand side of the Exchange admin center, click mail flow in the Navigation Pane
-
Click accepted domains
-
If the exch.contoso.com domain does not exist, the plus sign icon to add a new Accepted domain
-
In the Accepted Domain – Internet Explorer window that opens, fill out the form as follows:
|
Field Name |
Description |
Recommended Value |
|
Name |
Enter the other domain name here, with a comment that this represents Domino Users |
Ex: ”Exchange Sub-Domain (Inbound from Domino)” |
|
Accepted Domain |
Specify the domain name |
Ex: “exch.contoso.com” |

-
Click the Save button
The new accepted domain should now appear for incoming traffic from Domino that will be delivered to the new Exchange users. This accepted domain was set up to be authoritative for the domain. This domain will accept email addressed to the exch.contoso.com domain and deliver to Exchange users with a matching Proxy Address.
If using PowerShell to create a new Accepted Domain, from the Exchange Management Shell console, execute the Powershell commands shown below. Click New when complete.
|
PowerShell |
|
New-AcceptedDomain -DomainName exchange.<CustomerSMTPDomain> -DomainType Authoritative -Name exchange.<CustomerSMTPDomain> |
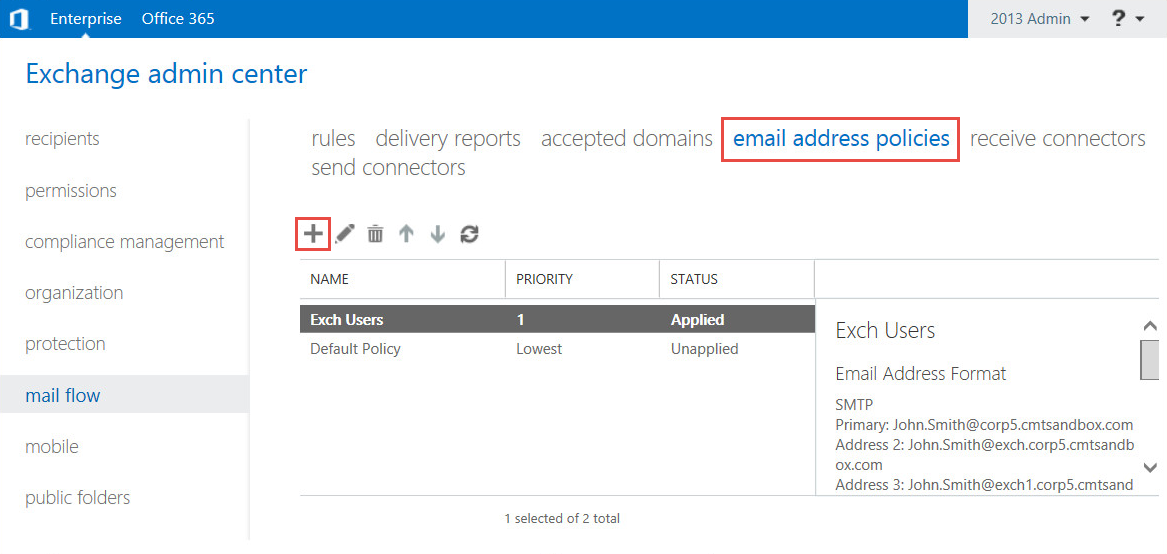
7.2.3 Email Address Policy
If using the Shared/Sub-domain namespace design, mailboxes in Exchange Server need to have an email address added in the Exchange domain. Rather than manually updating each user, an Email Address Policy can be created to perform this task.
-
Click email address policies
-
Click the plus sign to add a new email address policy
-
In the Email Address Policy – Internet Explorer window that opens, fill out the form as follows:
|
|
|
-
In the Policy name textbox, enter a name for the policy that is easy to recognize, e.g. “Exchange Users”
-
Under the Email address format heading, click the plus sign (+)
-
In the Email Address Format – Webpage Dialog window that opens, enter the recommended values as follows:
-
Select the Select an accepted domain radio button and choose the Accepted Domain that was created in the steps above; you do not need to specify a custom domain name for the email address
-
Select the alias@contoso.com radio button from the list of email address formats
-
Click the Save button
-
-
You will then be returned to the Email Address Policy – Internet Explorer window
-
Under the Run this policy in this sequence with other policies field, select 2 from the drop-down menu
-
Next, under the Specify the types of recipients this email address policy will apply to field, select the Only the following recipient types radio button and check the following boxes:
-
There is no need to click the add a rule button; leave as is
-
Click save


After applying immediately, a summary of the address policies to be created will be displayed. A green check mark displays when completed successfully.
The default address policies that will get stamped on each Exchange user as they are provisioned have successfully been created. The default address policies will ensure that proper namespace and aliases are created in Exchange for mail routing purposes.
If using PowerShell, execute the following commands to create a new email address policy:
|
PowerShell |
|
New-EmailAddressPolicy -Name "Exchange Users" -IncludedRecipients MailboxUsers,Resources,MailGroups -EnabledEmailAddressTemplates "smtp:%m@exch.btm.com","smtp:%m@exch.btm-lab.com","SMTP:%m@btm.com" Update-EmailAddressPolicy -Identity "Exchange Users" |
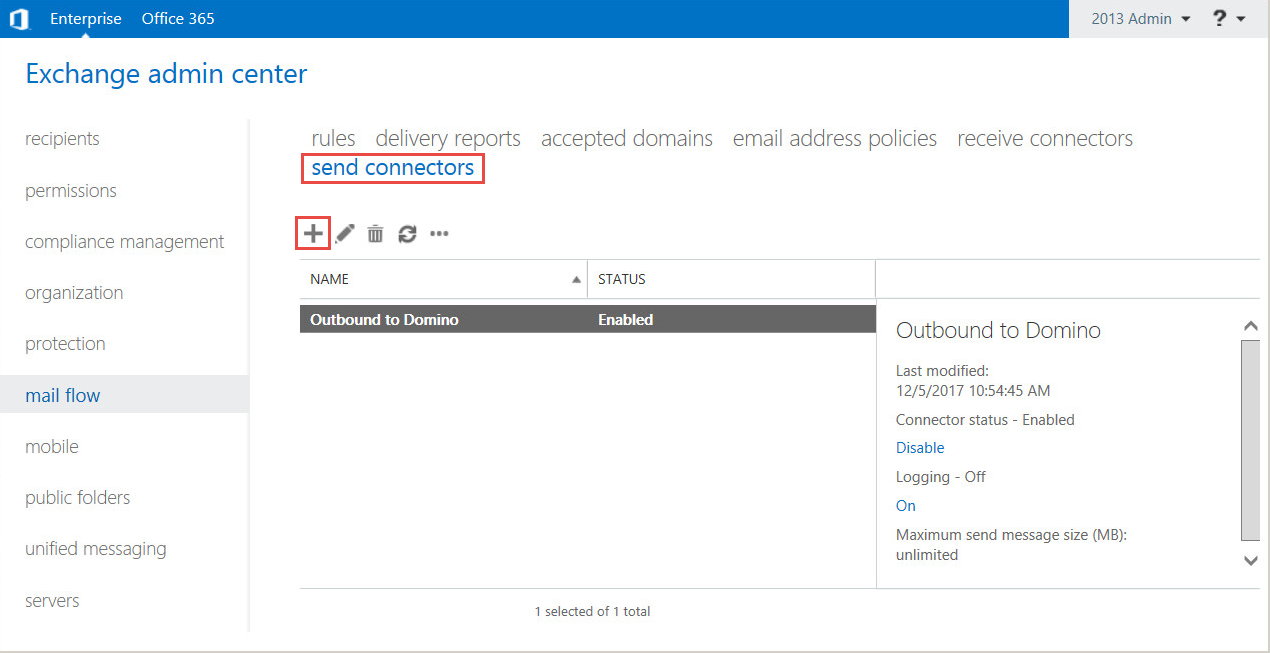
7.2.4 Create a Send Connector
Create and configure a send connector from Exchange to Domino. This connector defines the path to route mail that Exchange does not a have a mailbox for, which will be your Domino contacts.
|
|
This is one area in the coexistence process that can vary from customer to customer depending on what other type of routing they will be doing from Exchange, such as to internet or to other domains. |
-
Click send connectors
-
Click the plus sign (+) to add a new send connector
-
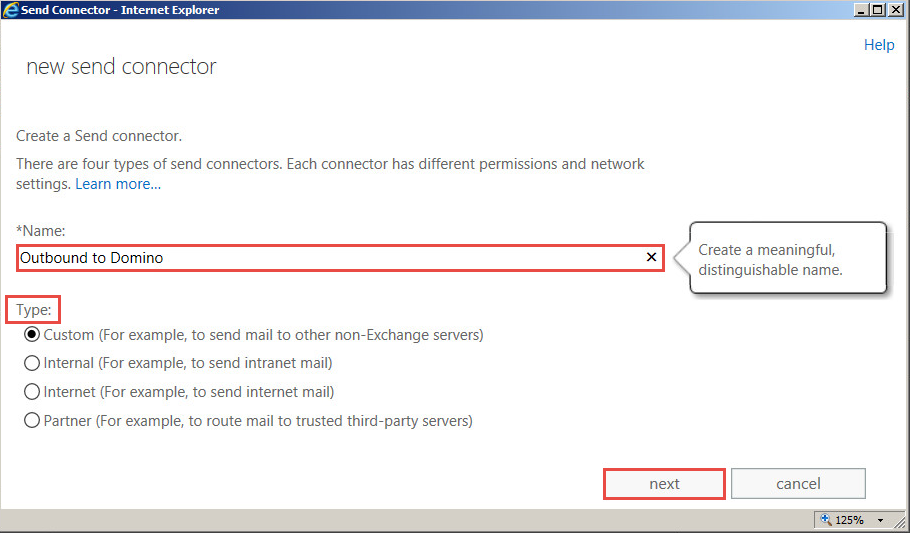
In the Send Connector – Internet Explorer window that opens, fill out the form as follows:
-
In the Name field, enter the “other” Domain name with a comment that represents a connection to Domino users (e.g. “Outbound to Domino”)
-
In the Type field, click the Custom radio button
-
-
Click next
-
Fill out the next form as follows:
-
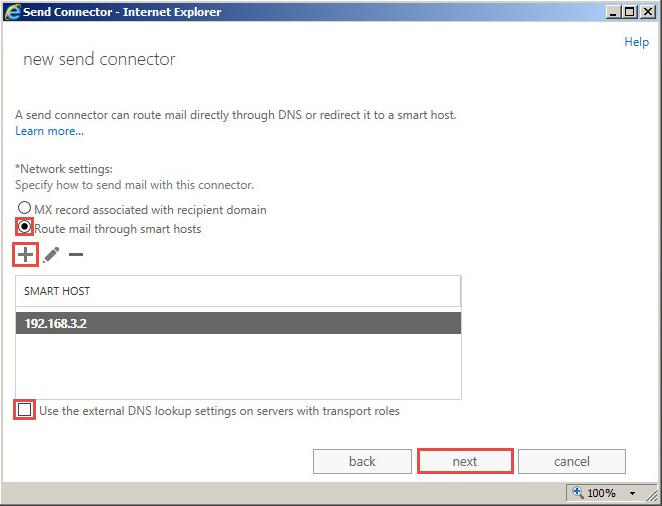
Under Network Settings, select the Route mail through smart hosts radio button
-
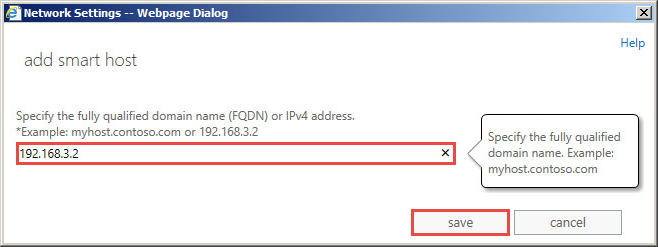
Click the plus sign (+) to add a Smart Host
-
In the Network Settings – Webpage Dialog box that appears, type the fully qualified domain name (FQDN) or IPv4 address (e.g. “myhost.constoso.com” or “192.168.3.2”)
-
Click save
-
Leave the Use the external DNS lookup settings on servers with transport roles checkbox unchecked
-
Click next
-
-
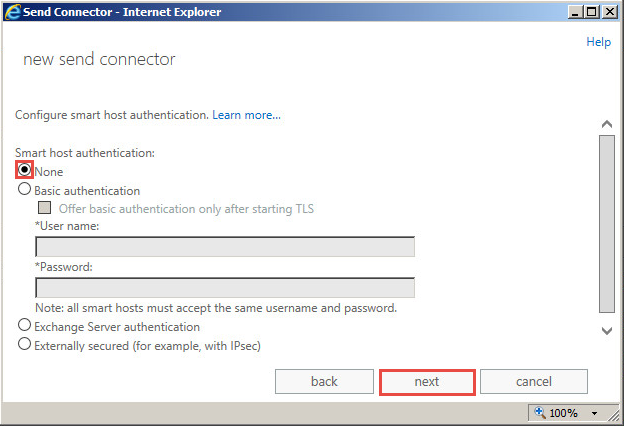
Fill out the Configure smart host authentication form as follows:
-
Under Smart host authentication, be sure that the None radio button is selected
-
Click next
-
-
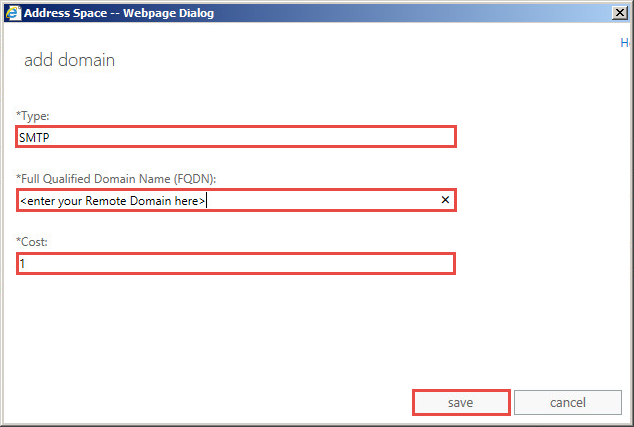
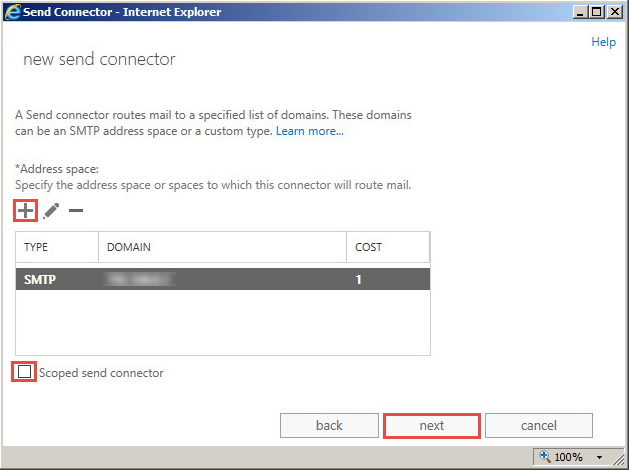
On the following screen, under Address Space, click the plus sign (+) and fill out the form as follows:
-
In the Type field, enter SMTP
-
In the Full Qualified Domain name (FQDN) field, enter the remote domain that you created earlier
-
In the Cost field, enter 1
-
Click save
-
-
Leave Scoped send connector unchecked
-
Click next
-
On the A send connector sends mail from a list of servers… screen, fill out the form as follows:
-
Under Source Server click the plus sign (+) and fill out the form as follows:
-
In the Select a Server – Internet Window, select the option with the Hub Transport role.
-
Click the add -> button
-
Click ok
-
-
Click Finish

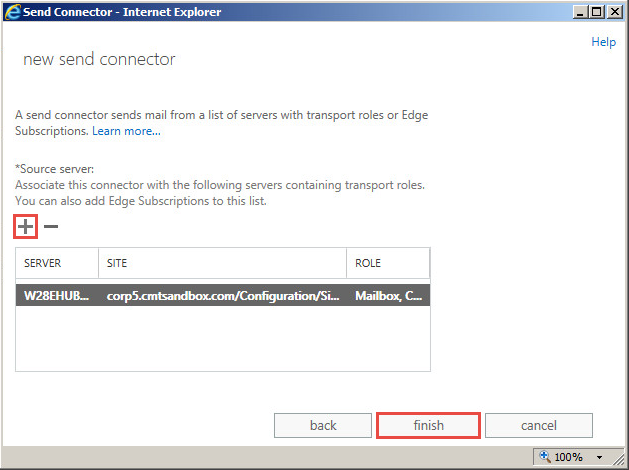
Now that the SMTP Send Connector has successfully been created, the Exchange server can connect to the Domino coexistence server and deliver SMTP mail to Domino users.
If using PowerShell to create a new Send Connector, from the Exchange Management Shell console, execute the following Powershell commands:
|
PowerShell |
|
New-SendConnector -Name ‘Outbound to Domino’ -Usage ‘Custom’ -AddressSpaces domino.<CustomerSMTPDomain>,domino.<CustomerSMTPDomain> -IsScopedConnector $false -DNSRoutingEnabled $false -SmartHosts <IP Address of Domino COEX servers (i.e. 10.1.1.1,10.1.1.2)> -SourceTransportServers BTM-Exch2016 |
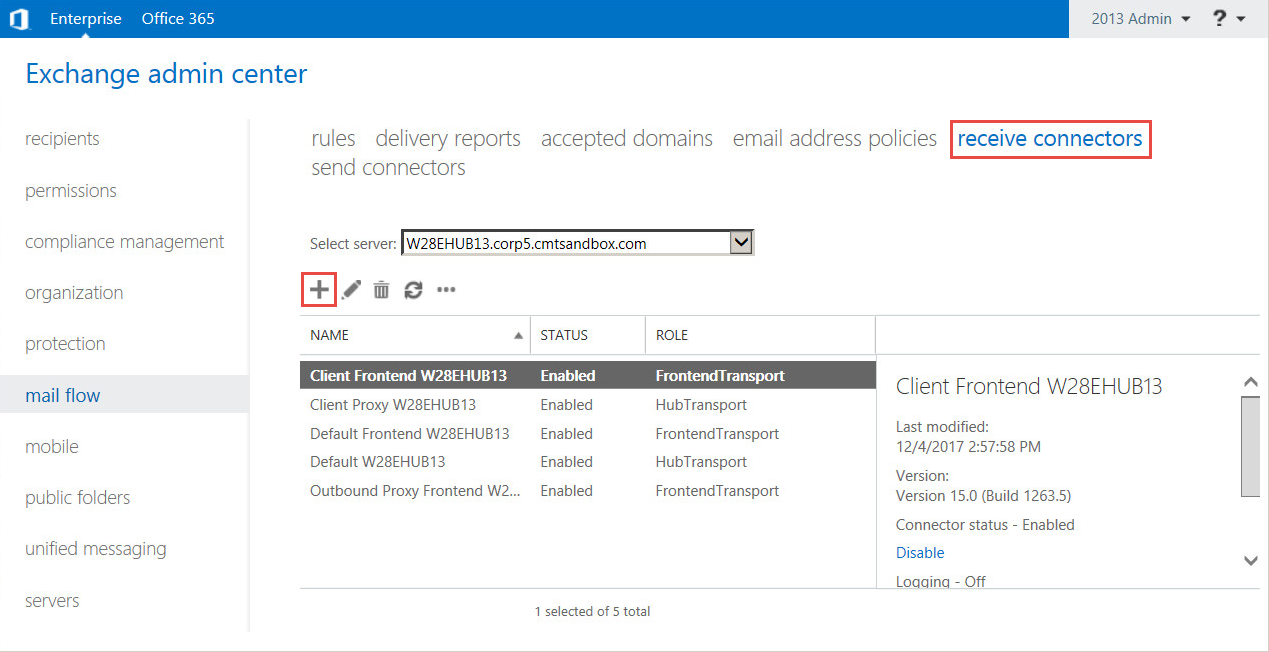
7.2.5 Create a Receive Connector
Create and configure the Receive Connector in the Exchange Management Console. A Receive Connector must be configured to allow messages from Domino to enter the Exchange Server 2007 environment.
-
Click receive connectors
-
In the Select server field dropdown menu, select your Hub Transport server
-
Click the plus sign (+) to add a new receive connector
-
In the This wizard will create a Receive connector window, fill out the form as follows:
-
In the Name field, enter a name with a comment that represents a connection to Domino users (e.g. “Inbound from Domino”)
-
The Server field will auto-populate; leave as is
-
Under Role, click the Hub Transport radio button
-
Under Type, click the Custom radio button
-
Click next
-
-
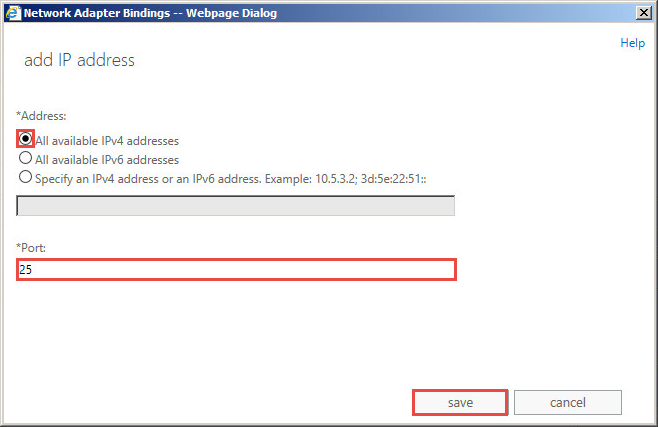
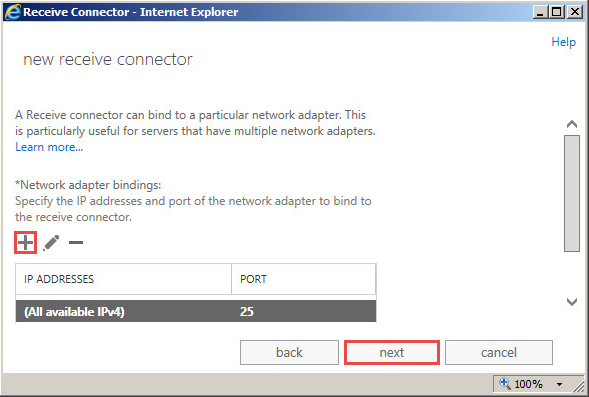
Under Network adapter bindings, click the plus sign (+) and fill out the form as follows:
-
Under Address, click the All available IPv4 addresses radio button
-
Under Port, enter 25 in the text box
-
Click save
-
-
Click next
-
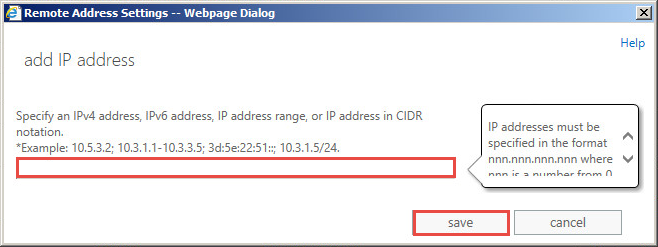
In the A receive connector can accept mail… window, under Remote network settings, click the plus sign (+)
-
In the Remote Address Settings – Webpage Dialog window, you have the option to add a Domino Coexistence Server IP address, otherwise just click save
-
Click save
-
-
Click finish
-
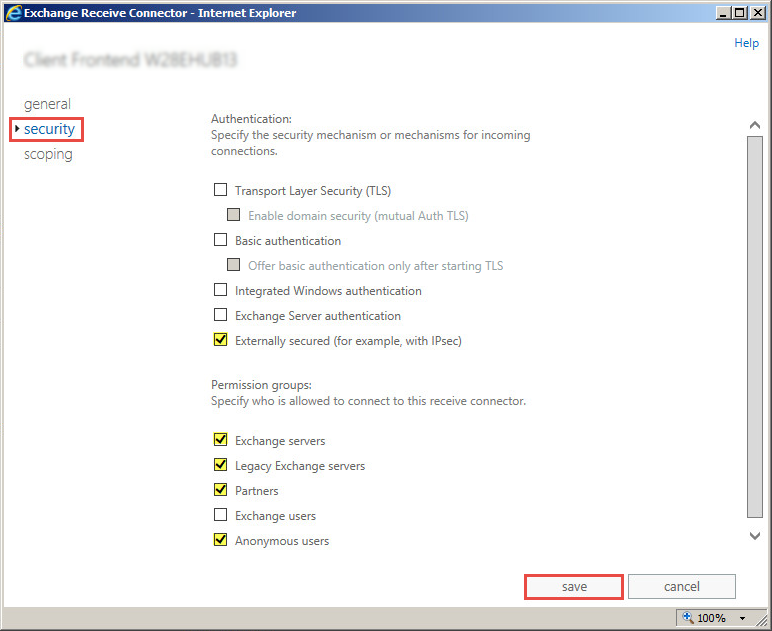
Once the receive connector has been created, reopen/edit it by selecting the receive connector and clicking the edit
icon. In the window that appears, do the following:
-
Click security
-
Make sure External secured (for example, with IPsec) is checked
-
Under Permission groups, check:
-
Exchange servers
-
Legacy Exchange servers
-
Partners
-
Anonymous users
-
-


-
Click save
This concludes all the settings required for routing SMTP mail to and from the Exchange server environment to the Domino Coexistence server. The next step is to set up the Domino SMTP settings.
If using PowerShell to create a new Receive Connector, from the Exchange Management Shell console, execute the following Powershell commands:
|
PowerShell |
|
New-ReceiveConnector -Name 'Inbound from Domino' -Usage Custom -Bindings 0.0.0.0:25 -RemoteIPRanges <IP Address of Domino COEX servers>(ie 10.1.1.1,10.1.1.2) -PermissionGroups AnonymousUsers,ExchangeServers,ExchangeLegacyServers,Partners -AuthMechanism ExternalAuthoritative -LiveCredentialEnabled $False |
Section 8: Licenses
Three types of licenses for BTCal are offered: a fully functional, but expiring, trial license; a full standard license; a standard license with ZApp support. When a trial license expires, the product shuts down and stops working. A standard license (with or without ZApp), however, includes software assurance which allows you to upgrade to any versions of BTCal that become available while the license is valid. When the license expires, BTCal will continue working, but you will need to purchase a new license to upgrade to any new versions.
To apply a license:
-
Copy the license file to the Domino server.
-
Use the following command on the Domino console:
-
tell btcal install license <full path to license file>
-
|
|
BTCal should be installed and configured with the BTPROCESSDOMAIN Notes.ini value prior to applying a license. |
Additional details about each license type can be found below:
-
A trial license – Expires in 30 days; when a trial license expires, BTCal will shut down and no longer function
-
A regular/standard license – Expires after a set time after license creation; license “timer” starts on the date the license is generated rather than the purchased date;
-
A regular license which includes support for ZApp – Expires after a set time after generation (set by Quest). When a regular license expires, BTCal will continue to operate normally, and ZApp (if licensed) will remain enabled.
If a license will expire, license expiration warnings will be shown on the Domino console and will be emailed to the BTCal administrator (configured during BTCal installation) at the following intervals: 90/30/3/2/1 days left before expiration.