
-
Title
How to export and import StoragePoint Configuration Elements -
Description
How can I export and import StoragePoint Configuration Elements? -
Cause
Below are two main scenarios the StoragePoint Import/Export Tool are designed to support:
The "Promotion" Use Case
The first scenario involves following the best-practice of working with a staging or QA SharePoint environment before pushing a project into production. StoragePoint works well in this scenario with the use of a trial and/or our "non-prod" licensing.
The snag most users run into is when time comes to "promote" the solution into production. Without tooling specifically for this need, the only way to do this is to manually reproduce the StoragePoint settings from QA in the production farm. Using the Export/Import tool, you can instead export the elements of a QA configuration to a file. Then, take the tool and the file to the production system and use them to selectively import elements that were defined in QA.The "Cloning" Use Case
The second scenario that users encounter is the desire to take a "back-up" of some portion of the production farm that contains externalized content and restore it into an existing QA system that has "diverged" from and is not an exact replica of production.
The general solution for "cloning" in this direction without additional tooling is to make a copy of the external content, restore the entire StoragePoint database from production into QA along with the desired content database and point the configuration to the copied data. In this case, existing QA StoragePoint configuration information would be over-written. This can be undesirable, particularly if QA already has externalized content with a StoragePoint configuration that differs from production.
Using the Export/Import tool, you can instead export the production farm configuration, take the tool and the exported file to the QA farm and selectively import only the configuration elements from production. -
Resolution
Planning for Export/Import
Supported StoragePoint configuration elements currently include Profiles, EndPoints and Settings. The Profile generally may be defined at several scopes with ContentDb being the most common. This choice makes it easy to move external content from one farm to another without pulling it back into any database or back-up set. To do this, you will need the following items:
- Database back-up
- Blob-Store back-up
- StoragePoint Configuration Import/Export tool (Optional)
It is a best practice to run the Content Queue Migration job on the source farm just prior to taking any Content DB back-up that will accompany the exported configuration. In this way, you can minimize the chances that any content from the System Cache of the source farm will be needed on the destination.
Note: If you have previously imported the Profile from the source farm to the target farm, then it is generally not necessary to use the StoragePoint Configuration Import/Export tool again.Using the Tool
The tool must be run from a WFE or other SharePoint farm member server. It launches to the following screen where you must click either "Export" or "Import." After that, you simply enter a file location for the configuration data.
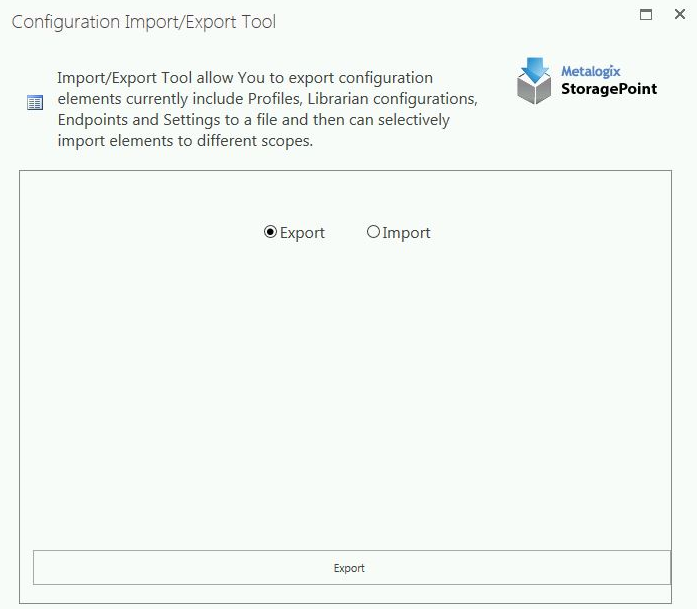
Export
When the tool is launched on a machine in a SharePoint farm, it finds and connects to the current farm. This allows it to find the associated StoragePoint configuration database automatically. When you click "Export", it will quickly gather all available Profiles, EndPoints and Settings placing them into the file you specified for the configuration data. Generally, this results in a small XML file (though you can use whatever extension you wish).
Once the file has been generated, you can exit the program. Take the generated file and a copy of the tool to the target farm and proceed with the instructions in the following "Import" section of this article.Import
When the tool is launched on a machine in a SharePoint farm, it finds and connects to the current farm. This allows it to find the associated StoragePoint configuration database automatically.
To conduct an Import, click the "Import" option at the top and browse for your previously exported configuration. After selecting a valid configuration file, click "Import" at the bottom and the tool will load all available Profiles, EndPoints and Settings from that file.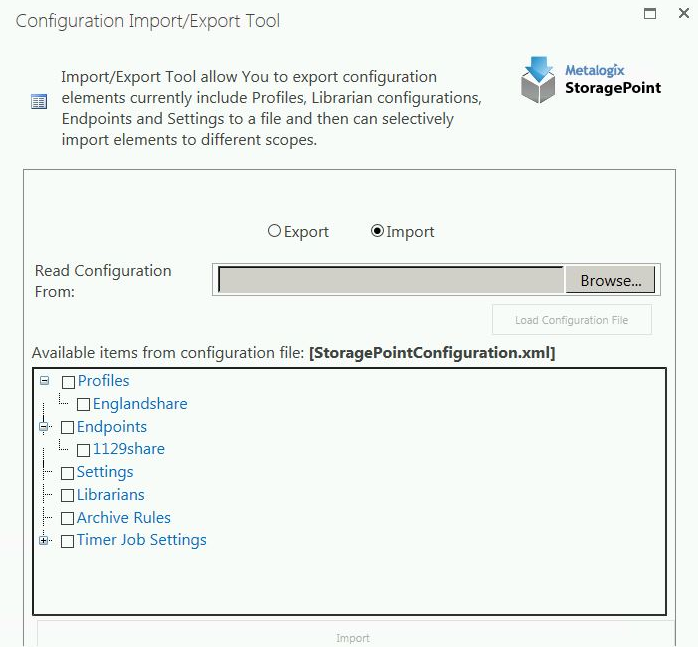
The following dialog will be displayed. In this form, the configuration elements that may be imported into the current farm are listed in a tree-view with check-marks. Place a check on each item you wish to import and click "OK" to begin the Import.
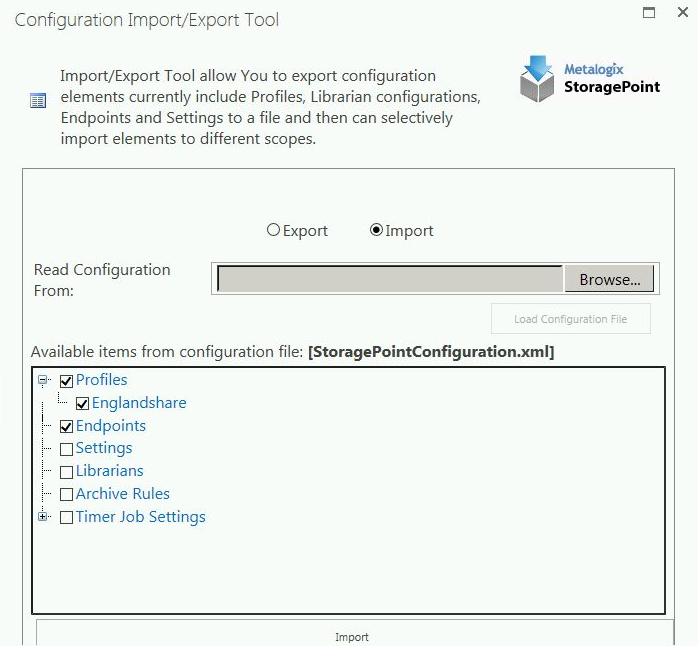
Hints:
- Selecting at the top level will select all items below it.
- Selecting a profile also automatically selects all of the endpoints that it uses.
- Artifacts that already exist in the target farm will not be listed for selection.
When the import is completed successfully, you will see the following message:
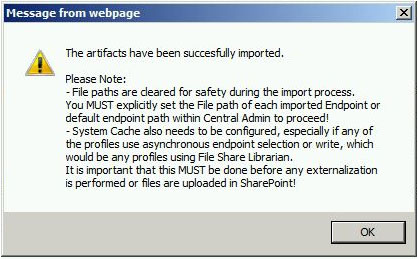
Hint: If you imported a profile or endpoint, please open Central Administration to correctly set the path(s) to point to the file share copy/back-up that you made previously.
Warning: DO NOT USE THE SAME FILE SHARE FOR MORE THAN ONE FARM! This is not a supported configuration.
Click OK to dismiss the dialog and then you are done with the tool. You may close the program or click "Import" again if you want to import more configuration artifacts.