
-
Title
Adding groups and users to Metalogix Archive Manager Exchange Edition -
Description
New groups or mailboxes need to be setup in Metalogix Archive Manager Exchange Edition -
Cause
N/A -
Resolution
A video is available which discusses this topic in detail. To view the video click here: https://metalogix-academy.wistia.com/medias/hi9ujroqqg
There are two types of groups within Archive Manager. Active Directory groups can be security groups or distribution lists. They can be synced through the automatic synchronization setting in the Address Book Manager. The other option for groups in the product is user defined (manual) groups. They are defined and fully managed in Archive Manager, but not within Active Directory. They are ideal for small groups, journal mailboxes or test groups.
How to set up a user-defined group
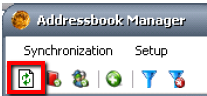
- Launch Enterprise Manager and click Tools > Address Book Manager, or click the Address Book Manager icon on the tool bar.

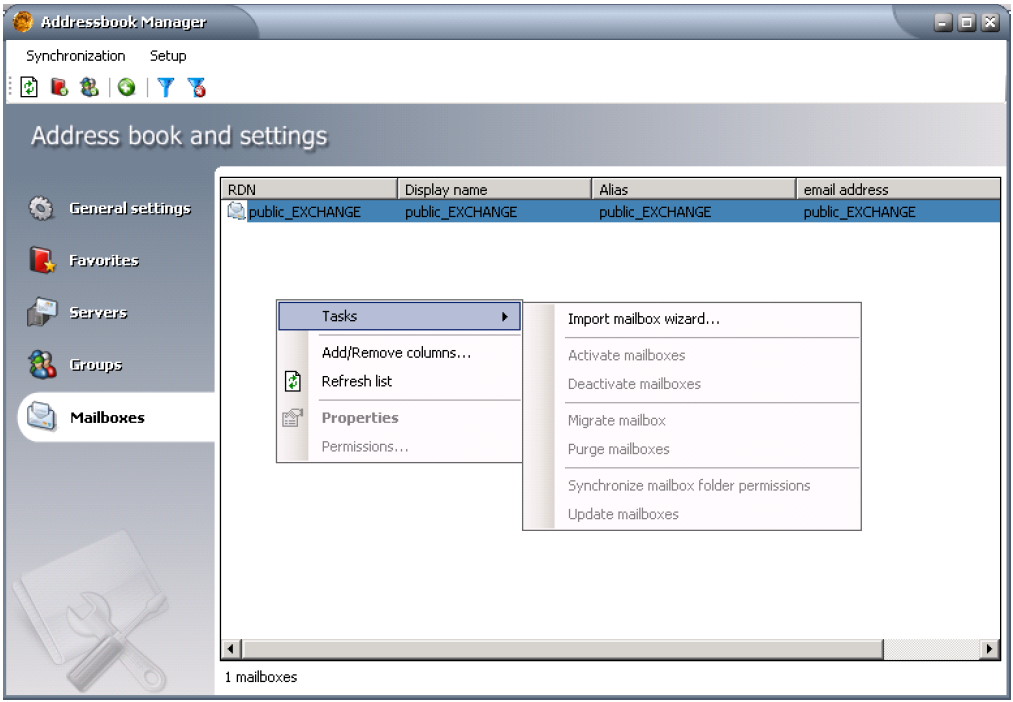
- Before creating the user defined group, you will need to add a user to Archive Manager. On the Address Book Manager window, click the Mailboxes tab, right-click on the main panel and select Tasks > Import mailbox wizard.
- On the Import mailbox wizard, choose from the 3 options to import users.
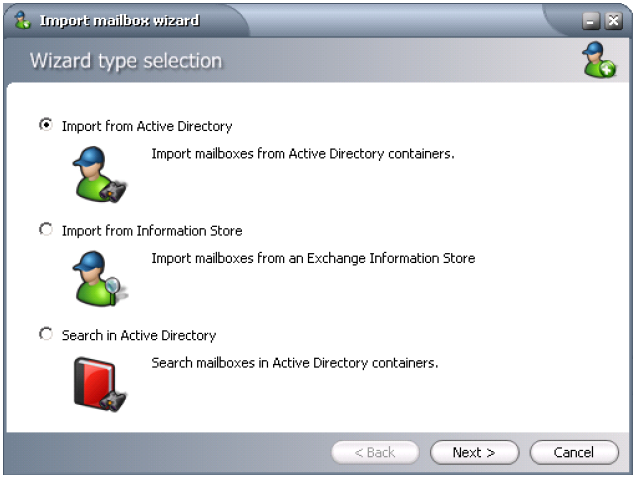
- Import from Active directory
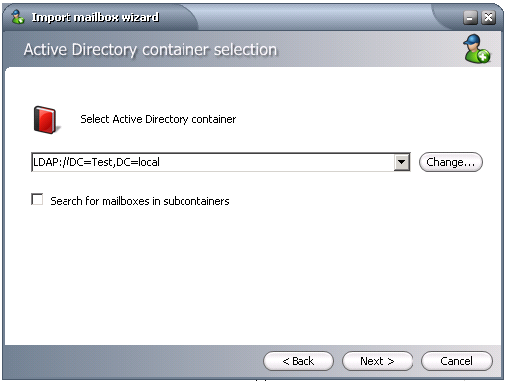
After selecting the option, enter the LDAP string for an organizational unit (OU) from the Active Directory or click the Change button to browse the Active Directory. There is also a checkbox to allow it to add all the users in the sub-organizational units. Then, click Next.
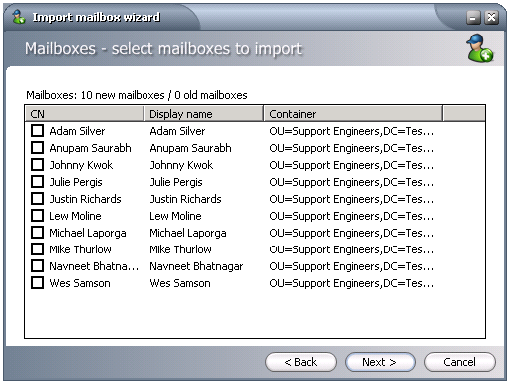
Select user/s with mailboxes in the OU, then click Next.
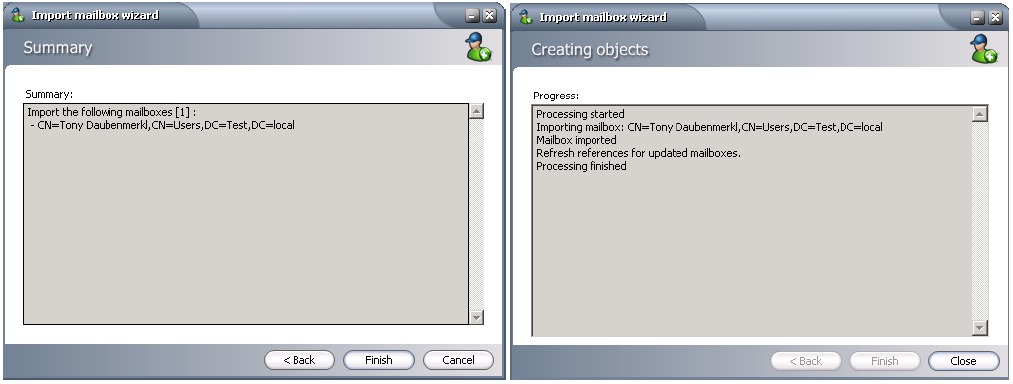
On the Summary screen of the wizard, click Finish to add the users to Archive Manager, then click Close.
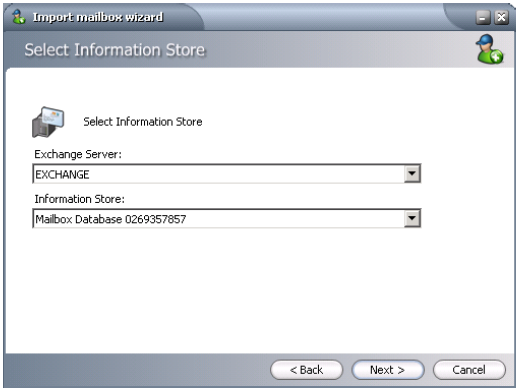
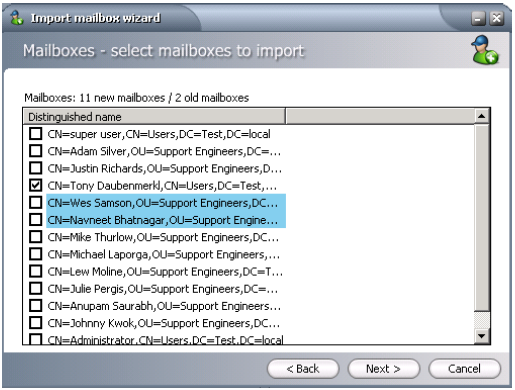
- Import from Information Store
After selecting the option, select the Exchange server where the Information Store is located and the Information Store to use, then click Next.
Select the mailboxes to add, then click Next.
On the Summary screen of the wizard, click Finish to add the users to Archive Manager, then click Close.
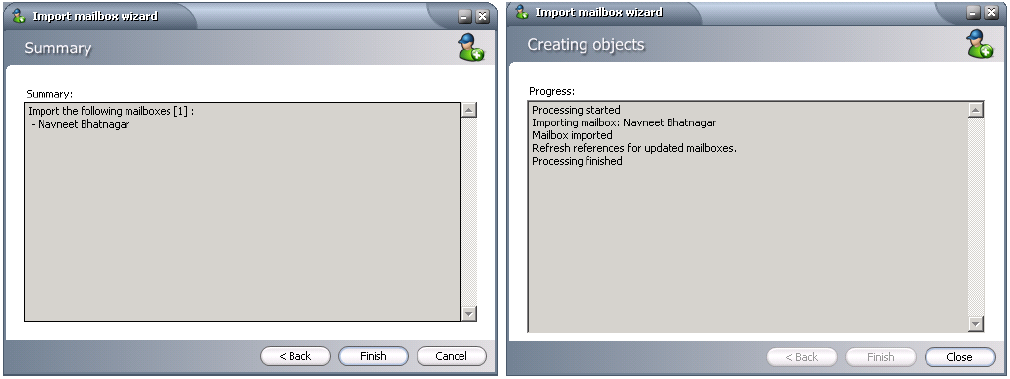
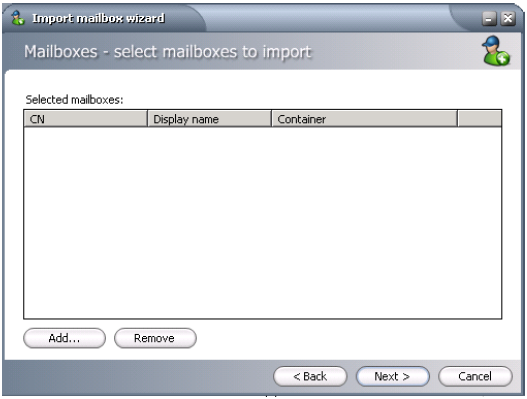
- Search in Active Directory
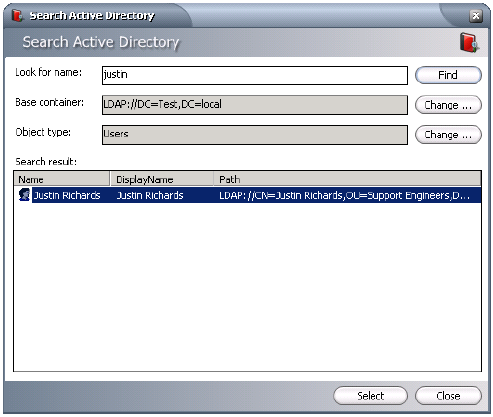
After selecting the option, click Add, enter the name of a user with a mailbox, then click Find.
Once the mailbox is found, select it from the results list and click Select.
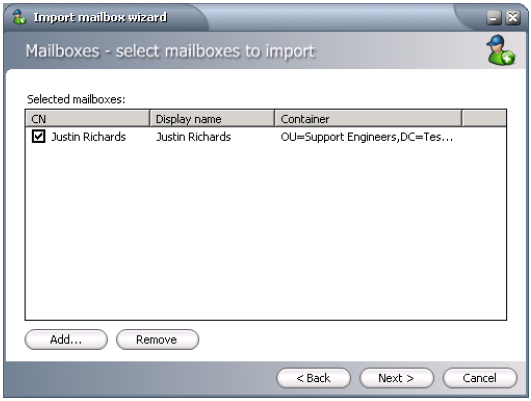
After selecting all users to be added to Archive Manager, click Next.
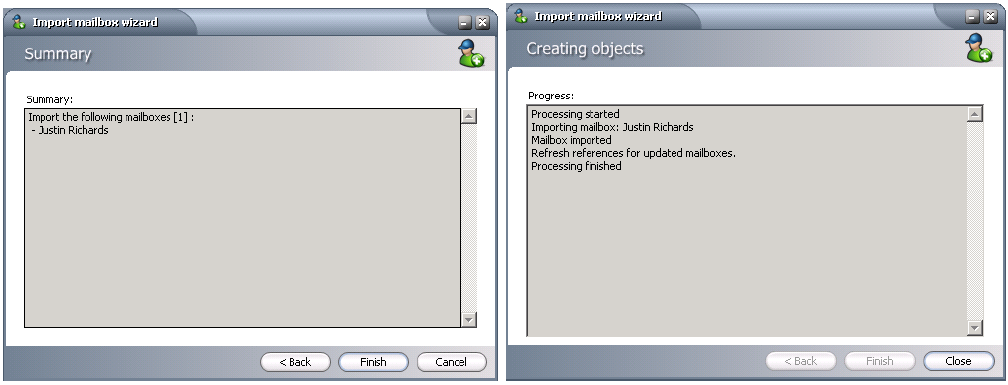
On the Summary screen of the wizard, click Finish to add the users to Archive Manager, then click Close.
- Import from Active directory
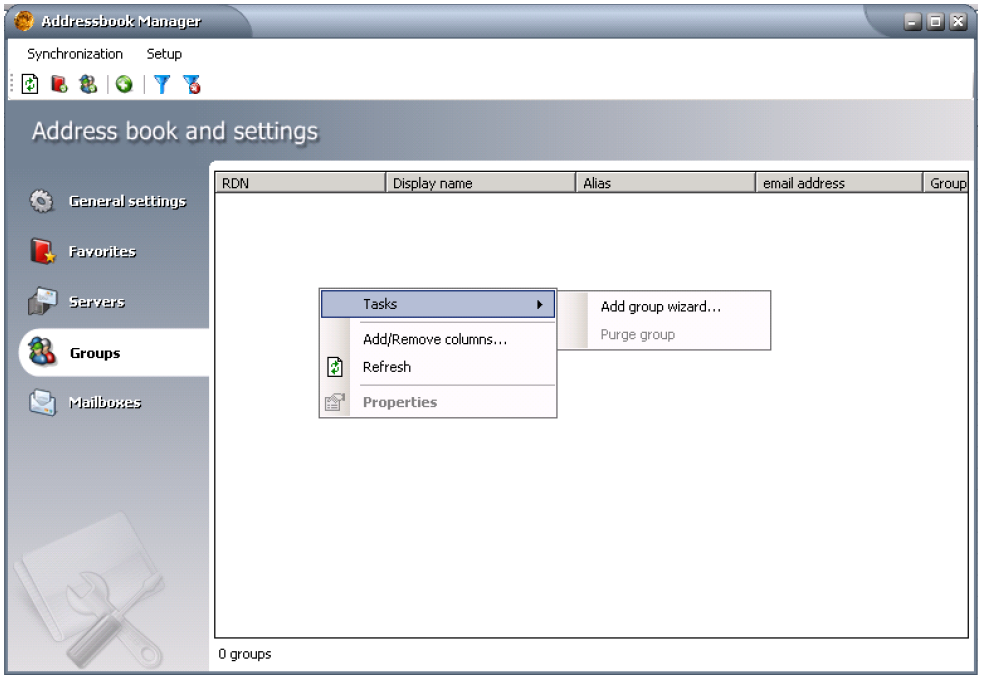
- On the Address Book Manager window, click the Groups tab, right-click on the main panel and select Tasks > Add group wizard.
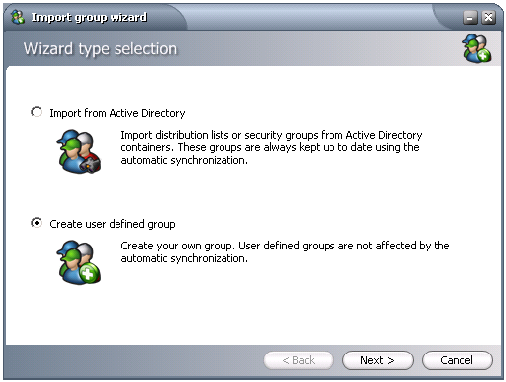
- On the Import group wizard, select Create user defined group, then click Next.
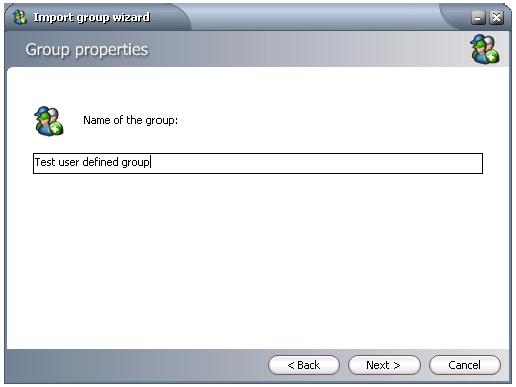
- Enter the name of the group (e.g. Test user defined group), then click Next.
- Click Finish to create the group and Close to go back to Address Book Manager.
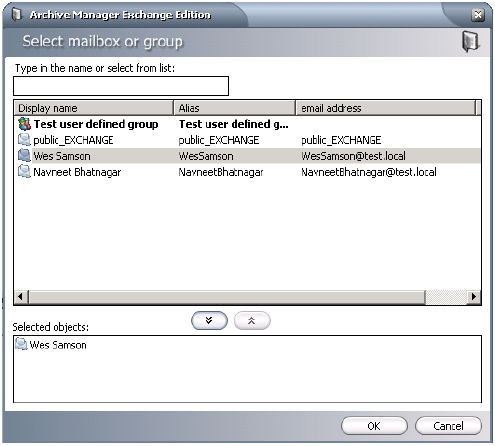
- All user defined groups will be highlighted with teal color in the Groups tab of the Address Book Manager. To add and remove users from the group, right-click on the group and select Properties. On the Members tab of the group properties window, click Add.
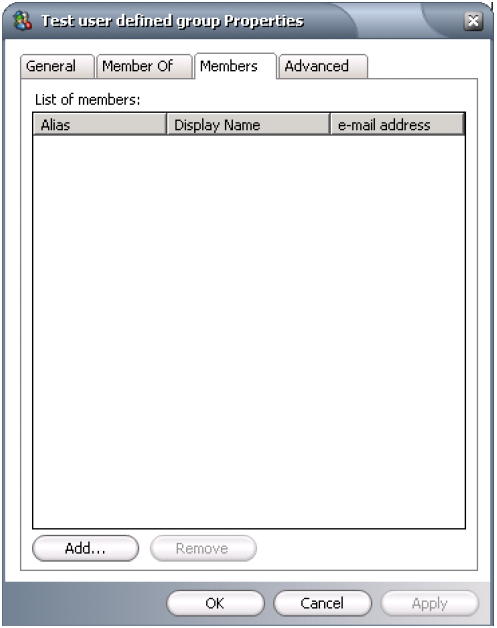
- Select the user or group mailboxes from the list and click the button with two downward arrows, then click OK to add them and to close the group properties window. NOTE: You are able to create nested groups, if needed.
How to set up an Active Directory group
- Log in to a domain controller with any account that has domain administrator permission. If you do not have a group created in the Active Directory, go ahead and create one. Please make sure to note what organizational unit (OU) the group is in because it will be needed later on in the process.
- Launch Enterprise Manager and open the Address Book Manager.
- On the Groups tab, right-click on the main panel, select Tasks > Add group wizard.

- Select Import from Active Directory, then click Next.
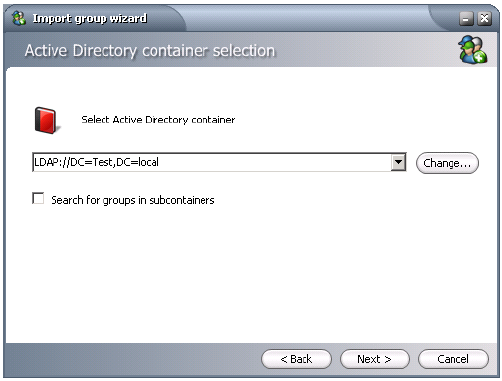
- Enter the LDAP string for an organizational unit (OU) from the Active Directory or click the Change button to browse the Active Directory. There is also a checkbox to allow it to add all the groups in the sub-organizational units. Then, click Next.
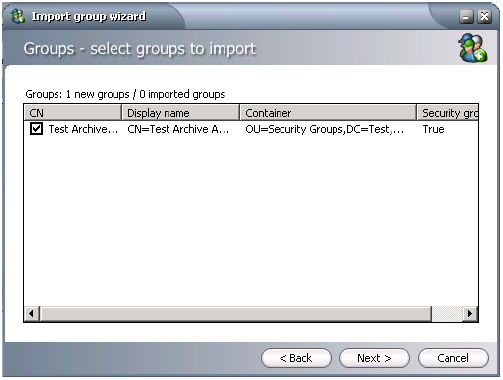
- Select group/s with mailboxes in the OU, then click Next.
- Select from any of the 3 options in the Group settings section of the wizard, then click Next.
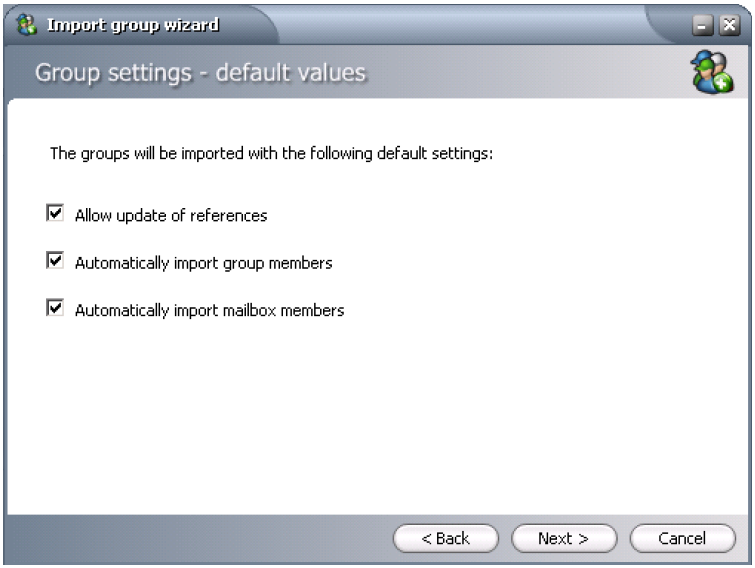
- Allow update of references option allows the group member objects to be updated when automatic synchronization runs
- Automatically import group members option allows new users and nested groups to be automatically added to Archive Manager when they are added to the Active Directory and the automatic synchronization runs
- Automatically import mailbox members option allows only mailboxes in the group to automatically be added when the automatic synchronization runs, but will not pick up any groups nested within the Active Directory group
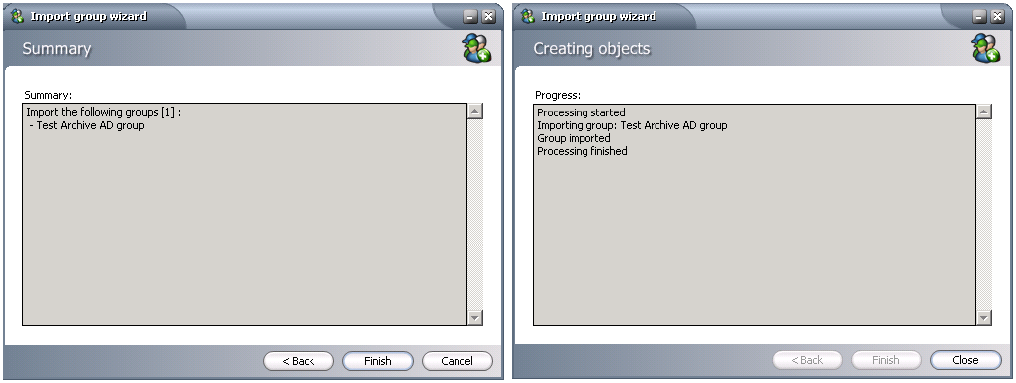
- On the Summary screen of the wizard, click Finish to add the group to Archive Manager, then click Close.
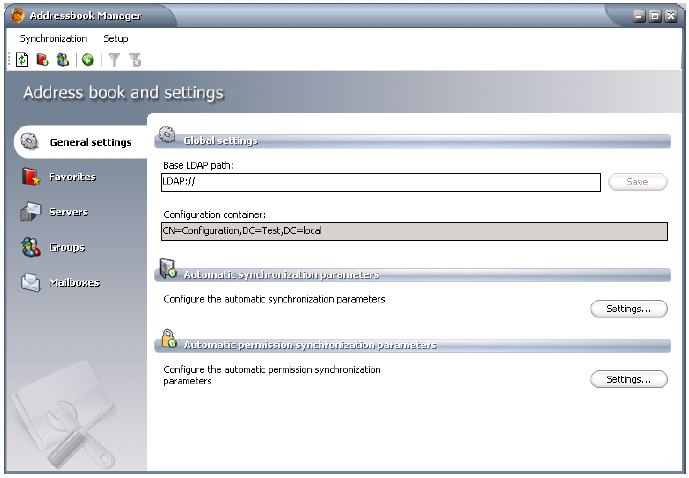
- Automatic synchronization has to be set up to allow the Active Directory group changes to be imported into the Address Book Manager. To do this, open Address Book Manager, click the General Settings tab and click the Settings button under the Automatic synchronization parameters section.
- The Addressbook synchronization options window will be displayed with the tabs below. Configure them accordingly, then click Apply > OK.
- Update rules
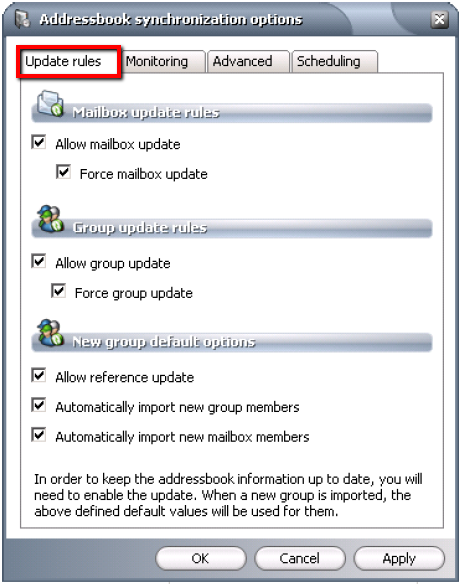
The Update rules tab allows you to choose what is synchronized.
Allow mailbox update option updates the mailbox with any changes from the Active Directory.
Force mailbox update option forces the mailbox update regardless of the modification date.
Allow group update option updates any changes made to the group object.
Force group update option forces the group update regardless of the modification date.
All of the settings under the New group default options are the same as the group setting when you add a group from the Active Directory, but these apply for when you are adding new groups from the organizational units that you monitor with the Monitoring tab. - Monitoring
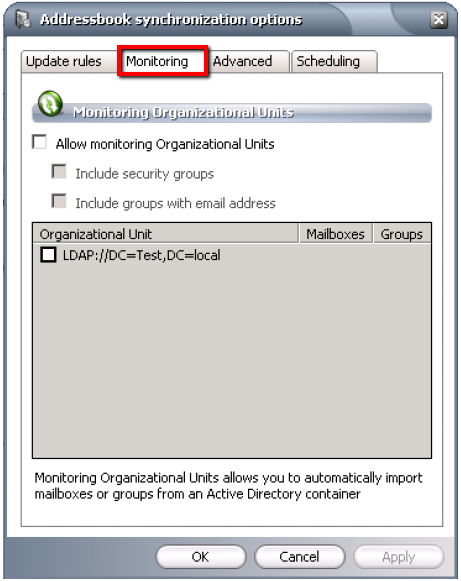
The Monitoring tab allows you to automatically add groups from organizational units that have been set in the Favorites tab of the Address Book Manager. To turn this on, check the box next to Allow monitoring Organizational Units. If Include security groups option is enabled, it will add all security groups in the organizational units. If Include groups with email address option is enabled, it will add all distribution groups.
- Advanced
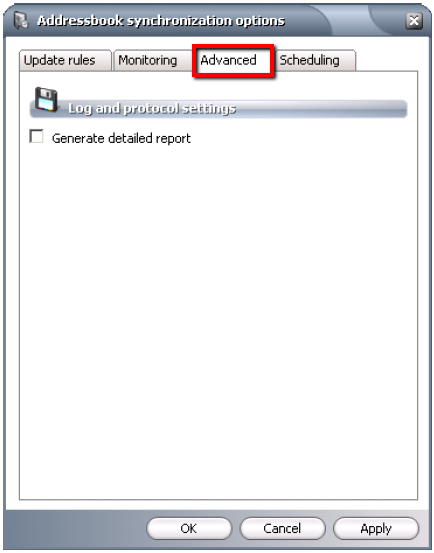
The Advanced tab only has one option (Generate detailed report). If enabled, it will provide more detailed logs whenever the automatic synchronization runs and they will be stored in the installation directory under the logs folder.
- Scheduling
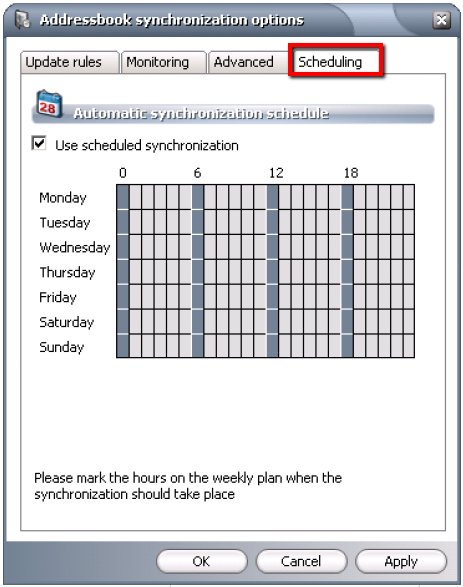
The final tab is the Scheduling tab. The automatic synchronization can be scheduled by clicking the boxes in the grid. It's recommended to run it every 6 hours.
- Update rules
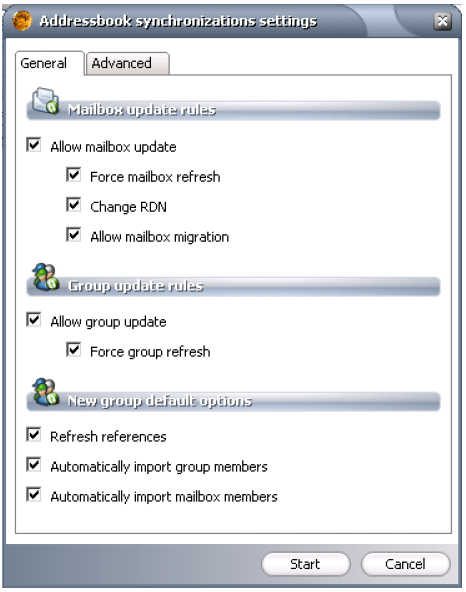
- If you do not want to wait for the automatic synchronization, click the Synchronize All button in the AddressBook Manager window.

- The Addessbook synchronization wizard will appear again with settings similar to the automatic synchronization. After selecting the applicable setting, click Start.
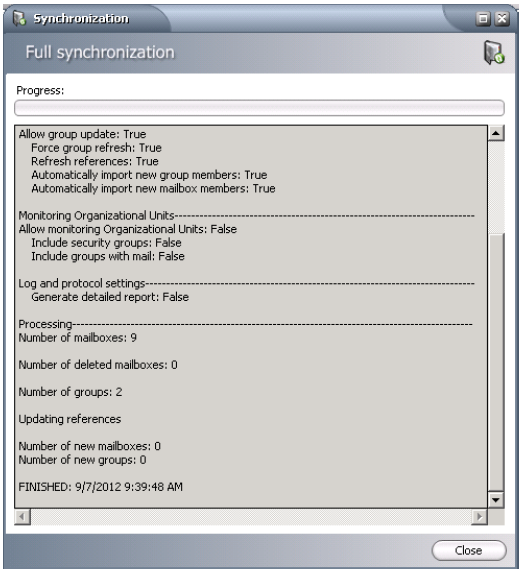
- An output similar to the one below will be displayed when the synchronization runs. When it's completed, click Close.
- Click the Refresh button. It should refresh the information from the SQL server and show all the users from the group along with any other mailboxes that have been added to Archive Manager.
- Launch Enterprise Manager and click Tools > Address Book Manager, or click the Address Book Manager icon on the tool bar.