In Toad Data Modeler you can access Application Settings via ApplicationConfig class:
function main(){
var App = System.GetInterface("Application");
var Log = System.CreateObject("Log");
var Model = App.Models.GetObject(0);
Log.Information(App.ApplicationConfig.PackagePath);
}
If you need to find out the path to the folder where your model is stored, use the property FilePath of the Model object (PERModel class):
function main(){
var App = System.GetInterface("Application");
var Log = System.CreateObject("Log");
var Model = App.Models.GetObject(0);
Log.Information(Model.FilePath);
}
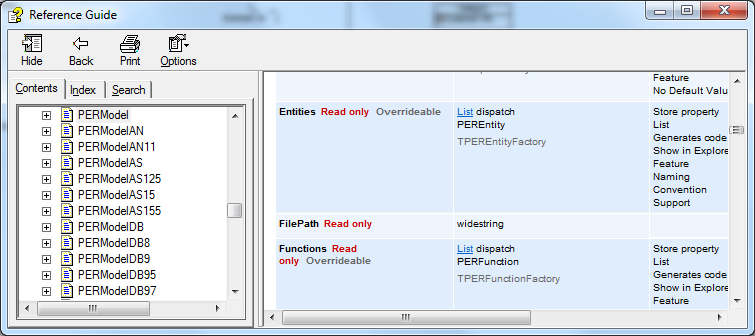
More information can be found in Reference Guide (in Expert Mode main menu, Expert Mode has to be enabled first).
This sample shows you how to iterate entities and attributes and how to recognize PK, PFK or FK attributes.
function main()
{
var app = System.GetInterface('Application');
var Model = app.Models.GetObject(0); // gets first model in application
var e, a, iterEntity, iterAttribute;
Model.Lock();
for (e=0; e<Model.Entities.Count; e++) // iterate entities
{
iterEntity = Model.Entities.GetObject(e);
iterEntity.Lock();
for (a=0; a<iterEntity.Attributes.Count; a++) // iterate attributes
{
iterAttribute = iterEntity.Attributes.GetObject(a);
if(iterAttribute.IsPrimaryKey == 1) // check if attribute is PK
{
if(iterAttribute.FKForeignKeys.Count !=0)
Log.Information(iterEntity.Name+'-'+iterAttribute.Name+'-PFK');
else
Log.Information(iterEntity.Name+'-'+iterAttribute.Name+'-PK');
}
else
{
if(iterAttribute.FKForeignKeys.Count !=0)
Log.Information(iterEntity.Name+'-'+iterAttribute.Name+'-FK');
}
}
iterEntity.UnLock();
}
Model.UnLock();
Model.RefreshModel();
}
Edit the Model Properties form. See the "Modify Form" topic to find out how to edit existing form.
Add there a new button and remember the name of the form - FmPERModelEdit. The name can be found in the Form Explorer.
Defined caption for the button - Write Customer Feedback To Log.
Set the name of the button to FeedbackButton.
Create a new script with the name of the Model Properties form - FmPERModelEdit.
Write event function to the script.
Code
function FeedbackButtonOnClick()
{
WriteFeedbackToLog.WriteFeedback()
}
Explanation
- FeedbackButton = name of the button.
- OnClick = event.
- WriteFeedbackToLog = name of script that contains called function.
- WriteFeedback = called function.
When you click the button, an output will be displayed in Message Explorer (Log).
For more information, see Modify HTML Reports.
To modify HTML reports, we need to extend existing method. The first thing we need to do is to find out what script should be extended.
In Script Explorer, you can see BasicHTMLPERReportOR script with function ReportTableUserProperties. This is the script that generates Tables pages in HTML reports, specifically the section Table Properties.
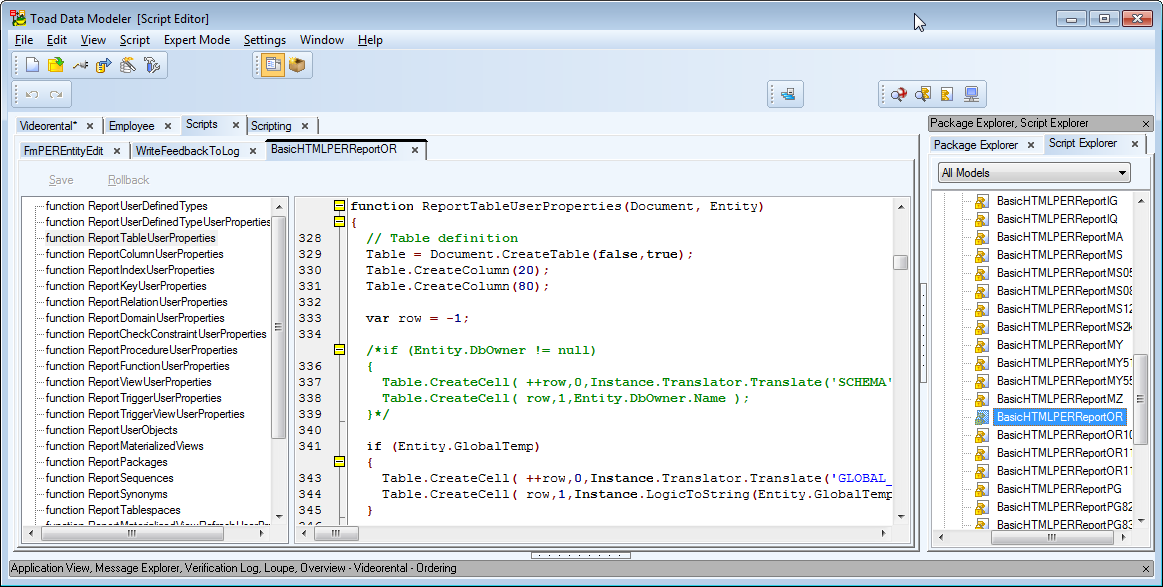
You can also see script BasicHTMLPERReportOR10 that extends the BasicHTMLPERReportOR script.
Now we now need to write a script that will extend the ReportTableUserProperties function defined in the BasicHTMLPERReportOR script.
For that purpose, we need to open our CustomerFeedback metamodel and the method there.
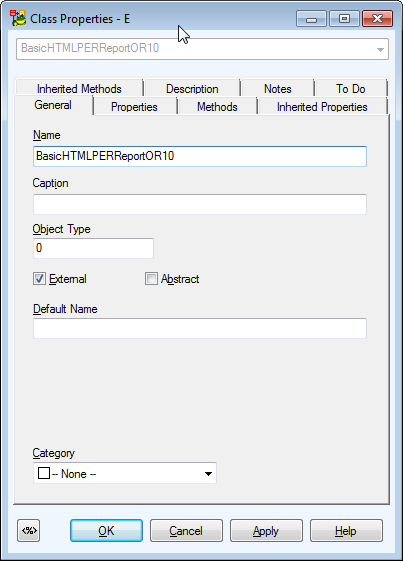
Open the CustomerFeedback metamodel, add there a new class (see the Class icon in the toolbar), edit the class and set the name to BasicHTMLPERReportOR10. (One extension of that class already exists, in our metamodel we will create another extension of the class).
Define Object Type (the value can be currently found out in metamodel to HTML report for Oracle 10g package).
Add the ReportTableUserProperties method to the class.
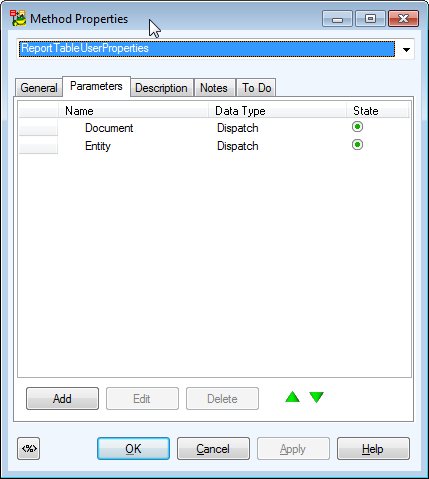
Add two new parameters to the method. (The method name and number of parameters must be identical to the original method - see the first screenshot).
Return back to the General tab. Click Reload. Script name and method name will appear there. Add a prefix My to it (this will be changed in future, no manual modification will be required).
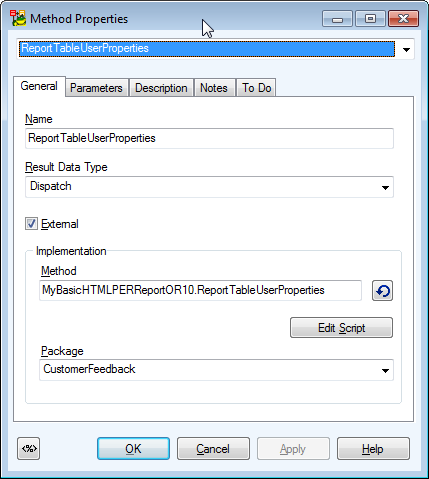
Click Edit Script.
Click OK and define code for the ReportTableUserProperties method that extends the existing method of the same name.
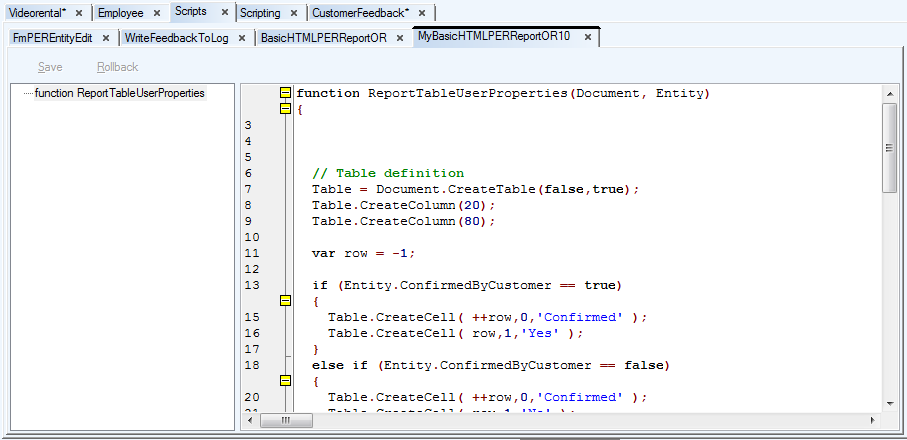
Code:
function ReportTableUserProperties(Document, Entity)
{
// Table definition
Table = Document.CreateTable(false,true);
Table.CreateColumn(20);
Table.CreateColumn(80);
var row = -1;
if (Entity.ConfirmedByCustomer == true)
{
Table.CreateCell( ++row,0,'Confirmed' );
Table.CreateCell( row,1,'Yes' );
}
else if (Entity.ConfirmedByCustomer == false)
{
Table.CreateCell( ++row,0,'Confirmed' );
Table.CreateCell( row,1,'No' );
}
else
{
Table.CreateCell( ++row,0,'Confirmed' );
Table.CreateCell( row,1,'Undefined' );
}
if (Entity.NotesFromCustomer.length > 0)
{
Table.CreateCell( ++row,0,'Notes from Customer' );
Table.CreateCell( row,1, Entity.NotesFromCustomer );
}
if (row > -1)
{
Document.WriteStyled( 'CAPTION2', 'Customer Feedback' );
Table.Draw();
Table.Close();
}
Instance.ReportTableUserProperties(Document, Entity);
};
Explanation
Table.CreateColumn(20) - the CreateColumn function belongs to the HTMLReportTable class. All functions related to the Table object can be found in the Toad Data Modeler Reference.
Entity.ConfirmedByCustomer - represents the variable we added earlier to the CustomerFeedback metamodel.
Entity.NotesFromCustomer.length - standard JavaScript function that returns number of characters of the NotesFromCustomer string.
Document.WriteStyled - represents function that belongs to the HTMLDocument class.
Instance.ReportTableUserProperties(Document, Entity);
- Instance - using the Instance keyword, we can call existing function we extended. We could copy and paste the content of the ReportTableUserProperties function defined in the BasicHTMLPERReportOR script. However, if a change was made to the script later, we would have to update our script too, which would be difficult to maintain. That's why it's better to write code that will extend the existing functionality only, and call the rest from existing script via the Instance keyword.
- ReportTableUserProperties - represents existing function we call.
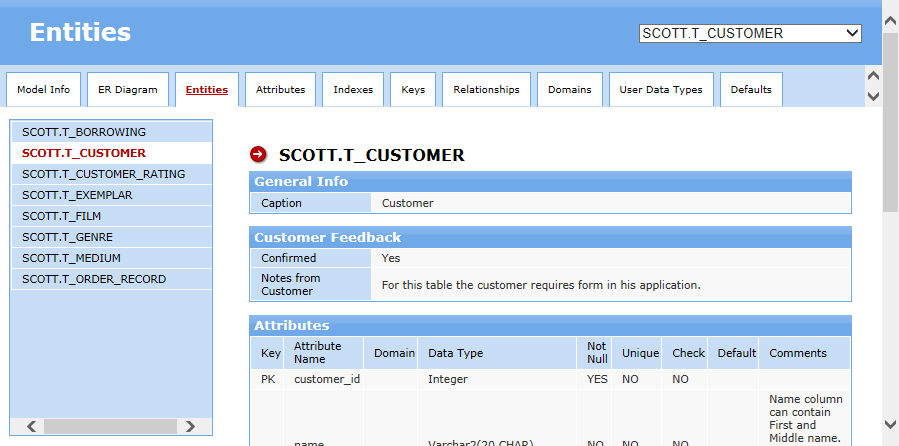
When you generate HTML reports now, you will see the following output. New section Customer Feedback is generated on top, followed by the Table Properties part, as originally defined in the ReportTableUserProperties function in script BasicHTMLPERReportOR.
