An orphaned recovery point is an incremental snapshot that is not associated with a base image. Subsequent snapshots continue to build onto this recovery point; however, without the base image, the resulting recovery points are incomplete and are unlikely to contain the data necessary to complete a recovery. These recovery points are considered to be part of the orphaned recovery point chain. If this situation occurs, the best solution is to delete the chain and create a new base image.
For more information about forcing a base image, see Forcing a snapshot.
This recovery point is labeled in the Type column as “Incremental, Orphaned.”
The Delete Recovery Points window appears.
|
|
Caution: Deleting this recovery point deletes the entire chain of recovery points, including any incremental recovery points that occur before or after it, until the next base image. This operation cannot be undone. |
The orphaned recovery point chain is deleted.
If you want to remove the recovery points of a protected machine from a repository without deleting them, you can migrate them to a different repository manually by using this procedure. This process involves archiving recovery points from the source repository, and then importing the archive into the target repository.
For example, you can perform this procedure if your existing repository is full, or if your needs change and you want to protect a machine using a different Core and repository.
|
|
Caution: If your repository was upgraded previously from AppAssure 5.3 or 5.4 and used replication, Quest recommends performing the Check Repository Job on each repository in that target Core before migration. Performing this job will preclude copying any data irregularities to the new destination repository. The Check Repository Job is only available in the UI if it is applicable to your Core, and could take a substantial amount of time to run. For information about this job, see About checking the integrity of DVM repositories. For information on performing this job, see Performing an integrity check on a DVM repository. |
|
|
NOTE: Without removing existing recovery points, you cannot change repositories for a protected machine. |
If you want to use an existing repository, select the name of an existing repository.
|
|
NOTE: When migrating recovery points to an existing repository, ensure that the existing repository has enough free space to contain the migrated recovery points. |
![[Save]](/ko-kr/technical-documents/image/5ba2fd37-09f4-4323-8902-615c85073991) to save the change to settings.
to save the change to settings. This section describes how to configure and manage the replication of protected data from a Rapid Recovery source Core to a Rapid Recovery target Core for disaster recovery.
Topics include:
Replication with Rapid Recovery
Recovery point chains and orphans
Determining your seeding needs and strategy
Performance considerations for replicated data transfer
Viewing incoming and outgoing replication
Replicating to a self-managed target Core
Replicating to a third-party target Core
Adding a machine to existing replication
Consuming the seed drive on a target Core
Removing outgoing replication from the source Core
This section provides conceptual and procedural information to help you understand and configure replication in Rapid Recovery.
Replication is the process of copying recovery points from one Rapid Recovery Core and transmitting them to another Rapid Recovery Core for disaster recovery purposes. The process requires a paired source-target relationship between two or more Cores.
The source Core copies the recovery points of selected protected machines, and then asynchronously and continually transmits that snapshot data to the target Core.
Unless you change the default behavior by setting a replication schedule, the Core starts a replication job immediately after completion of every backup snapshot, checksum check, mountability check, and attachability check. Log truncation of any type also triggers a replication job, as does checking the integrity of recovery points or of an Oracle database. If any of these actions are included in nightly jobs, then completion of nightly jobs also triggers a replication job. For more information, see Scheduling replication.
|
|
NOTE: When you replicate data for a cluster, you must replicate the entire cluster. For example, if you select a node to replicate, the cluster is automatically selected. Likewise, if you select the cluster, all nodes in that cluster are also selected. |
For optimum data security, administrators usually use a target Core at a remote disaster recovery site. You can configure outbound replication to a company-owned data center or remote disaster recovery site (that is, a “self-managed” target Core). Or, you can configure outbound replication to a third-party managed service provider (MSP) or cloud provider that hosts off-site backup and disaster recovery services. When replicating to a third-party target Core, you can use built-in work flows that let you request connections and receive automatic feedback notifications.
Replication is managed on a per-protected-machine basis. Any machine (or all machines) protected or replicated on a source Core can be configured to replicate to a target Core.
Possible scenarios for replication include:
|
|
NOTE: In this scenario, customers only have access to their own data. |
Possible replication configurations include:
Figure 1: Point-to-point replication configuration
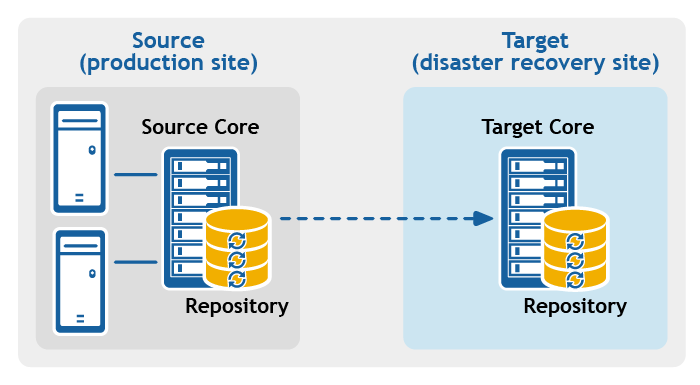
Figure 2: Multipoint-to-point replication configuration
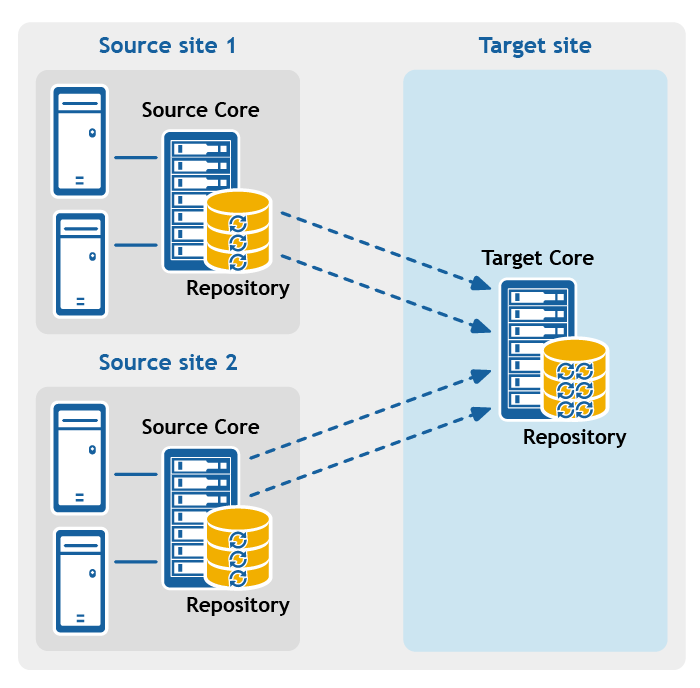
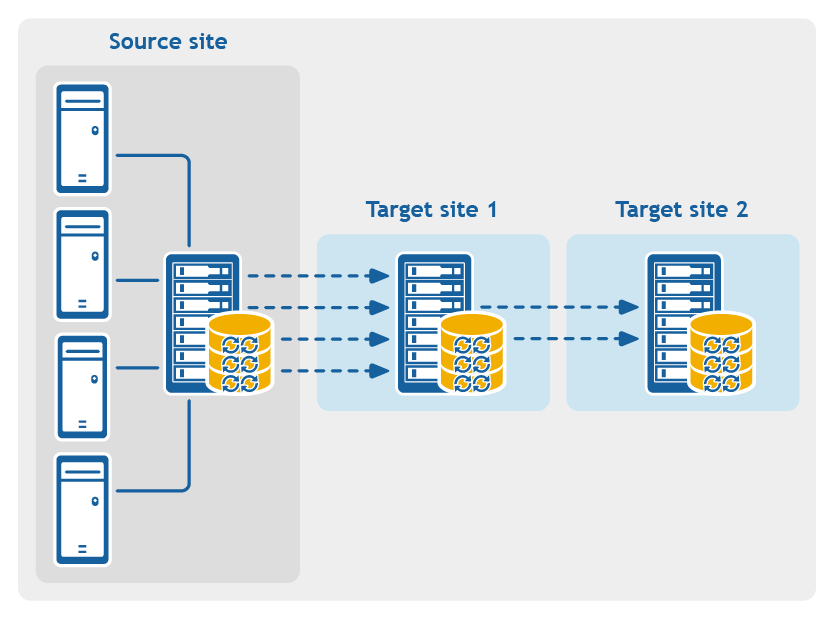
Figure 3: Point-to-multipoint replication configuration
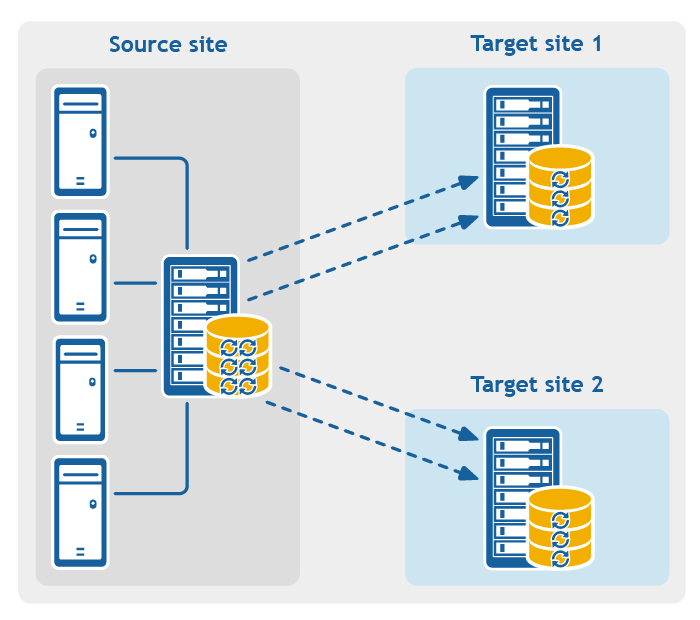
Figure 4: Multi-hop replication configuration