|
3 |
On the navigation panel, under Homes, click Protection. |
|
5 |
On the menu bar, click the Administration tab. |
|
6 |
|
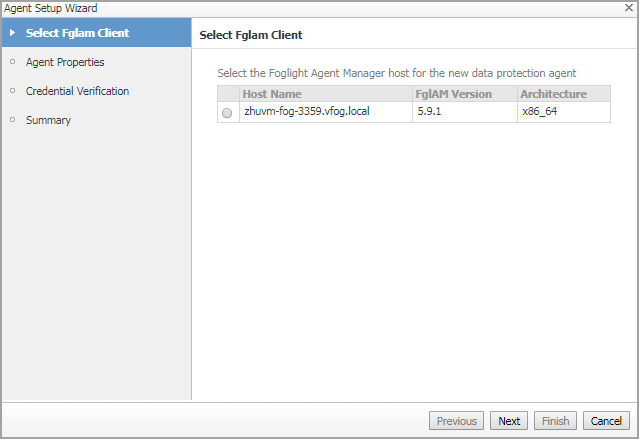
7 |
In the Select Fglam Client step, select the agent manager on which the new agent is to be deployed, and then click Next. |
|
8 |
|
• |
Enterprise Manager: The name or IP address of the computer on Veeam Backup Server is running. |
|
• |
Port: The HTTP port number used by the Veeam Backup Server. |
|
9 |
In the Credential Verification step, perform either of the following: |
|
1 |
Select Add Veeam Manager Server to a new credential, then the Create New Credential view appears on the right. Specify the credential related information, and then click Next. |
|
2 |
Select Add Veeam Manager server to an existing credential, then the Selected Existing Credential view appears on the right. Select an existing credential, and then click Next. |
|
10 |
|
3 |
On the navigation panel, under Homes, click Protection. |
|
5 |
On the menu bar, click the Administration tab. |
|
6 |
|
7 |
In the Rapid Recovery Agent: Edit Properties dialog box, edit the properties as needed, and then click Save. |
|
3 |
On the navigation panel, under Homes, click Protection. |
|
5 |
On the menu bar, click the Administration tab. |
|
6 |
|
7 |
|
3 |
|
4 |
Select a Virtual Machine from the Monitoring > Virtual Machine Quick View > Virtual Machines tree view. |
The Protect Virtual Machine Automation includes the following three options:
|
• |
|
• |
|
• |
The VMware VM Protection Setup Wizard guides you through the procedure for identifying virtual machines that you want to protect. This wizard also enables you to customize the schedule for performing the protection automation.
|
3 |
|
4 |
Select a Virtual Machine that you want to protect from the Monitoring > Virtual Machine Quick View > Virtual Machines tree view. |
|
5 |
|
6 |

|
7 |
In the VMs to Protect step, select VMs from the left vCenter table, click >> to move selected VMs to the right table, and then click Next. |
|
8 |
|
9 |
In the Select Repository step, select a repository from the Core Repositories drop-down list, and then click Next. |
|
10 |
|
• |
Default protection: The automation will be performed hourly for all volumes. |
|
• |
Periods: The automation will be performed on specified weekdays or weekends. |
|
• |
Daily protection time: The automation will be performed on a daily basis. |
|
11 |

