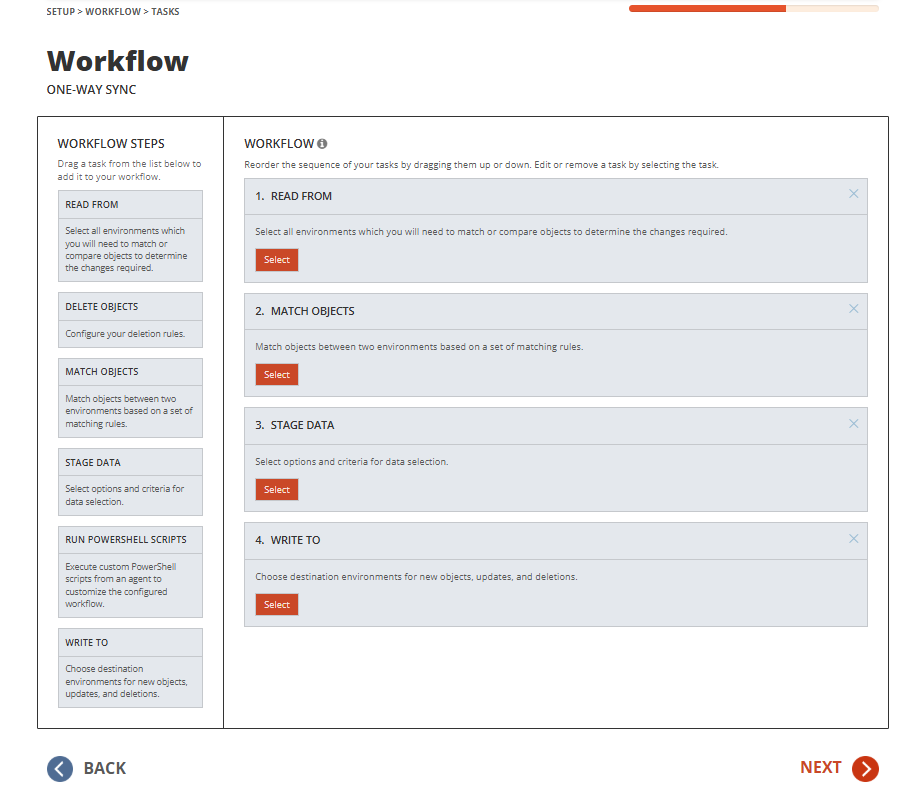
- Navigate to Templates.
- Click New.
- Enter the Name and Description of the template.
- In our example, we will name our template “Cloud to Cloud GAL Sync Target to Source”. Click Next.
- Click Cloud as the source environment type. Click Next.
- Click Cloud as the target environment type. Click Next.
- Set CREATE NEW USERS AS = CONTACT
- Set UPDATE CREATED USERS= ENABLE
- Set UPDATE MATCHED USERS= DISABLE
- Click Next.
- Set CREATE GROUPS AS = SKIP
- Set UPDATE CREATED GROUPS = DISABLE
- Set UPDATE MATCHED GROUPS = ENABLE
- Click Next.
- Set CREATE OFFICE365 GROUPS AND TEAMS AS = SKIP
- Set UPDATE CREATED CONTACTS = DISABLE
- Set UPDATE MATCHED CONTACTS = DISABLE
- Click Next.
- Set CREATE NEW CONTACTS AS = DO NOT CREATE
- Set UPDATE CREATED CONTACTS = DISABLE
- Set UPDATE MATCHED CONTACTS = DISABLE
- Click Next.
- Enter a default password. Click Next.
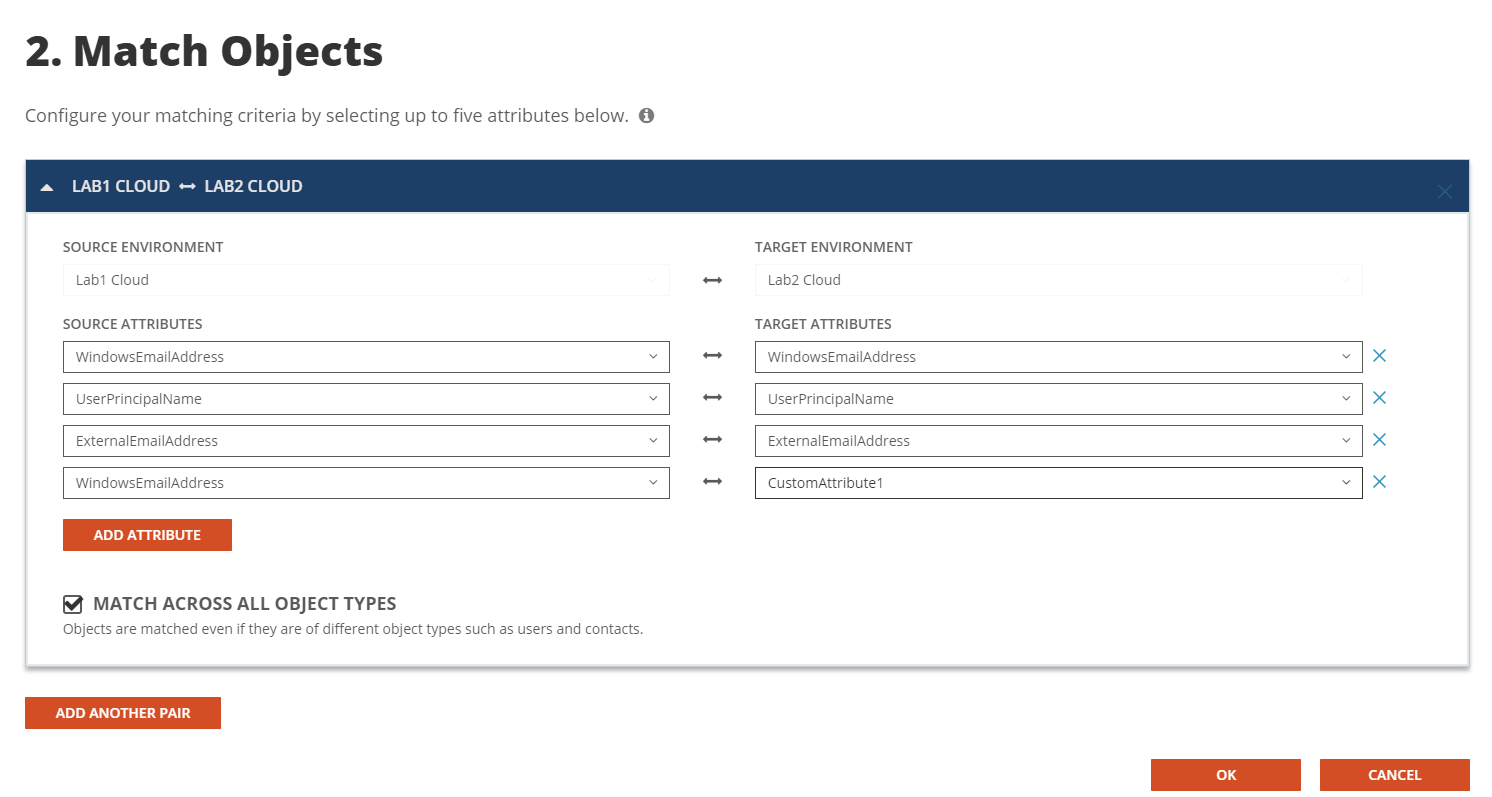
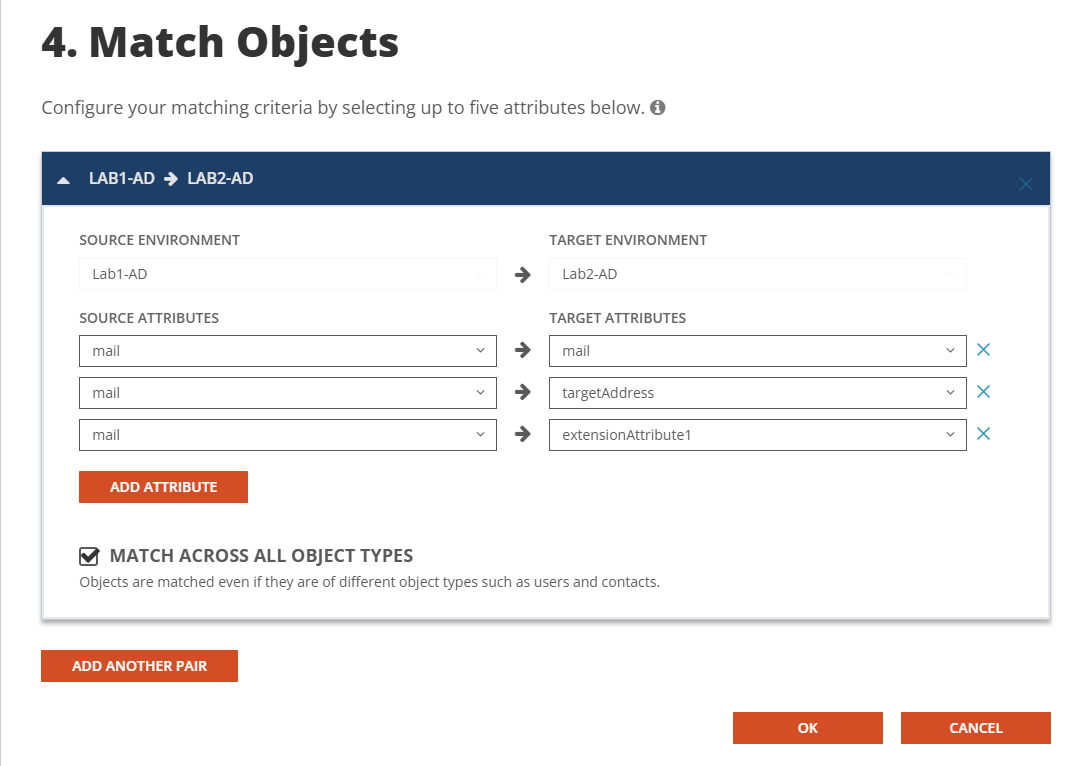
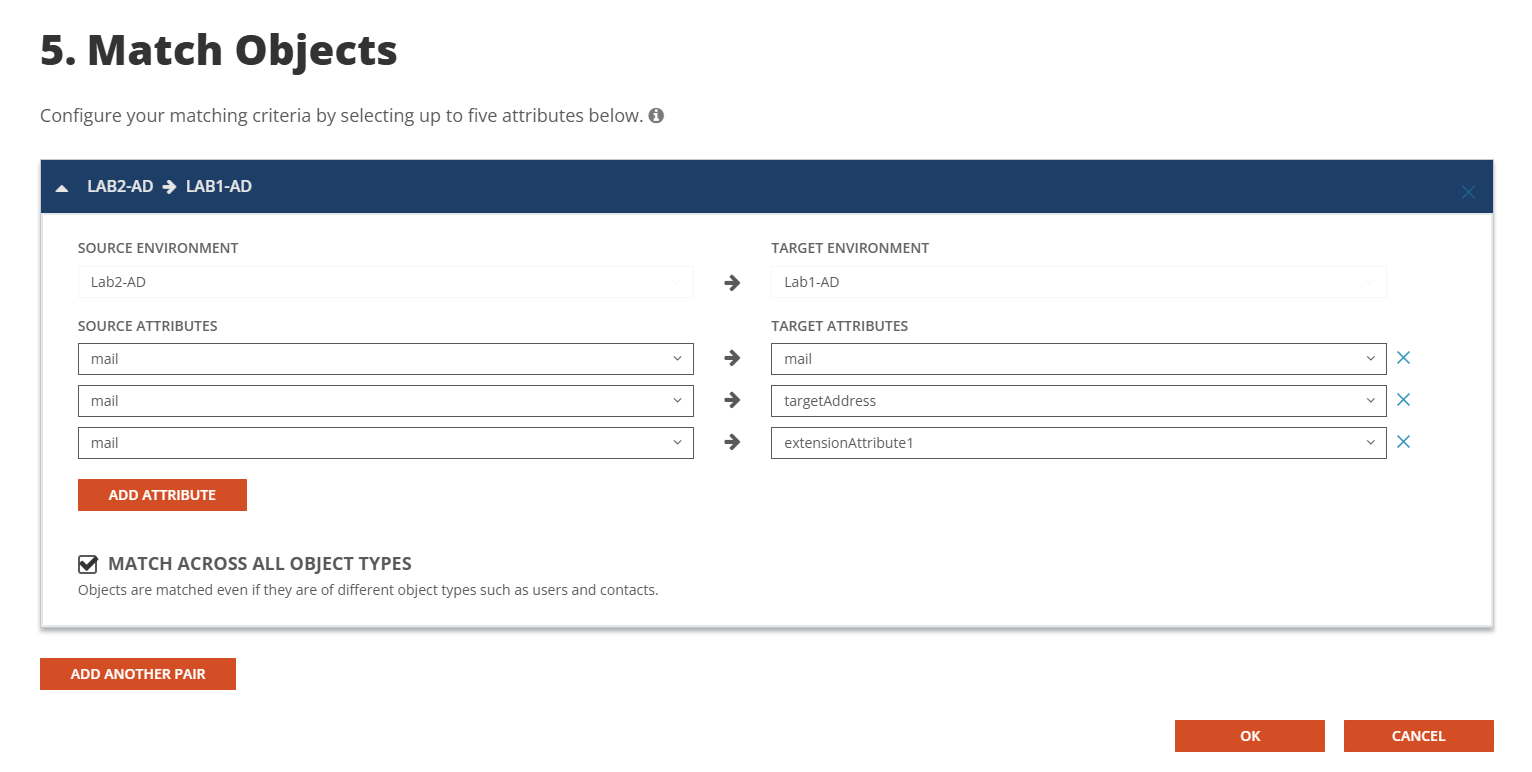
- Under mappings, we need to make several modifications to the default template in order to make the MailContact to be compatible with Tenant to Tenant.
- Select mapping for ‘EmailAddresses’ and double click, enter the below expression under value field.
GetProxyAddresses(null, null, prefix(Result("WindowsEmailAddress"), "SMTP:"), prefix(LegacyExchangeDN, "x500:"))
- Select Contact as the Target Object Type
- Select mapping for ‘CustomAttribute1 and double click, enter the below expression under value field.
"s.WindowsEmailAddress"
- Select All as the Target Object Type
- Select mapping for ‘EmailAddresses’ and double click, enter the below expression under value field.
- Leave rest of the mappings as default.
- Click Next.
- Click Finish.