After completing this tutorial, consider performing the following activities:
|
• |
Investigate what effect changing the time range has on the CPU Memory Utilization Chart: T3 and possibly Alarm Table for Host T3 views. |
|
• |
Change the height of the Alarm Table for Host T3 view by opening the Host Details T3 view for editing, opening its Layout tab, double-clicking the Alarm Table for Host T3 area, and setting the Height property to Automatic. When you chose Automatic, you rely on the layout algorithm to adjust the height to a reasonable size, but you can override that by forcing the component to have a specified height. |
|
• |
The Alarm Table for Host T3 view can have more entries than the height of the component allows. Add scrollbars to the view and observe the change. |
|
• |
Before you get started, obtain a deep copy of the [chart] Disk I/O Utilization view. Deep copying gives you your own copy of the component and any of its referenced components, which you can edit any way you want. You need to add this view to the grid, and by copying it first you can make changes to the copied version without affecting the installed component.
|
1 |
|
3 |
In the Module Contents pane, in the drop-down list, ensure that Views is selected. |
|
4 |
Locate and click the row containing the [chart] Disk I/O Utilization view. |
|
5 |
|
6 |
Deep copy the [chart] Disk I/O Utilization view from Hosts > Host.
To start off, give the newly copied chart a title and ensure that the legend is enabled.
|
1 |
In the Module List pane, click My Definitions. |
|
2 |
Open your copy of the [chart] Disk I/O Utilization view for editing. |
|
3 |
|
4 |
Open the Context tab and ensure the Usage column of the host entry is set to Required. Like in the previous tutorials, you pass a host object to the component in this tutorial. |
|
5 |
Configure the timeRange context key to use the following settings: |
|
• |
Set Usage: Required |
|
• |
List: False |
|
• |
Data Type: Common:Time Range |
|
6 |
|
7 |
Locate and expand the Header node. |
|
8 |
In the Text sub-node, in the Value column, click Edit ( |
|
9 |
|
10 |
In the Parameter {0} row that appears in the table below, in the Value column, click Edit ( |
|
11 |
In the Edit - Text dialog box that appears, click the Input Key box, and choose host (Host) from the list that appears. |
|
12 |
|
13 |
Click Set to close the Edit - Parameter {0} dialog box, then in the Edit - Text dialog box, click Set to close it. |
|
1 |
|
2 |
In the Visible sub-node, in the Value column, click Edit ( |
|
3 |
Click Set to close the dialog box. |
|
4 |
These are the only changes you need to make to the chart after copying it from Hosts > Host.
The views that we will choose are:
|
• |
A Row-Oriented Table for choosing hosts. We build this table in the tutorial. |
|
• |
|
• |
CPU Memory Utilization Chart T3 from the module containing the tutorial views. |
|
• |
Alarm List with Filter from the Alarms. |
|
• |
[chart] Disk I/O Utilization from the user module My Definitions for Tutorial 5. |
For the Customizer, we make use of the Host Browser view from Hosts > Host, inserting it as the Customizer for this page.
|
1 |
In the Module List pane, ensure that My Definitions is selected. |
|
2 |
|
3 |
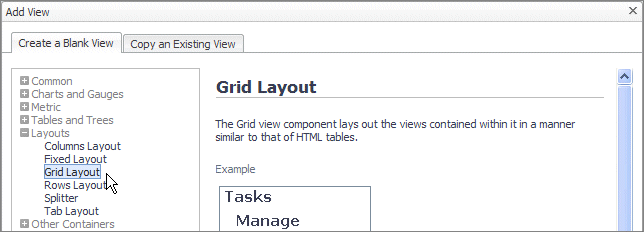
In the Add View dialog box that appears, on the Create a Blank View tab, choose Layouts > Grid, and click OK. |
|
4 |
|
5 |
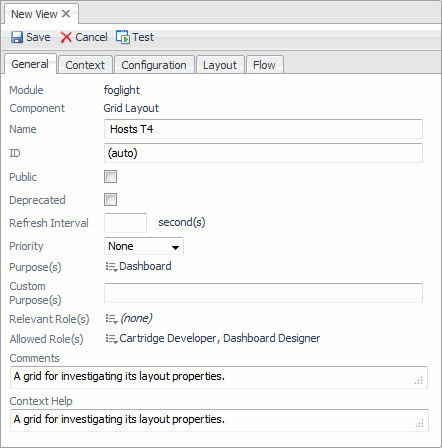
Configure the settings on the General tab using the following values. |
|
6 |
Define a Context to instruct the component accept a Host object as context input and supply the component with actual host-related data. You configure this dashboard to permit the choice of a different host and then update itself.
|
1 |
Open the Context tab. |
|
2 |
|
• |
Key: host |
|
• |
Name: Leave unchanged |
|
• |
Usage: Optional |
|
NOTE: This dashboard does not have a required Host input. You will set an initial value in the context in a following step.
The host context key is necessary because you use it to supply the host name and state to the dashboard title. By setting a default value, you supply the dashboard with an initial host value. Without it, the view might show errors until a host is selected and an update action is triggered. |
|
• |
List: False |
|
• |
Data Type: Monitoring:Host |
|
4 |
Click Save. |
|
1 |
Copy the Active Hosts query from Tutorial 4. |
|
c |
In the Add Query dialog box that appears, open the Copy an Existing Query tab, choose Dashboard Development > Support > Tutorials > Tutorial 4 > Active Hosts, and click OK. |
|
2 |
|
3 |
On the Context tab, under Inputs, in the host row, in the Fallback Value column, click Edit |
|
4 |
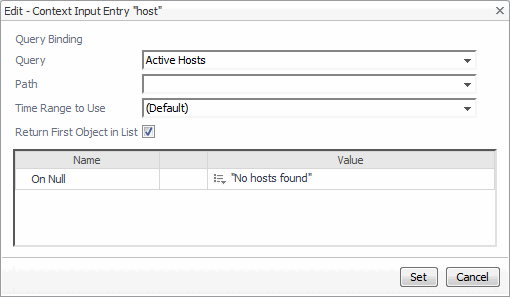
In the Edit - Context Input Entry “host” dialog box that appears, click the Query box, and choose My Queries > Active Hosts from the list that appears. |
|
5 |
Select the Return First Object in List check box. |
|
7 |
Click Set. |
