General Server Properties
Connection
The Connection page displays the name of the server or database availability group (DAG) for which the connection settings are configured. The settings for a DAG, an Exchange server in a DAG and an individual server differ slightly. This is because different synchronization jobs are available in different configurations, as follows:
| Public Folders |
Yes |
No |
Yes |
| Free/Busy Status |
Yes |
No |
Yes |
| Mailboxes |
Yes |
Yes |
No |
| Calendars |
Yes |
Yes |
No |
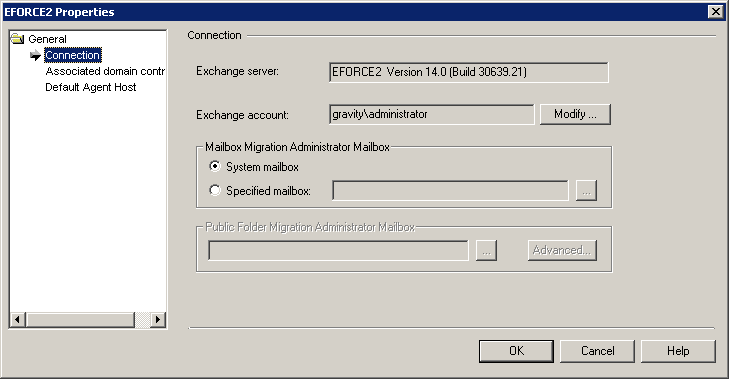
You can specify the Exchange account used by all of this server's agents to connect to the server and perform all the actions required for synchronizing the server objects. Please note that this account must:
- Be member of the Administrators built-in group for the domains where the source Exchange organization recipients are located.
- Have Full Control rights for the Exchange organization including Send As and Receive As rights for the Exchange organization.
- Be a Local Administrator of all Exchange servers in the organization.
- Have an Administrator role in the AD LDS or ADAM partition where the migration project is stored.
- If there are cluster Exchange servers in the organization, the account should have Full Control rights for the clusters.
Please see the System Requirements and Access Rights document for details about the Exchange account used by the Migration Manager agents.
This page also allows you to specify the Mailbox Migration Administrator Mailbox and the Public Folder Migration Administrator Mailbox, which are described below.
Mailbox Migration Administrator Mailbox
Mailbox and Calendar Synchronization agents access the migrated mailboxes via the specified Administrator Mailbox. By default, the Microsoft System Attendant mailbox is used as the Administrator Mailbox. It is not recommended to change this setting until either of the following occurs:
- Migration Manager agents fail to log on to the System Attendant Mailbox.
- Migration Manager console cannot commit settings of the synchronization job because of problems enumerating the System Attendant Mailbox.
If the Specified mailbox option is selected, the mailbox you specify should be hosted on the same server and must be fully accessible by the Mailbox and Calendar Synchronization agents.
Public Folder Migration Administrator Mailbox
The Public Folder Migration Administrator Mailbox is used to get administrative access to the server’s public folders. It is the same mailbox that you select when setting up a public folder synchronization job. This mailbox does not need any rights on the public folders for the synchronization. The account that is used by the agent should have full access to the mailbox that is specified here.
|

|
Caution: Be careful when selecting the administrative mailboxes. Once you start the public folder synchronization process, you should not change the administrative mailboxes; doing so will lead to full resynchronization of public folder contents and might cause other issues. |
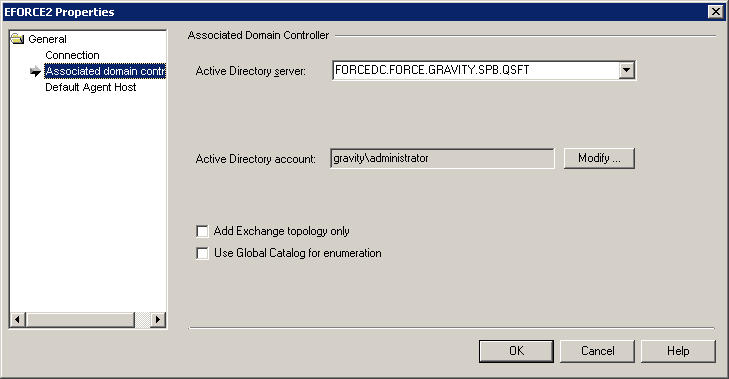
Associated Domain Controller
Because Exchange uses Active Directory to store the directory information, Migration Manager for Exchange uses domain controllers (DCs) to enumerate Exchange objects.
Migration Manager associates one DC with each Exchange server when you first register the source and target organization in the database. In some cases, you may need to change a DC associated with the server. For example, you may need to do this if a DC is temporarily unavailable.
The Associated Domain Controller page allows you to change the server association as well as the account used to work with Active Directory. The account must have the following rights:
- Read access to the domain in which the DC is located
- Write access to Active Directory
- Full Control on the OU where the proxy objects are stored
- Full Control on the OU belonging to the domain where the proxy objects will be created.
|
|
Caution: If you are working in a multi-domain environment, it is recommended that the associated DC have a copy of Active Directory Global Catalog. This is needed to apply the mailbox and public folder client permissions granted to users migrated to other Active Directory domains. |
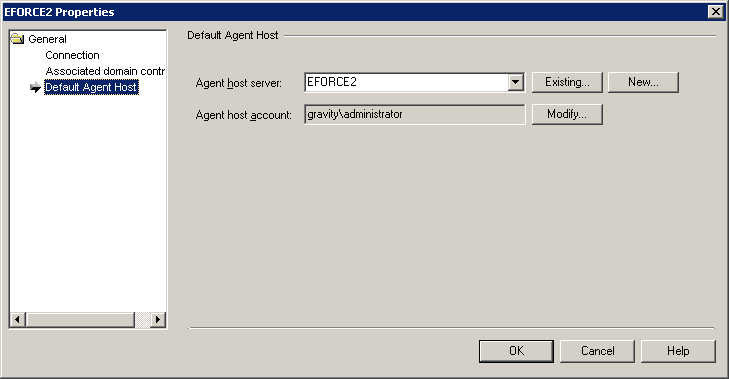
Default Agent Host
This page lets you specify an agent host—a computer that will host the Migration Manager agents performing the migration workload. It is recommended that you use a computer that is not a participating Exchange server. For more information about the automatic choice of default agent host, see the Finding Installed Agents topic. For general details about agent hosts, see the Using Agent Hosts for Migration Agents topic.
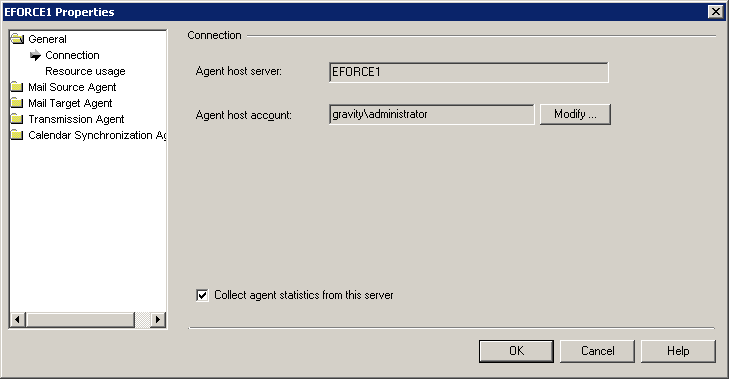
Agent Host Properties
This section refers to properties of servers shown in the right pane when any of the following nodes is selected in the treeview:
- Agent Management
- Job and collection nodes nested under the Synchronization Jobs node
Collecting Agent Statistics
To collect agent statistics from a server, select the Collect agent statistics from this server check box on the Connection page.
Controlling Resource Usage
For each server, you can specify the amount of disk space (either in megabytes or in a percentage of the total available drive space) that should not be used by the agents working on the server.
You can also specify the memory limit that should not be exceeded by each agent working on a server. We do not recommend changing this parameter unless your environment requires it.
Increasing the memory limit might be required if the agents’ performance is slow and you see the following trace message in the log: “The agent’s system memory limit 64000 Kb has been exceeded. Agent will be terminated.” This affects the agents’ performance, so you might want to increase the memory limit if you have enough resources.
Decrease the memory limit if the server is unstable and low on memory. Be very careful with this option. Setting it to a lower value will affect the performance of all the agents. If the memory limit is reduced, we recommend that the PST size limit be set to a lower value, since this will reduce the impact on the performance of the mail and public folder agents.
Be aware that the agents might not even be able to start if the limit is too low. The lowest acceptable value depends on the server. An administrator should carefully test this in the environment to find a value that:
- Will not affect the performance of the agents too much
- Will not load the server memory too much
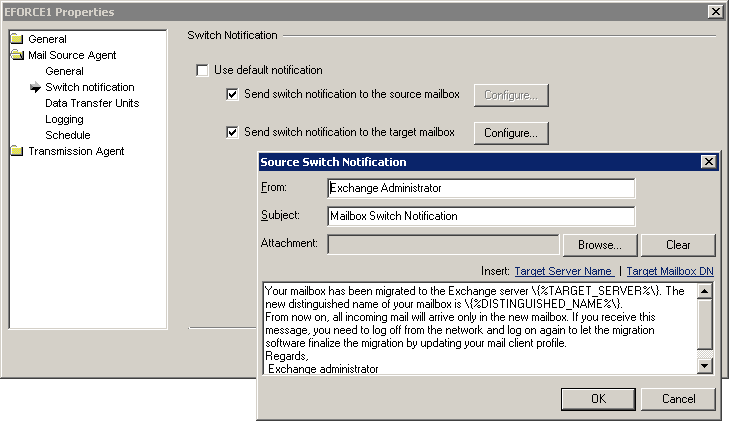
Enabling Notifications about Mailbox Switches
The Mail Source Agent can send a notification message to each user whose mailbox has been switched. The Switch notification page in the properties of the Mail Source Agent allows you to edit this message and select whether the notification should be sent to the source mailbox, the target mailbox, or both.
Migration Project Options
The settings that are applied to the entire Exchange migration project are all gathered in the Options dialog box. To open this dialog box, click Options on the Tools menu.
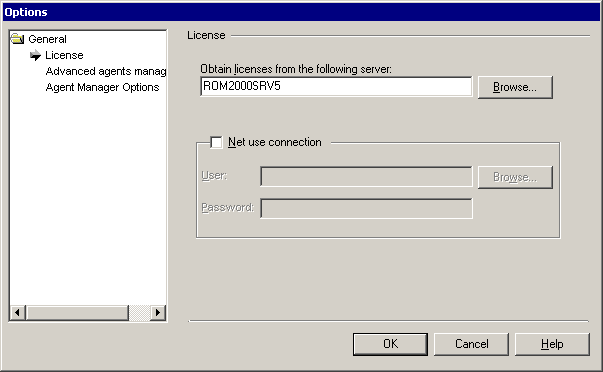
License
Because Migration Manager for Exchange uses a distributed architecture, the agents obtain all license information from a single license server that you can specify in this page. By default, a server on which Migration Manager is installed is used as the license server.
If the agents are running under an account that does not have access to the license server, you can force the agents to establish a Net use connection to the license server by selecting the Net use connection check box and specifying the appropriate credentials.
Please refer to the Licensing section of the Migration Manager Installation Guide for further details.
Advanced Agents Management
This dialog allows you to fine-tune agents behavior.
- Create mail-enabled public folders
Mail-enable / mail-disable and control GAL visibility of the target public folders based on the source settings. If two-way public folder synch is enabled, those settings are also synced from the target to the source public folders. For the corresponding INI value, see SyncMailEnabled in Fine-Tuning the Agents section.
Do not synchronize source and target public folder settings. Public folders created by the migration agent are mail-disabled by default.
- if source folder is mail-enabled
Synchronize all settings between the source and target public folders.
- if source folder is visible in GAL (default)
If the source public folder is mail-enabled and not hidden from GAL, synchronize the target public folder settings with the source. Otherwise, leave the target public folder unchanged.
|

|
Caution:
- If you enforce creation of mail-enabled public folders on target, e-mail addresses of such folders are not synchronized with the source. As a result, target public folders will not receive the mail sent to source public folders. To synchronize public folder e-mail addresses, request the custom Public Folder Directory Synchronization Solution utility from Quest Support.
- Settings are not synchronized for Exchange 2003 / Exchange 2007 root public folders.
- Settings are not synchronized for the public folders that are synched with Office 365.
|
- Agent logging in Unicode format
Write Migration Manager agent’s logs in Unicode format. This greatly improves the readability of logs containing localized content (such as folder names), but increases the amount of disk space consumed by log files.
Agent Manager Options
Migration Manager for Exchange allows you to manage synchronization agents using the Migration Manager console. To view the list of agents that perform a job, select the job in the management tree and click the Agent Manager button on the Migration Manager toolbar. To view the recent log entries for an agent, right-click the agent in the right pane and select Recent Log Entries from the shortcut menu.
The Agent Manager Options page allows you to fine-tune the refresh options for the information displayed. You can select the time intervals at which Migration Manager will refresh the agent’s list, the agent’s state, and the recent log entries.
Default Synchronization Properties
To set the default properties for the synchronization agents, synchronization jobs, and servers involved in synchronization, you can use the Default Properties dialog box. Instead of opening the properties of each server, job, or agent and modifying them separately, you can set the default properties all on one page. The default settings can be overridden by modifying the properties of a server, job, or an agent directly.
The Default Properties dialog box provides three sets of pages so you can select the default properties for synchronization agents, synchronization jobs, and servers involved in synchronization.
To change the default settings for agents, jobs, or servers, take the following steps:
- Make your changes on the appropriate set of pages: the Agents pages, the Synchronization Jobs pages, or the Servers pages.
- Select the check box to apply the properties you set, depending on the set of pages you are changing: the Apply these properties to all instances of the [Agent_name] check box, the Apply these properties to all [job_name] jobs check box, or the Apply these properties to all servers check box.
- Click OK. Your settings will be applied to all existing agents, jobs, or servers, and to any new agents.
To cancel all changes you have made to the default settings for agents, jobs, or servers, take the following steps:
- Click the Restore Defaults button.
- Select the check box to apply the restore operation, depending on the set of pages you are changing: the Apply these properties to all instances of the [Agent_name] check box, the Apply these properties to all [job_name] jobs check box, or the Apply these properties to all servers check box.
- Click OK. The default settings will be applied to all existing agents, jobs, or servers, and to any additional agents you install.
- For detailed information about the default properties that you can set for synchronization agents, jobs, and servers, see the Migration Manager for Exchange online help.
