When HSM is installed and configured, you can install Archive Manager for Files. To install Archive Manager for Files:
1.Login to the server with the credentials of the Installer account (eg. democorp\mamadmin)
2.Run the Quest Archive Manager Installation Package to extract the files to a local folder.
3.Close the integrated installer wizard which starts automatically.
4.Run the Archive Manager Search setup. The default path is C:\Quest\Archive Manager Installation Package\Files\Archive Manager for Files Setup.exe
5.A prerequisite check occurs and missing requirements if any are displayed. Click Install to ensure all missing requirements are installed.
6.The Welcome window of the Archive Manager for Files installer opens.
7.Click Next. The License Agreement window opens.
8.Click Yes to accept the license. The License Key window opens. Click Print if you wish to print the license agreement.
9.If you are connected to the internet, select Online activation or see License Activation for more options. Click Next. When your license is activated, you will see a confirmation message and the license details. Click Finish to close the Activate License Key dialog.
10.Click Next. The Setup Type window opens.
Select the Complete option. The Custom option allows advanced users to manage individual features of the product like Auditing or ArchiveWeb which can be installed remotely.
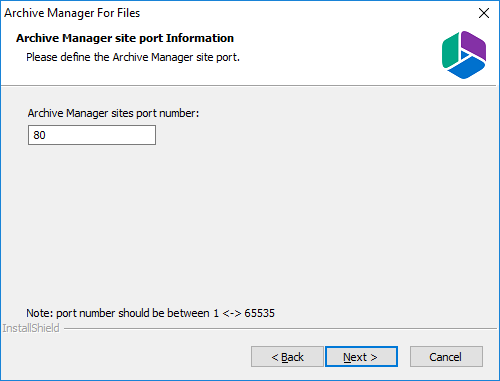
11.Click Next. The Archive Manager site port Information window opens.
12.Keep the default port 80 unless there are other application co-located on this server that also use port 80. Click Next and the Select HSM server window opens.
In the HSM server field, enter the name, FQDN or IP address of the server where the HSM application feature was installed. You can click Browse to locate the server in the domain.
13.Click Next. The Logon Information window opens.
14.In the Username field, specify the superusername (eg. democorp\mamadmin)and Password. Enter the password again in the Confirm password field. This user account must have the appropriate DCOM rights on the fileserver to launch COM objects and must have full access to files and folders which are meant to be archived. We recommend using a local administrator account. In case that Archive Manager will be used to archive files on remote servers (through shared drives), the user running the Archive Manager services must be granted full rights to the remote folders.
15.Click Next. The Security Settings window opens.
a.Allow programs to communicate through Windows Firewall - select this option to let Archive Manager for Files communicate through the firewall.
16.Click Next. The Ready to Install the Program window opens.
17.Click Install to start the installation. When the installation completes, the InstallShield Wizard Complete window opens.
18.Click Finish to close the wizard.
In this topic:
·Steps to configure the Archive Manager database connection
·Steps to install the Archive Manager database
Steps to configure the Archive Manager database connection
1.When the installation completes, the Post installation Tasks wizard opens. You can open the the Post installation Tasks wizard from C:\Program Files (x86)\Quest\MAM4Exchange\Tools\LaunchTools\LaunchTools.exe.
2.Click Start next to the Configuration step to open the Archive Manager Configuration wizard. To directly open the Archive Manager Configuration wizard click Start > Quest > Archive Manager Configuration.
3.From the feature panel on the left, click Files Archive and select the Database tab.
4.Click Configure. The Database Connection Wizard opens.
5.Select either Microsoft SQL Server or Oracle and click Next. The database connection information window opens for the selected database.
For Microsoft SQL Server
a.Server name - name of the SQL server (eg. AMXDB).
b.Initial catalog - name of the HSM database (e.g. MAMFILE which is the default name of the Archive Manager for Files database).
c.Schema name - name of the SQL Schema (e.g. dbo).
d.Authentication authentication type used for the database. Choose either Windows authentication or SQL Server authentication.
e.Username - database login username if SQL Server authentication is the selected as the authentication mode.
f.Password - password of the database user if SQL Server authentication is the selected as the authentication mode.
For Oracle
a.Oracle net name - net service name that describes the network address of the HSM database in your tnsnames.ora file (eg. AMXDB).
b.Schema - name of the HSM database (e.g. MAMFILE which is the default name of the Archive Manager for Files database).
c.Username - database login username.
d.Password - password of the database user.
6.Click Next and then click Yes on the confirmation dialog that opens.
7.If the database connection is setup successfully, the confirmation window opens.
8.Click Finish to close the Database Connection wizard. The connection information is displayed in the Database connection section.
Steps to install the Archive Manager database
1.From the feature panel on the left in the Archive Manager Configuration wizard, click Files Archive and select the Database tab.
2.Verify that the database connection information is as expected. Then click Run Scripts. The Run Scripts selection window opens.
3.Click Select All to select all check boxes. Then click Next. The Run Scripts authentication window opens.
Enter the information as described below:
a.Authentication - authentication type used for the database. Choose either Windows authentication or SQL Server authentication.
a.Database user - database login username if SQL Server authentication is the selected as the authentication mode.
b.Password - password of the database user if SQL Server authentication is the selected as the authentication mode.
c.(optional) Check the I want to review the SQL Scripts check box to view the scripts.
4.Click Next. If you chose to view the SQL scripts then the View SQL scripts window opens. If you chose to view the Oracle scripts then the View Oracle scripts window opens. Click Save Script to save the script as a script file to a folder. Check the Word wrap check box to display long lines as multiple lines of text.
5.Click Next. The Run SQL scripts window reopens with the scripts you have chosen to run.
6.Click Next. When the status changes to Scripts were run successfully, click Finish to close the script installer. The Scripts section of the Archive Manager Configuration wizard displays the status and version of the scripts.
7.Click the Settings tab. Information presented here is filled in by default and configuration is necessary only for special purposes as described below:
a.Archive server name of the machine where Archive Manager for Files is installed.
b.HSM server indicates the HSM server.
c.Minimum size of the file to be replaced by shortcut identifies the minimum size of a file, which can be replaced with a shortcut after archiving.
8.Close the Archive Manager Configuration wizard.
In this chapter:
·Troubleeshooting: Adobe reader X is not able to open archived PDFs
In case of a remote HSM Server, i.e. if the HSM Server is installed on a separate machine, it is necessary that:
·The HSM Base service runs under the Archive Manager super-user account
·DCOM Rights are reduced
a)The Archive Manager super-user account is an account under which Archive Manager services (MAMfsaHandlerSv, MAMfsaRemoteSV, MAMfsaArchiverSv) run on the Archive Manager server.
On the HSM server, follow these steps:
1.Open Start / Administrative tools / Services and locate the MAM HSM Base Operations service.
2.Right-click it and open its Properties. On the Log On tab check This account option and enter the super-user account with its password. (Super-user account is an account which Archive Manager services (MAMfsaHandlerSv, MAMfsaRemoteSV, MAMfsaArchiverSv) run under.)
Finally click OK.
b)DCOM Rights has to be reduced in two locations to
·AuthenticationLevel=None
·ImpersonationLevel=Anonymous
and after that the IIS have to be reset.
On the HSM Server follow these steps:
1.Open machine.config from:
C:\WINDOWS\Microsoft.NET\Framework\v2.0.50727\CONFIG\machine.config
In case the 64-bit .NET FrameWork open:
C:\WINDOWS\Microsoft.NET\Framework64\v2.0.50727\CONFIG\machine.config
2.Locate the entry for processModel and add:
comAuthenticationLevel="None" comImpersonationLevel="Anonymous"
The entry then looks as follows:
<processModel autoConfig="true" comAuthenticationLevel="None" comImpersonationLevel="Anonymous" />
3.Close the config.
4.Now run Component Services (click Start /Settings /Control Panel /Administrative Tools /Component Services).
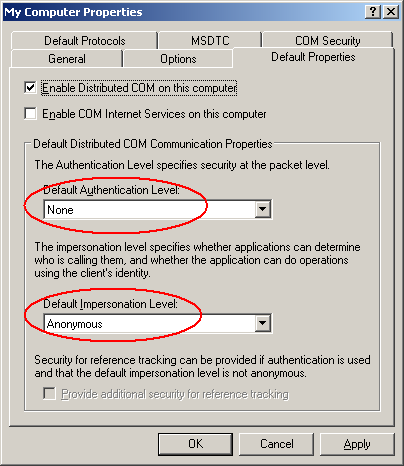
5.In the Component Services window expand the Component Services tree down to Component Services \Computers \My Computer and then right-click My Computer to open its Properties window.
6.Switch over to the Default permissions tab. Check Enable Distributed COM on this computer. Then in the Default Authentication Level dropdown box select None and in the Default Impersonation Level select Anonymous.
Click Apply, then OK.
7.Finally reset IIS.