
-
Title
HOW TO Report on installed Operating Systems in your environment -
Description
How to Report on installed Operating Systems in your environment -
Resolution
Step 1
-
Navigate to Administration > Setup > Software.
-
Select the Applications tab if not already selected.
-
Click “Create new applications” under Setup.
-
Create an application for each OS. (Windows XP, Windows 7, Windows 2008,….).
Step 2
-
Navigate to Administration > Setup > Software.
-
Select the “WMI” tab.
-
Click “Show WMI rules” under Setup.
-
Click “Create new WMI scan rule” under Setup.
-
Press “Load preferred WMI”.
-
Select “OS Version with OEM” press OK.
-
Click Save.
-
Click back on “Create new WMI scan rule”.
-
Again press “Load preferred WMI”.
-
Select “OS Version without OEM” press OK.
-
Click Save.
Step 3
-
Navigate to Administration > Monitor > Server Task Scheduler.
-
Make sure that “Process hardware/WMI packages” and “Process workstations software packages” are Enabled. (The scanning process might take some time).
Step 4
-
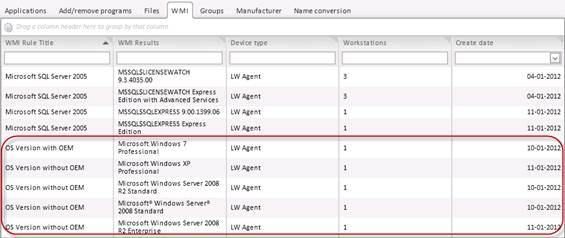
Navigate to Administration > Setup > Software > WMI.
-
When the scanning process has finished you will be able to see the result on this page (Check the results for e.g. Windows 2008 versions).
-
Click “Use selected for application identification”.
-
Find your application and add the WMI-rules for identification of the OS.
Step 5
-
Navigate to Software and search for your application to see the result of the identification.

Step 6 (Report)
-
Click Reports > Application reports.
-
Enter the Application title and click “GO”.
-
Now the report is created for the required OS.
-
If you select Installations > “Workstations with application installed” you’ll get a specified list of the workstations.

When a new workstation enter the environment Asset Manager’s WMI-rules will scan for the OS and the result will be updated.
-