
-
Title
How to install Help Desk Authority -
Description
How to install Help Desk Authority -
Resolution
Video Solution for How to Install Quest Workspace Help Desk
Help Desk Authority ships with three installation packages. The HDASetup_[Version].exe is for installing all or selected features of Help Desk Authority on a server, the others are for installing client, figure 1.
![[image]](https://support.quest.com/KBArticleImages/SL4218/475138b3.jpg)
Figure 1
Double click on the “HDASetup_9.x.x.xxxx.exe” and click “Next”, figure 2
![[image]](https://support.quest.com/KBArticleImages/SL4218/f8cee869.jpg)
Figure 2
Accept the license terms and click “Next”, figure 3.
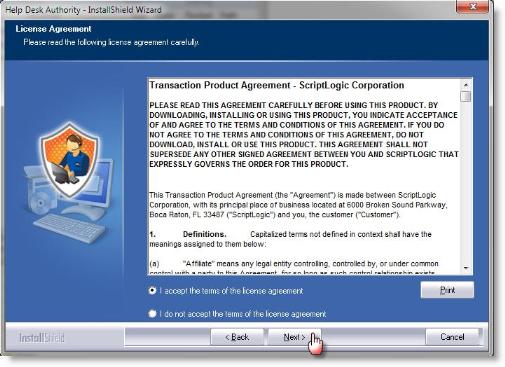
Figure 3
Select the “Full” option and click “Next”, figure 4.
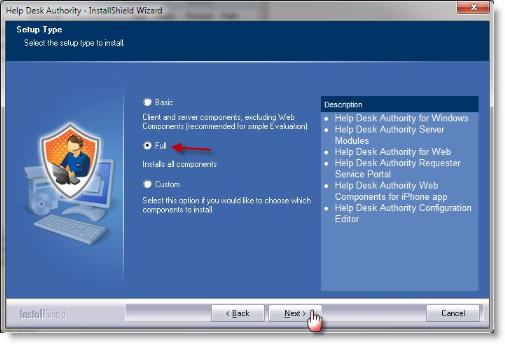
Figure 4
Enter the SQL server instance and SQL user name and password and click “Next”, figure 5.
![[image]](https://support.quest.com/KBArticleImages/SL4218/cd80b67d.jpg)
Figure 5
Enter a database name or accept the default. If a working model of Help Desk Authority is needed, check the “Create sample data” checkbox to add sample data to the database, figure 6.
![[image]](https://support.quest.com/KBArticleImages/SL4218/34e471a2.jpg)
Figure 6
Click “Install” to begin the installation, figure 7.
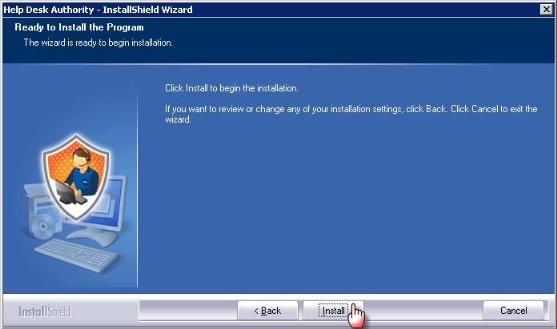
Figure 7
At the end of the installation check the “Launch help Desk Authority for Windows” checkbox and click “Finish”, figure 8.
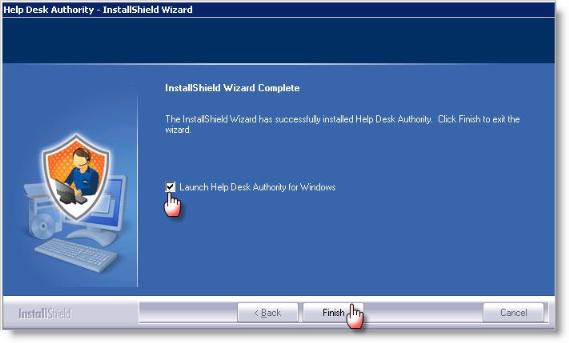
Figure 8
Notice and record the default user name “Admin” and password “evaluation” then click “OK”, figure 9.
![[image]](https://support.quest.com/KBArticleImages/SL4218/dc3ecedc.jpg)
Figure 9
The user name and password fields will be pre-populated with the defaults when the HDA client launches, figure10.
![[image]](https://support.quest.com/KBArticleImages/SL4218/025dadd9.jpg)
Figure 10
Changes during Installation:
Inbound rules were added to the windows firewall, figure 11.
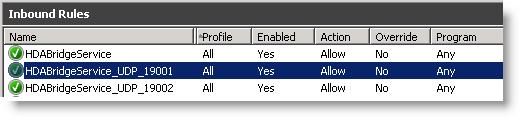
Figure 11
Several Windows Services were also added, figure 12. Please review the description of each service for their respective function.
![[image]](https://support.quest.com/KBArticleImages/SL4218/4f373679.jpg)
Figure 12
Three new sub-sites were also added to the default website, figure 13.
![[image]](https://support.quest.com/KBArticleImages/SL4218/32acd92e.jpg)
Figure 13
The new database was created in the selected SQL instance, figure 14.
![[image]](https://support.quest.com/KBArticleImages/SL4218/60c74e63.jpg)
Figure 14
Items are also created in the Windows start menu, figure 15.
![[image]](https://support.quest.com/KBArticleImages/SL4218/26227a14.jpg)
Figure 15