This article will explain what documentation settings can be saved as a template in a profile file to reuse it for later projects with the SQL/MySQL database documentation tools. The steps are the same for ApexSQL Doc for MySQL and ApexSQL Doc. For demonstrative purposes, ApexSQL Doc for MySQL will be used.
When access to the complete database data is not permitted to the whole team, there is a need to create separate documents for the same database but with the different database objects selection. The creation of this type of database documentation daily can be timeconsuming.
The created Profile file with MySQL database documentation will save settings for the only selected database objects.
Note: With the Project file, additional database options can be saved. More information about the Project file can be found in the How to set a MySQL database documentation tool project template and save it article.
How to save a Profile file with the previously selected database objects will be described in this article. For this example, the adventureworks and sakila databases will be used.
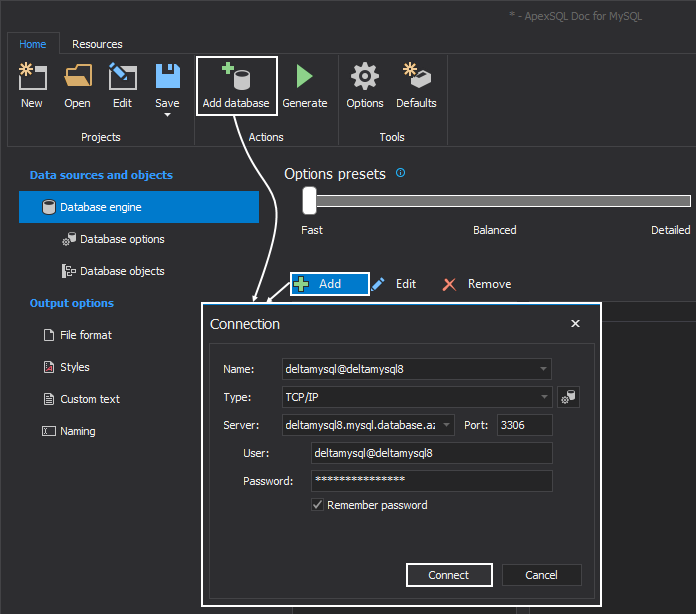
The first step is to connect to the MySQL Server. When the Database engine option is selected, connection to MySQL Server can be done in two ways. Click on the Add database button in the Home ribbon or on the Add button in the right panel. No matter which way is chosen the Connection window will appear. To connect to the MySQL Server, provide the needed information, and click the Connect button:

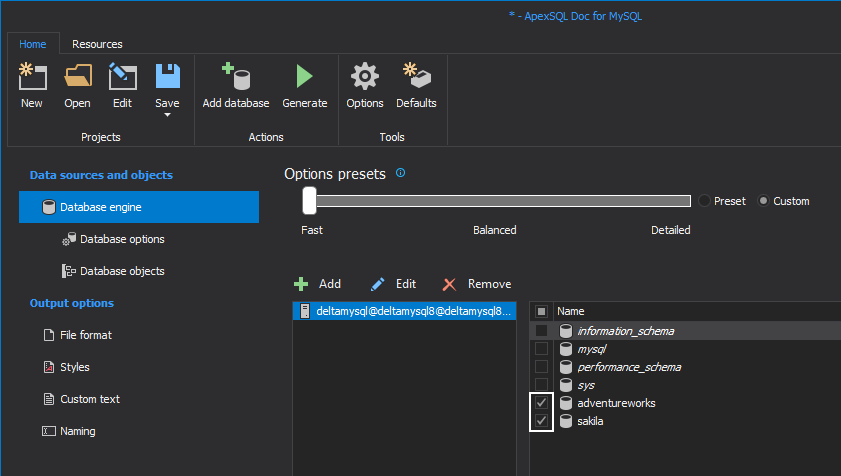
In the MySQL database documentation tool, all databases from the selected MySQL Server will be listed and shown on the right-side panel of the Database engine window. To specify databases for documentation, check them:

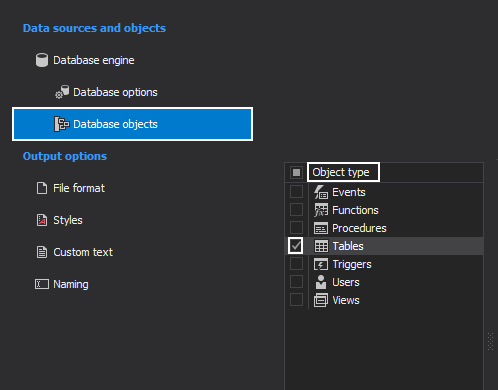
The next step is to define which type of database objects will be documented. Click the Database objects filter to see all present object types in the chosen databases. By default, all available object types will be checked. For this example, only the Tables object type will be chosen and all other will be unchecked:

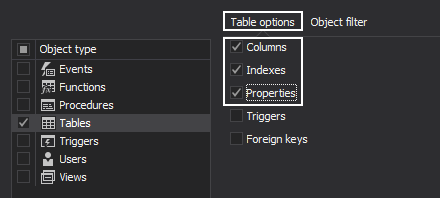
To define which table options will be included in the documentation, click on the Tables will open the Tables option list with all available table attributes. In this example the Columns, Indexes, and Properties attributes will be used:

By click on the Object filter tab, the list of all tables from the chosen databases will be listed in the grid below:
The tables that should be included in the documentation must be checked. For this example, the address and contact tables from the adventureworks database and the address and customer tables from the sakila database will be checked:
To export these settings click the Export button. Type the name in the File name text box in the Export profile window, then click the Save button:
The exported profile file can be used again but only against the same set of defined Server, databases, and objects.
Using this feature will speed up the creation documentation process for databases that often need documentation for the same set of tables.