Migrate, Externalize, and Recall by Folder and List
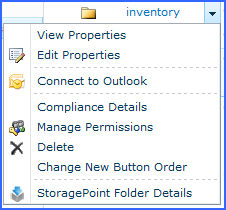
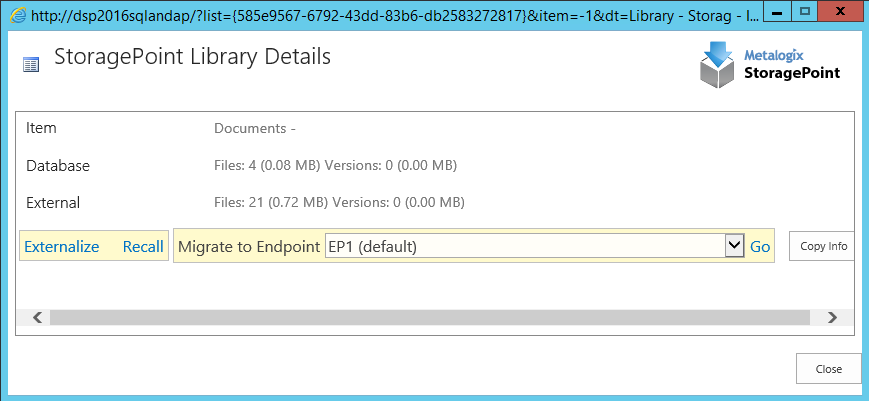
There is a StoragePoint Folder Details and StoragePoint menu option that applies to folders and entire libraries or lists. If the context menu for a folder is selected, there would be a StoragePoint menu at the bottom that would open a dialog where BLOBs can be externalized, recalled, and migrated within the scope of the selection. This will schedule a manual timer job instance of the requested operation.
In order for these timer jobs to complete, the web app pool account should have access to the SharePoint configuration database (as well as the StoragePoint configuration database) to create the timer job.
|
Folder Menu |
|
SharePoint 2010 List Ribbon |
|
SharePoint 2013 and SharePoint 2016 List Ribbon |
Activating the Software
The Metalogix StoragePoint software licenses are activated during the installation of the software. There are a few times when the software may need to be activated.
·If the number of servers in a farm is changed or an existing server is re-provisioned, the software must be re-activated to obtain a new license key. Make sure there are enough available licenses if adding servers to the farm. Contact support to purchase additional licenses.
·If the license was activated via Offline Activation during installation, the license needs to be reactivated every 6 months using Offline Activation. Online activations can be kept in synch by using the License Verification timer job.
|
|
NOTE: If activating a Trial license key, all Metalogix StoragePoint features except deleting storage profiles and the Recall timer job will stop working at the end of the trial period. |
1.Open SharePoint Central Administration:
2.Navigate to the Application Management page.
3.Click the License Management link in the StoragePoint section of the page.
4.If taken to the License Management page start here: 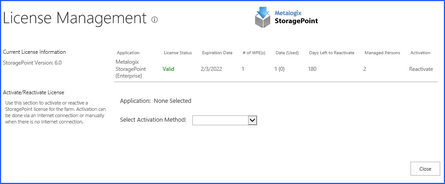
One or more Application licenses will display, depending on what Metalogix StoragePoint products are installed. To activate or reactivate a license, click the Activate/Reactivate link associated with the product that needs to be activated.
|
|
NOTE: If the License Status is Valid and more servers are not being added to the farm or correcting a corrupt license key, no action is necessary. Go directly to Planning the Metalogix StoragePoint Implementation. |
The following sections will go through the Automatic and Manual activation processes.
Automatic (Internet) Activation
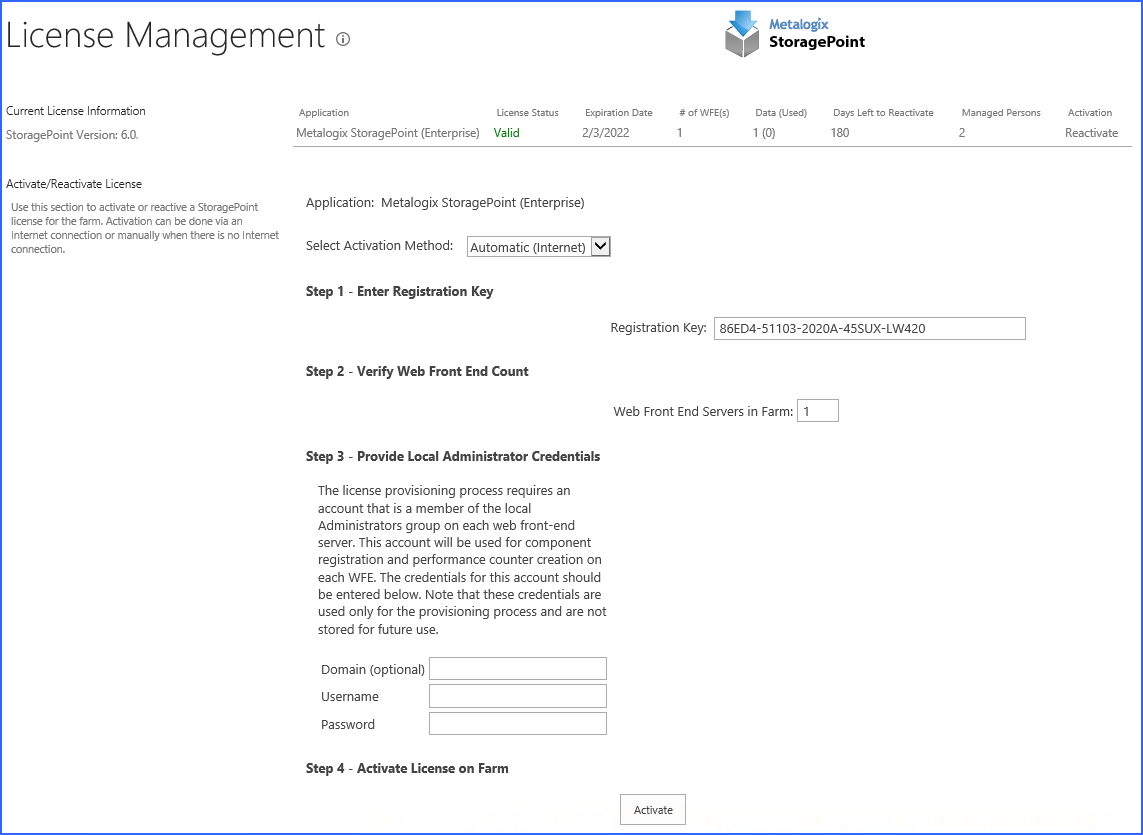
Automatic activation requires an internet connection to access the Metalogix StoragePoint activation server. If the WFE(s) in the farm do not have access to the internet then they will need to be activated manually. See the Manual Activation section below for more information.
To start the Automatic Activation process:
1.Click the link in the Activation column.
2.Select the Automatic (Internet) option from the Select Activation Method dropdown.
3.Enter the registration key in the Registration Key box.
|
|
NOTE: There may be more than one registration key depending on what licenses are installed. Please make sure to use the correct key. There are different keys for production and non-production licenses. |
4.Verify the number of WFE servers in the farm. This can be less than the number requested with the license. Enter an explanation in the Reason for Override field if the Override box is checked.
5.Provide the credentials for an account that has local administrator rights on the WFE(s). The activation and provisioning job that runs requires this access to register certain components on each WFE.
6.Click Activate to start the activation process.
7.Go to the Activation Completion section below.
Manual Activation
Use this activation method if the web front-ends do not have access to the internet.
|
|
NOTE: If manual activation is used, it will need to be done every 180 days to prevent an invalid license status. |
To start the Manual Activation process:
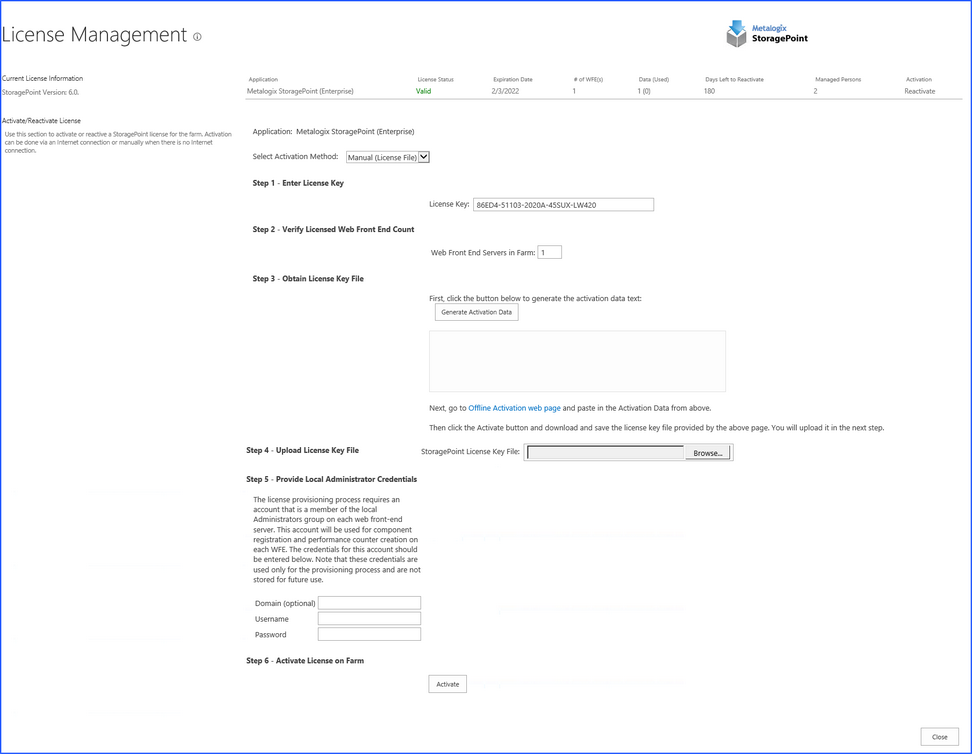
1.Select the Manual (License File) option from the Select Activation Method dropdown.
2.Enter the registration key provided in the Enter Registration Key box.
|
|
NOTE: There may be more than one registration key depending on what licenses are installed. Please make sure to use the correct key. There are different keys for production and non-production licenses. |
3.Enter the number of WFEs from the License Management page into the Verify Licensed Web Front End Count box. This can be less than the number requested with the license. Enter an explanation in the Reason for Override box if the Override box is checked.
4.Click Generate Activation Data to generate the data. Copy the generated data.
5.Click the link or open a browser on a computer with access to the internet and navigate to https://support.quest.com/offline-activation
6.Paste the Activation Data in the top field and click Activate.
7.There will be an error if an invalid registration key is entered. If all values entered are valid a file download dialog displays. Save the file to a location that is accessible by the server where the license activation is being performed.
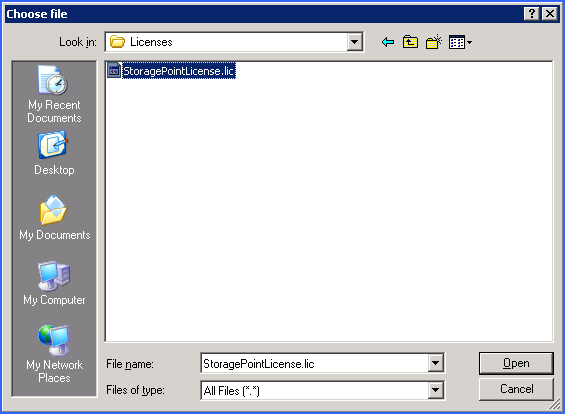
8.Back on the License Management page in SharePoint Central Administration, upload the license key file by clicking Browse
and navigate to the location where the file was saved. Select the file and click Open.
9.Provide the credentials for an account that has local administrator rights on the WFE(s). The activation and provisioning job that runs requires this access to register certain components on each WFE.
10.Click Activate to start the activation process.
11.The activation process can fail for any numbers of reasons. The following tables list the possible error messages and License Statuses that can be returned along with a description. The messages are prefixed with An error occurred while activating the license.
|
Message |
Description |
|
Must specify at least one WFE to activate |
Number of WFE(s) specified during manual activation is 0 or less. |
|
Invalid Registration Key Format |
The format of the supplied registration key is incorrect. Please verify that it is a GUID (xxxxxxxx-xxxx-xxxx-xxxx-xxxxxxxxxxxx) |
|
Invalid Registration Key |
Registration key cannot be validated. It has not been issued by Metalogix. |
|
Insufficient Activations (x) Remaining on this Registration Key |
Not enough authorized activations available to account for all servers in the farm. |
|
A trial key has already been activated on this farm. Cannot activate another trial. |
Only one trial license can be activated on a farm. |
|
License Status |
Description |
|
Not Activated |
License has not been activated yet. |
|
Too Many WFE(s) |
Too many WFEs for the current license. The software needs to be reactivated to account for newly added server(s). |
|
Farm Mismatch |
The license file supplied is for a different Farm. |
|
WSS-only License |
WSS-only license being used on MOSS. |
|
License Expired |
The license has expired. This is likely due to an expired trial/evaluation license. |
|
License Corrupt |
Signature didnt match license or there is something wrong with the license format. This would occur if the license file was tampered with. Reactivate the software to resolve. |
|
License Invalid |
Miscellaneous license issues. Should check the SharePoint logs for details. |
Go to the Activation Completion section below.

