Managing SharePoint User Permissions
ControlPoint includes a variety of value-added actions that facilitate the management of SharePoint users, groups, and permissions:
These actions are accessible from various levels of the hierarchy, enabling you to act on a single site collection or site, multiple site collections, sites, and/or lists within a Web application, or across the entire farm.
EXCEPTION: You cannot use these actions to manage user permissions for the SharePoint Central Administration site.
From the ControlPoint left navigation pane, you can also link directly to SharePoint pages for managing users and permissions.
Accessing SharePoint Pages for Managing User Permissions
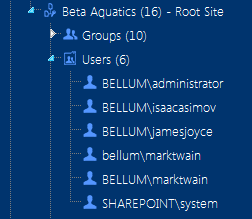
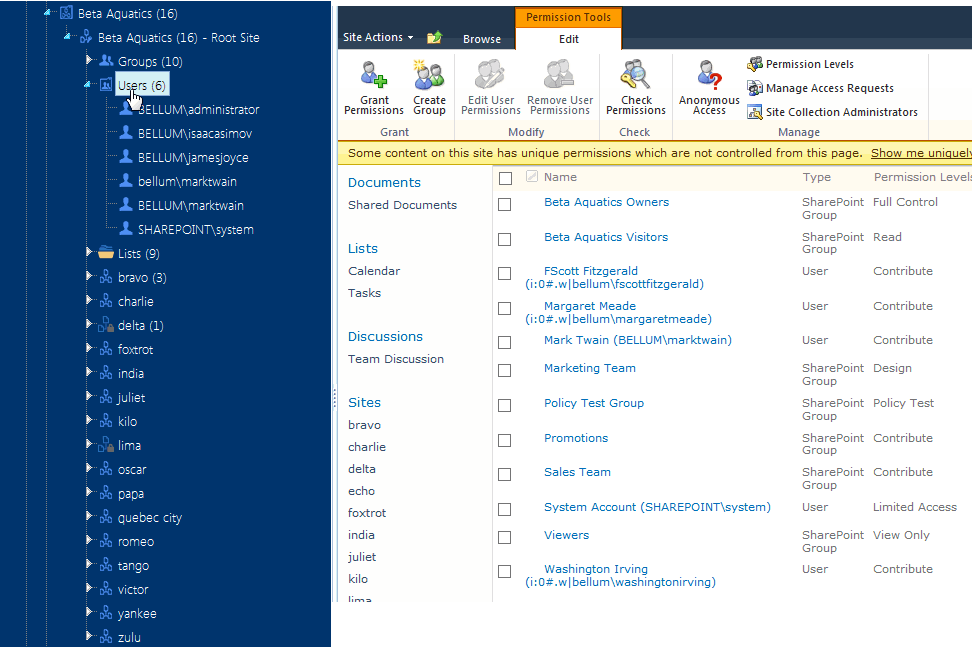
The Users folder displays all of the users with direct or explicit permissions for a selected site collection or site. You can link directly to the SharePoint pages for managing direct permissions of an existing user or create a new user.
NOTE: Users do not display for sites whose permissions are inherited (as indicated by a 
If a user has permissions to the site collection/site via a group, permissions are managed at the group level. See Accessing SharePoint Pages for Managing Groups.
To view user permissions for the site collection/site in SharePoint
Click on the Users folder to access the SharePoint Permissions page for the site collection/site
To view/edit information about a user in SharePoint:
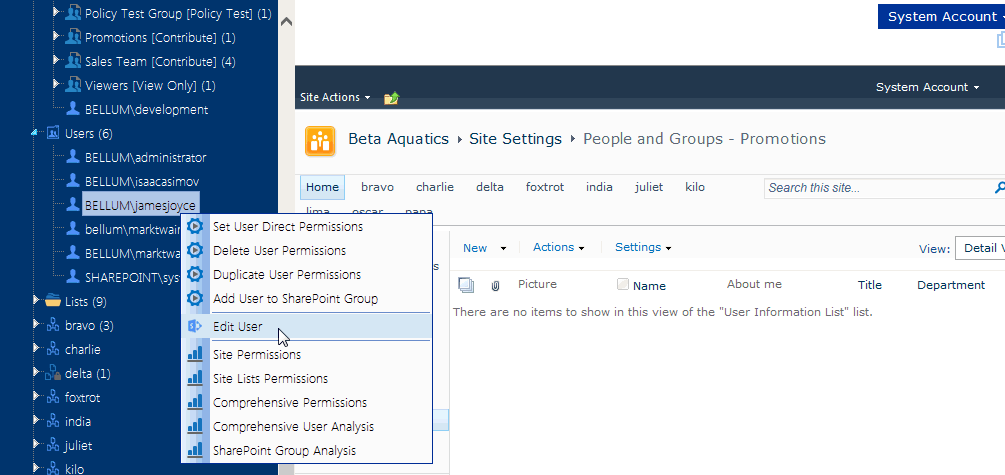
Select a user name and choose Edit to access the SharePoint Edit Personal Settings page for that user.
As an alternative to managing permissions through SharePoint, you can use ControlPoint value-added features for managing user permissions. These features are especially useful if you want act on multiple users and/or across multiple sites in a single operation.
Accessing SharePoint Pages for Managing Groups
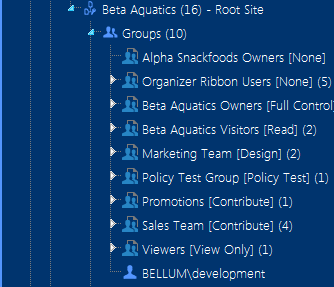
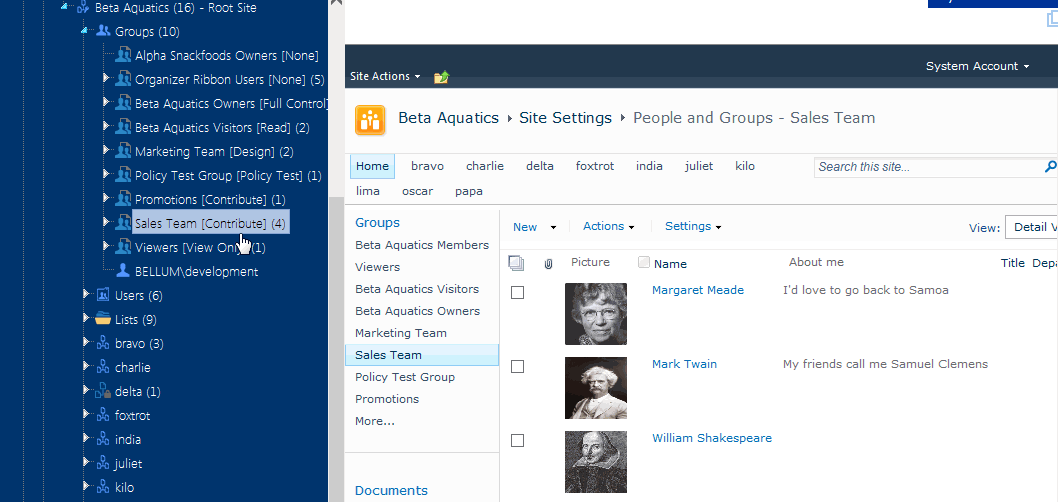
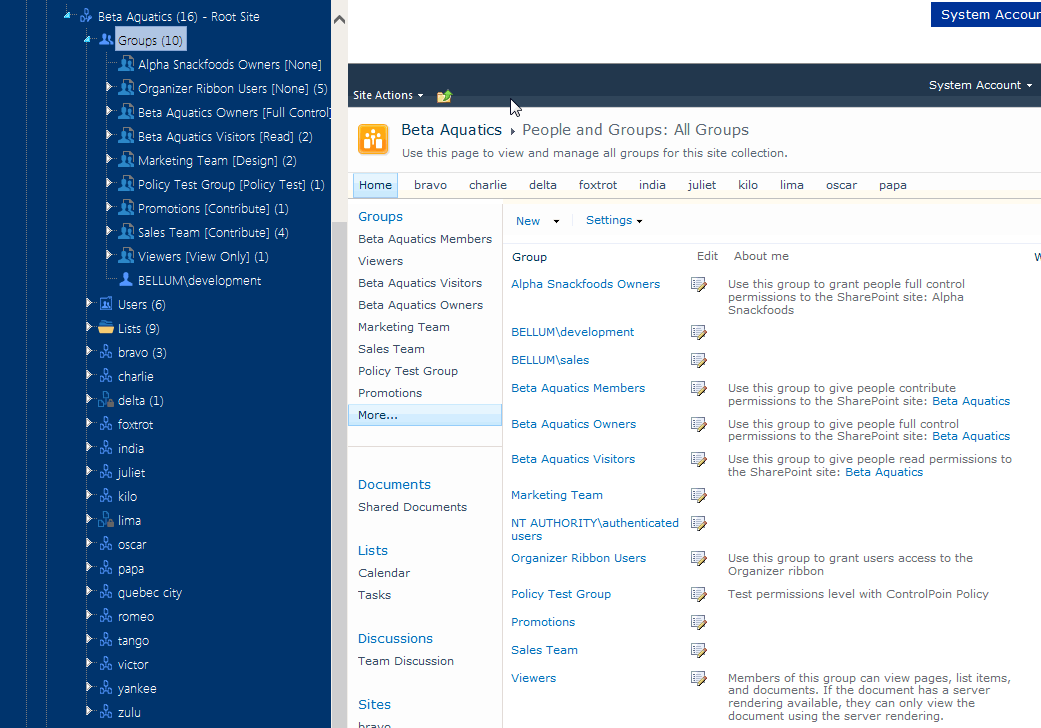
The Groups folder displays all of the SharePoint and Active Directory groups with permissions for a site. You can link directly to the SharePoint pages for managing an existing group or create a new group.
All groups with permissions for each site within a site collection display beneath the site. In the case of SharePoint groups, the number of users within a group, as well as the group's permission level, displays to the right of each group name.
NOTE: Groups do not display for sites whose permissions are inherited (as indicated by the 
You can view group membership by clicking on the plus sign (+) to the left of the group name.
To view/edit an existing group in SharePoint:
Click on a SharePoint group name to access the SharePoint People and Groups page for that group.
To view/edit groups in SharePoint:
Click the Groups folder to access the SharePoint All Groups page, from which you can create a new group for the site.
Consult your SharePoint documentation for instructions on creating a group.
NOTE: If the Groups folder does not display for a root site or a site with unique permissions, no groups have been granted permissions for it. To set up permissions for the first Group, navigate to the People and Groups page through the SharePoint site. Once a group has been granted permissions, the Groups folder will display in the ControlPoint left navigation pane as soon as you refresh the SharePoint Hierarchy.
Setting User Direct Permissions
Set User Direct Permissions is a ControlPoint action that lets you grant users direct permissions to one or more SharePoint sites, lists/libraries, and/or items. (The action will not, however, overwrite or replace any direct permissions a user may already have.)
NOTE: If you want to add users to an existing SharePoint group, use the procedure for Adding Users to SharePoint Groups.
In a multi-farm environment, direct permissions can be set across multiple farms.
Setting Permission for Multiple Users Using a Wildcard
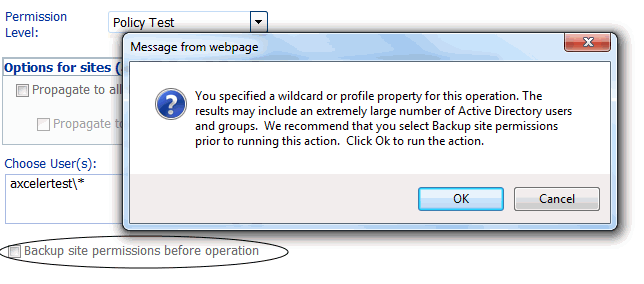
If a wildcard is used to select users, at the time you attempt to run, schedule, or save the operation a pop-up dialog will display, warning that you may be running the operation on a large number of Active Directory users and groups.
If you want to back up all permissions for the selected site(s) before running, saving, or scheduling the operation and have not already elected to do so, click [Cancel] to cancel the operation and check the Backup site permissions before operation box. To dismiss the dialog and run, schedule, or save the operation, click [OK].
Because the action requires an Active Directory lookup, a full domain name must be specified in the People Picker (that is, a wildcard cannot be used in place of the domain name or any part of it). For example, axcelertest\* is supported, but *\marktwain is not. It also means that alternate authentication methods (that is, other than Active Directory) are not supported.
To set user direct permissions:
1Select the object(s) to which you want to grant user permissions.
2Choose Users and Security > Set User Direct Permissions.
3Complete the Parameters section as follows:
a)For Set Permissions for User(s), select the user(s) for whom you want to set direct permissions.
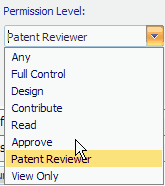
b)In the Permission Level (Direct) drop-down, select a level from the list.
NOTE: All custom permissions levels that are currently assigned to at least one user within the scope of your selection display in the drop-down. (In a multi-farm environment, this list is populated from the permissions of the home farm.) If you want to assign a custom permissions level that has been defined for a site collection but either is not currently in use or exists only on a remote farm, you can type it into the drop-down.
c)If your selection includes one or more sites and you want the permissions to be applied to all lists within the site(s) that have unique permissions, check the Propagate to All Lists with Unique Permissions box.
d)If you have checked the Propagate to All Lists with Unique Permissions box and want the permissions to be applied to all items within the list(s) that have unique permissions, check the Propagate to List Items box.
NOTE: The "Propagate" options do not apply to lists that you selected explicitly. If you want to include items within explicitly-selected lists, use the Include Children or Choose option in the Selection panel. See also Selecting List Items on Which to Perform a ControlPoint Operation.
Now you can:
·run the operation immediately (by clicking the [Run Now] button)
OR
·complete the Enforce Policy section and schedule the operation to run at a later time.
OR
·save the operation as XML Instructions that can be run at a later time.
If you chose the Run Now, option, after the operation has been processed:
·a confirmation message displays at the top of the page, and
·a ControlPoint Task Audit is generated for the operation and displays in the Results section.
If you schedule the operation, a link to the Task Audit is included in the scheduled action notification email.
See also The ControlPoint Task Audit.

