To configure the LDAP Sync Service do the following:
1. Open the LDAP Sync Service and log in with your credentials.

2. Define any Custom Fields.
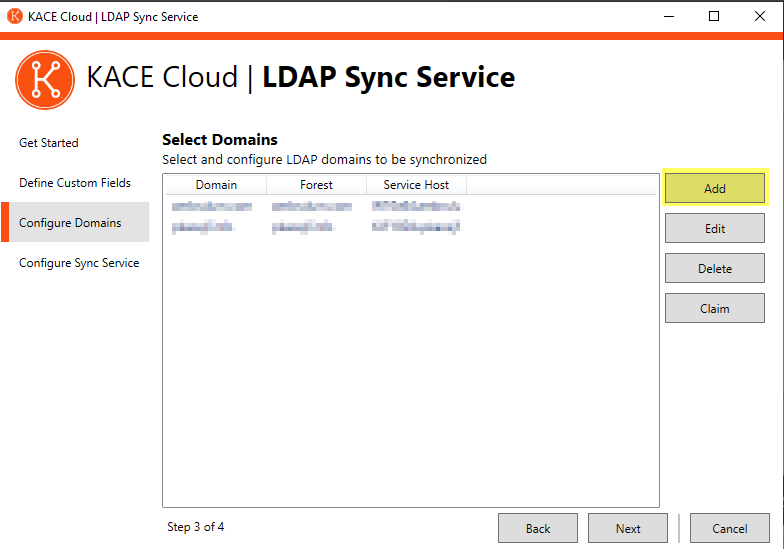
3. At the "Configure Domains" section click on "Add".
3. At the "Connect to LDAP" section enter the following information:
* Domain Name= FQDN of our LDAP Server (ie dc01.mydomain.com)
* Login= email address (ie admin01@mydomain.com)

4. Click login and after the "Success!" message click Next
5. Enter the Forest and Domain information, or use the "Select Domain" option to browse the correct domain then click Next.
6. Enter the OUs that contain the users that will be synced to KACE Cloud. Use the add button to use the LDAP browser.
Note: in this step, you may get the following error message, this can be ignored.

7. Map any desired attributes.
8. At the Confirm Selections section click Save

9. Next the wizard will return to the "Configure Domain" section.
10. Select the Domain that was just configured, click Claim, enter the credentials once again, and click OK.
11. At the "Configure Sync service" module, if there is a "true" under the "Connect" column next to the domain that was configured, click Configure Service.
12. When the "Configuration Complete" message appears click OK and then click the Close button to finish the process.

At this point, the LDAP Sync Service will start syncing users as expected.
For details on how to troubleshoot this tool, please visit this
document.
