On this tab it is possible to define mailboxes for which the Threshold job must run (see "Threshold job). The threshold functionality allows the administrator to control the size of the mailboxes in the Microsoft Exchange Server and to prevent them from overflowing. (The limit defined for a mailbox in MS Microsoft Exchange Server can be processed by Archive Manager as well).
The administrator can set the Lower and Upper limit. Upper and Lower values are percentages from the total mailbox limit allocated to a mailbox/group on the MS Microsoft Exchange Server. These two values are closely associated with Threshold job, which actually does the "cleaning up of the Microsoft Exchange message store. When the Upper value is reached for a specific mailbox/group, then archiving via Threshold job can "free up some space on the MS Microsoft Exchange Server until the Lower value is reached for the respective mailbox/group.
Example: The mailbox has a limit of 100 MB (defined in MS Microsoft Exchange Server). The administrator defines the threshold values 50/90. If the mailbox size reaches 90% of the limit (90 MB), the Threshold job will archive the mailbox until the size of the mailbox drops under 50% of the limit (50 MB). The threshold job archives the oldest messages first (default settings). The order of the messages can be modified using the scheduler service config key ("ThresholdSortBy) in <installdir>\ Quest\MAM4Exchange\ Services\ PamExSchedulerSv\ PamSchedulerSv.exe.config. The following values can be used:
·Order by last modification date (ascending, i.e. oldest first) [value = "0]
·Order by received date (ascending) [value = "1]
·Order by size (descending, i.e. biggest first) [value = "2]
|
|
NOTE: After config file modification services must be restarted. |
Further, it is possible to exclude specific messages from threshold processing. The Threshold job will archive the mailboxes but it will filter out specific messages based on your configuration. Available filtering for Threshold job:
·Filtering by message size
·Filtering by age
·Filtering by folder
·Filtering by message class
This filtering can be also configured using the scheduler service config keys in <installdir>\ Quest\MAM4Exchange\ Services\ PamExSchedulerSv\ PamSchedulerSv.exe.config. For more information see the following table:
|
Filtering |
Config key |
Default value |
Description |
|
By message size |
ThresholdMinimumSize |
4 |
Minimum size (in KB) of the email which can be included in the threshold processing. All emails smaller than the defined size are not archived. |
|
By age |
ThresholdMinDate |
0 |
If value > 0, messages which are younger than x days are excluded from processing. |
|
By folder |
ThresholdExcludeFolders |
- |
Semicolon separated list of exclude folders defined for threshold job; the syntax is the same as in case of group exclude folders. |
|
By message class |
ThresholdMessageClasses |
- |
Semicolon separated list of include message classes for the threshold job. |
The mailbox limit in Microsoft Exchange Server can be defined on two levels: on the mailbox level and on the Information Store level. For Archive Manager the mailbox limit has a higher priority than the Information Store limit. These limits are read from Microsoft Exchange Server and can be checked in Address Book Manager (Tools > Address Book Manager > click the Mailbox node > double-click the mailbox > in Properties window switch to the Others tab).
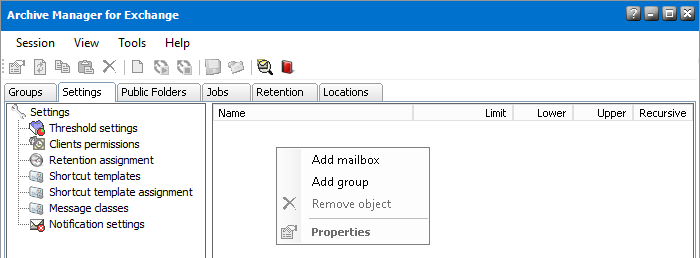
To add a group/mailbox to the Threshold tab:
1.In Manager view, click the Settings tab.
2.Click Threshold settings.
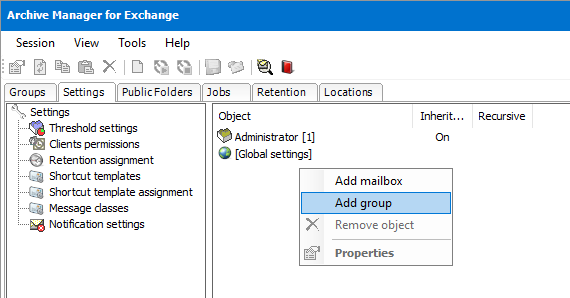
3.Right-click inside the right pane and then select Add group or Add mailbox from the context menu.
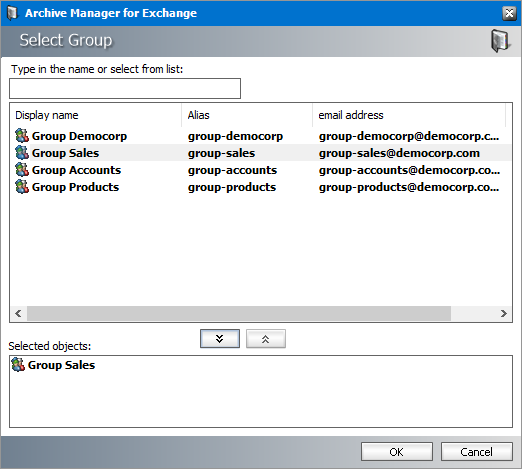
4.In the Select mailbox or group window enter the name of the group/mailbox in the text box or select the group/mailbox from the list. Then click OK.
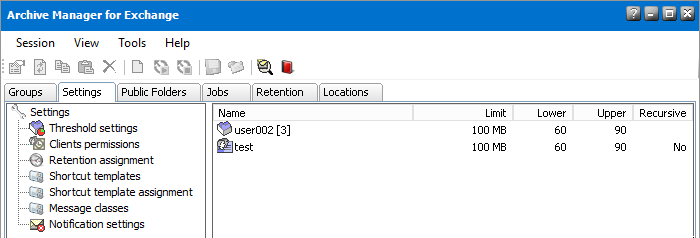
5.The respective group/mailbox will now appear on the Threshold tab.
As a next step you must set the mailbox size limit as well as Upper and Lower values to that group/mailbox.
By setting size limitations for a group/mailbox you actually allocate space on the MS Microsoft Exchange message store for the group/mailbox.
Upon adding a group/mailbox onto the Threshold settings tab you must specify their maximal size limit, as well as Upper and Lower values. Whenever the Threshold job (see the section "Threshold job) starts running it looks for mailboxes and groups having been specified on the Threshold settings tab, and starts archiving the content of those which have reached their Upper value, and keeps archiving until the Lower value has been reached.
To set size limitations for a group or mailbox:
1.In Manager view, click the Settings tab
2.Click on the Threshold settings tab.
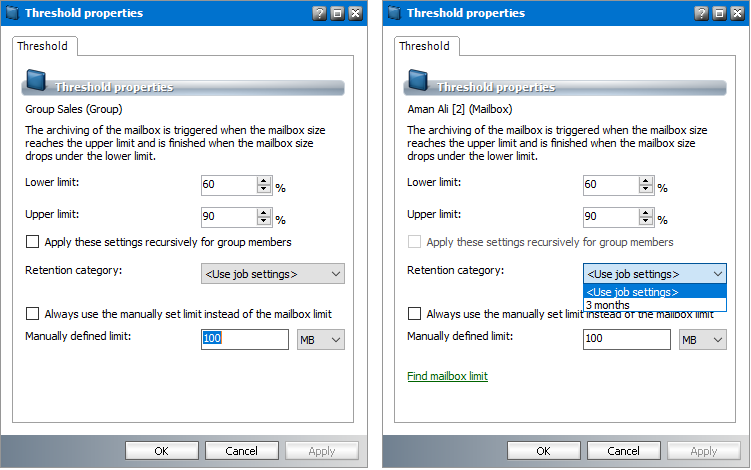
3.Right-click the group/mailbox in the list and then, in the context menu, select Properties. The Properties window opens.
4.In the Properties window enter your specifications for Manually defined limit. This will be the maximal space that every mailbox of the group (or the given mailbox) will occupy in the Microsoft Exchange Server. must you want to use a value different from the limit defined in Active Directory, check the Always use the manually set limit instead of the mailbox limit checkbox. If this checkbox is not checked, the Active Directory limit will be used instead of the here defined value.
Enter your specifications for Lower limit and Upper limit as well.
|
|
NOTE: Make use of the Find mailbox limit link to display the limit set in the Active Directory for the selected mailbox. |
If you want those settings to be applied to any subgroup of a group, select the Apply the settings recursively for group member checkbox. In that case your settings will be applied to its subgroups.
In the Retention category dropdown box you can select the retention category to be used for archiving. Otherwise the retention category of the Threshold job (see the section "Threshold job) will be used as default.
Click Apply and then OK.
|
Group Properties window |
Mailbox Properties window |
5.Click OK and verify the settings in the Threshold tab.
Global settings are applied automatically to every client computer where the Archive Manager Outlook AddIn and Archive Manager OWA Extension client applications are installed. Depending on your company security and access control plans, you may want to modify the global settings to grant or revoke additional rights for some mailboxes or groups.
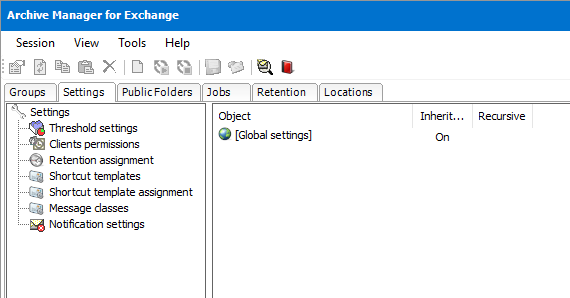
The Clients permissions node in the Settings tab is used to set global client permissions as well as group or user client permissions that override the global permissions.
|
|
IMPORTANT: No client permissions are granted when either the Archive Manager Outlook AddIn or Archive Manager OWA Extension clients are installed. The administrator must grant the global client permissions and setup individual permissions as needed. |
In this topic:
·Configuring global client permissions
·Configuring group or user client permissions
To configure global client permissions:
1.In Manager view, click the Settings tab.
2.Click the Clients permissions in the left pane.
3.Double-click the [Global settings] icon in the right-hand pane to open the Properties window. For every option listed here, you can choose whether you want to allow or deny the permission to use the feature.
4.When you are finished, click Apply and then OK. Options that are allowed will be available to all users.
The table below describes what a user can do for each client option that is permitted:
|
Feature |
Description |
|---|---|
|
Deleting |
User will be able to mark items in the archive for deletion. This means that items marked for deletion will be deleted from the archive upon the expiration of their retention period by using the Delete Files job, if specified (see the section "Delete Files job). |
|
Restoring |
User will be able to restore items from the archive himself. |
|
Keyword search |
User will be able to conduct keyword search within the user's archived items. |
|
Archiving |
User will be able to archive items. |
|
Offline support |
User will be able to work offline with archived items. |
|
Dialog Download |
User will see a message box displayed when downloading. |
|
Dialog Create new version |
User will see a message box displayed when creating a new version. |
|
Dialog Get versions |
User will see a message box displayed when retrieving one of the archived versions. |
|
Versions view |
User will be able to view different versions of archived items. |
|
Dialog Get Keyword results |
User will see a message box displayed when getting keyword search results. |
|
Dialog Identifying user |
User will see a message box displayed when identifying the user at the beginning (when opening MS Outlook). |
|
AddIn Options |
User will be able to set some options, such as whether to auto-synchronize when Outlook starts or exits, and the format to save archived messages. |
|
Create version |
User will be able to create versions. |
|
Select retention |
User will be able to choose which retention category to use during archiving. |
To set up clients permissions for a group or user:
1.In Manager view, click the Settings tab.
2.Click Clients permissions in the left pane.
3.Right-click inside the right-hand pane and select select Add group or Add mailbox from the context menu.
4.In the Select group (or Select mailbox) window enter the name of group or mailbox in the search box or select from the list. Then click 

5.Click OK. The groups or mailboxes in the Selected objects list will be added to the Clients Permissions pane. Double-click any user or group to open its Properties window.
6.Configure the client permissions by selecting either the Allow or Deny checkboxes. These settings will override the global settings for the group or user.
7.Configure the following settings as needed:
a.Apply these permissions for group members recursively - (available for groups only) select this option to apply the client permissions to sub-groups.
b.Use global settings and ignore inherited permissions - (available for user mailboxes only) select this option to apply the global settings and ignore any client permissions set for this user.
8.When you have finished, click Apply and then OK.