Each Foglight® cartridge contains extensions for monitoring a specific environment, such as applications, operating systems, or database management systems. Cartridges are installed on the server. A cartridge can contain one or more agents that are used to collect data from monitored environments.
The Management Server includes the Cartridge Inventory dashboard, which contains controls for installing, enabling, disabling, and uninstalling cartridges, and for viewing information about the installed cartridges. To access this dashboard, from the navigation panel, click Dashboards > Administration > Cartridges > Cartridge Inventory.
Some cartridges include additional components, such as agent installers or additional configuration files. After cartridge installation, these components are available for download from the Foglight Management Server using the Components For Download dashboard. To access this dashboard, from the navigation panel, click Dashboards > Administration. On the Administration dashboard, click Component Download in the Cartridges column.
For more information, see the following topics:
Foglight® agents collect data from monitored environments and send it to the Management Server. Each agent type can monitor a specific part of your environment, such as an operating system, application, or server. Foglight cartridges that you install on the server include one or more agent types. Foglight also includes internal agents that monitor Foglight components and services.
After installing and enabling a cartridge, and downloading remaining cartridge components, deploy its agent package to each host running an Agent Manager that you want to monitor. After deployment, create an agent instance for each monitored host, edit the agent’s properties, and start its data collection. See the Installation and Setup Guide set for information on installing the Agent Manager on the hosts that you want to monitor.
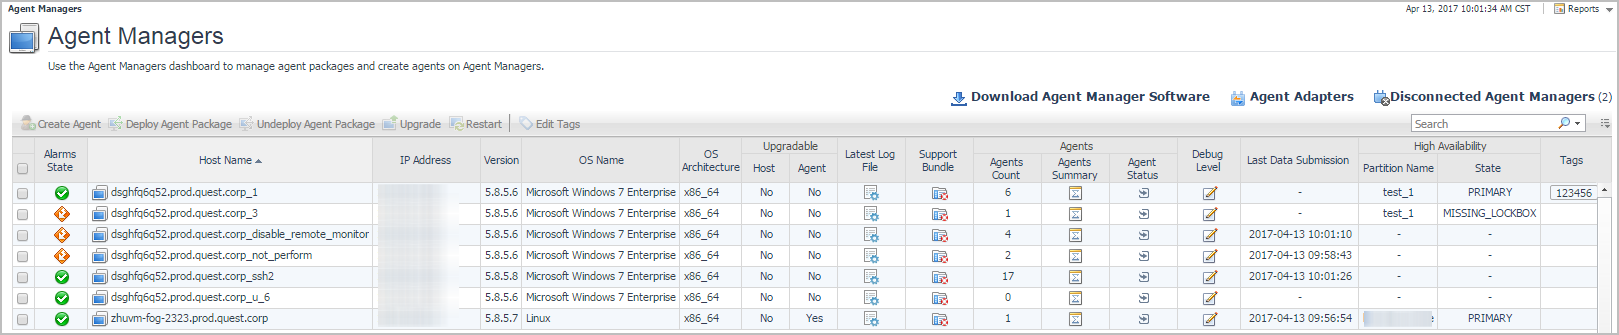
There are two dashboards that allow you to deploy agent packages and create agent instances: Agent Status and Agent Managers. To access the Agent Managers dashboard, from the navigation panel, click Dashboards > Administration > Agents > Agent Managers.
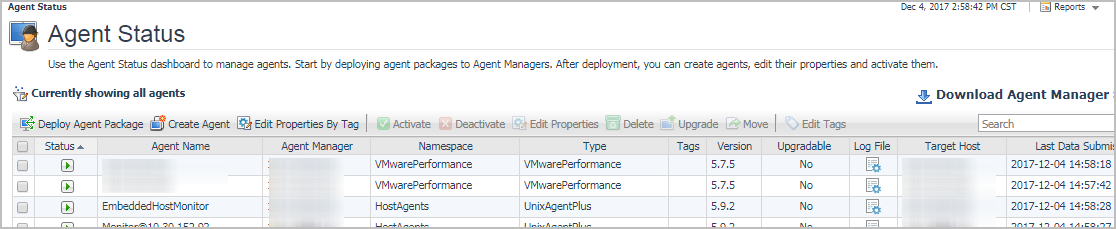
To access the Agent Status dashboard, from the navigation panel, click Dashboards > Administration > Agents > Status.
For more information, see the following topics:
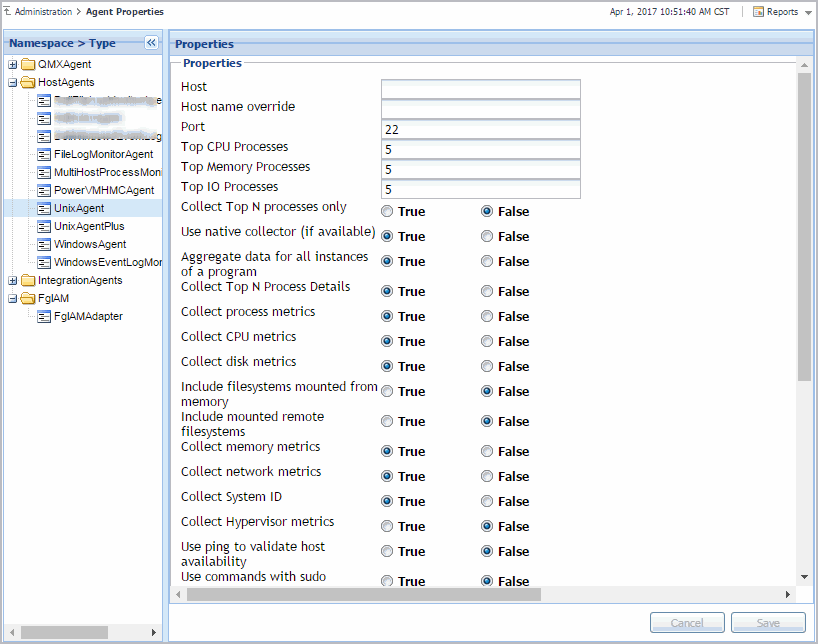
When an agent connects to the Foglight® Management Server, it is provided with a set of properties that it uses to configure its correct running state. Foglight stores agent properties on the Management Server.
You can edit the properties of agent types (global properties), or the properties of individual agent instances (private properties). Typically, after creating an agent instance, before its activation, you edit the agent properties. This causes the agent property values to become private. Agent instances with private properties are not affected by any subsequent changes made to its global properties. Changes to global properties are only carried over to new agent instances that are created after those changes.
Another classification of agent properties refers to their format, complexity, and shareability. Primary properties are typically text, number, or Boolean values. These types of values are easily specified and changed. Secondary or shared properties are in list form and contain multiple values organized into rows and columns. They can be easily cloned and modified to suit the needs of individual agent instances. The difference between primary and secondary (shared) properties is that secondary properties can be shared amongst multiple agent instances, meaning that a list can be associated with multiple agent instances of the same type. However, any changes made to a shared list affect all of those agents.
Agent properties can be edited using the Agent Properties dashboard. You can use it to edit the properties globally, for all instances of the same type, or only for a specific agent instance. To access this dashboard, from the navigation panel, click Dashboards > Administration > Agents > Agent Properties, or select an agent instance on the Agent Status dashboard and click Edit Properties.
The Agent Status dashboard allows you to move the FglAM agents within various FglAM hosts, if needed. To access the Agent Status dashboard, from the navigation panel, click Dashboards > Administration > Agents > Status. For the detailed information about the Agent Status dashboard, see Explore the Agent Status dashboard .
|
NOTE: The agent movement function is only applicable for the FglAM agent which type is one of the following: FileLogMonitorAgent, UnixAgentPlus, WindowsEventLogMonitorAgent, MultiHostProcessMonitorAgent, PowerVMHMCAgent, UnixAgent, and WindowsAgent. |
|
1 |
|
3 |
Use the group selector to select the target FglAM host from the Select Agent Manager drop-down list, and click Move. |
|
• |
The WindowsAgent stops collecting the data, if this WindowsAgent is moved from FglAM-A (an FglAM host installed with the Windows environment) to FglAM-B (an FglAM host installed with the Linux environment). See the “Access to DCOM objects and registry is denied” section in the Foglight Agent Manager Guide to resolve this issue. |
|
• |
When moving an FglAM agent which ASP configurations include a value of “localhost”, it is strongly recommended that you change the corresponding ASP value to the name or IP address of the local host; otherwise the unexpected result may occur. |
|
• |
The agent movement fails if an FglAM agent is moved from Solaris OS to Windows 2008 OS. This issue is known to exist. For more information, see the Foglight 5.7.6 Release Notes document. |