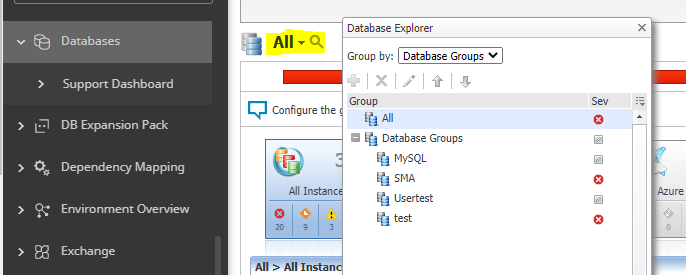
The following video details how to create a custom user defined group of databases.
To create a database group:
- In Foglight 6.0 and higher, navigate to the Databases dashboard and click the collapsing arrow next to All in the top left corner of the panel

- Select the parent database instance group, Database Groups, under Databases in the navigation pane.
- Click the + button (icon).
The Add Sub Group dialog box appears. - Type a name for the group in the Name field.
- Type a description for the group (optional).
- Select an instance in the Available column, and click [>] to move the instance to the Selected column.
Alternatively, click [>>] to move all the databases to the Selected column. - Click OK.
The sub-group name appears in the Database Groups list.
The database instances are listed in the Databases dashboard.
After adding one or more user-defined sub-groups, it is possible to add sub-groups to these sub-groups.
To add sub-groups to a selected group:
- Position the cursor on the requested group’s name.
- Repeat Step 2 to Step 6 from above.
* NOTE: The Add Group dialog box displays the name of the parent group in the Parent field. Before proceeding, ensure that the sub-group is added to the requested group.
To remove a database sub-group:
- Select the sub group to remove.
- Click the X button (icon).
The verification dialog box appears. - Click Remove.
The sub-group is removed from the Database Groups list.
To edit a database sub-group:
- Select the requested sub group.
- Click the pencil button (icon).
The Edit Group dialog box appears. - To add an instance to the sub group, select the requested instance in the Available column and click [>].
The selected instance moves to the Selected column. - To remove an instance from the sub-group, select the requested instance in the Selected column, and click [The selected instance moves to the Available column.
- Click OK.