Submitting forms on the support site are temporary unavailable for schedule maintenance. If you need immediate assistance please contact technical support. We apologize for the inconvenience.
You can create email templates within Archive Shuttle that can be used to send emails about the migration process. The templates can be customized with text and tokens specific to your migration. After creating a template, simply add a task to a Stage 2 workflow policy and it triggers an email to be sent to a target user or administrator, notifying them of a certain event related to the migration process. For example, you could configure and send an email to an administrator when a certain VIP user’s migration is complete. Or, you could send an email to a user telling them their migration is complete and instructing them to restart their client. Keep reading to learn how to create a template and use it to send an email.
Prerequisites
Before sending emails through Archive Shuttle, you need to ensure outbound SMTP settings are correct. To do this, go to Configuration > System Configuration > SMTP Settings.
Step 1: Create email template
Follow these steps to create a new email template.
Go to Configuration > Email Templates.
Click Add.
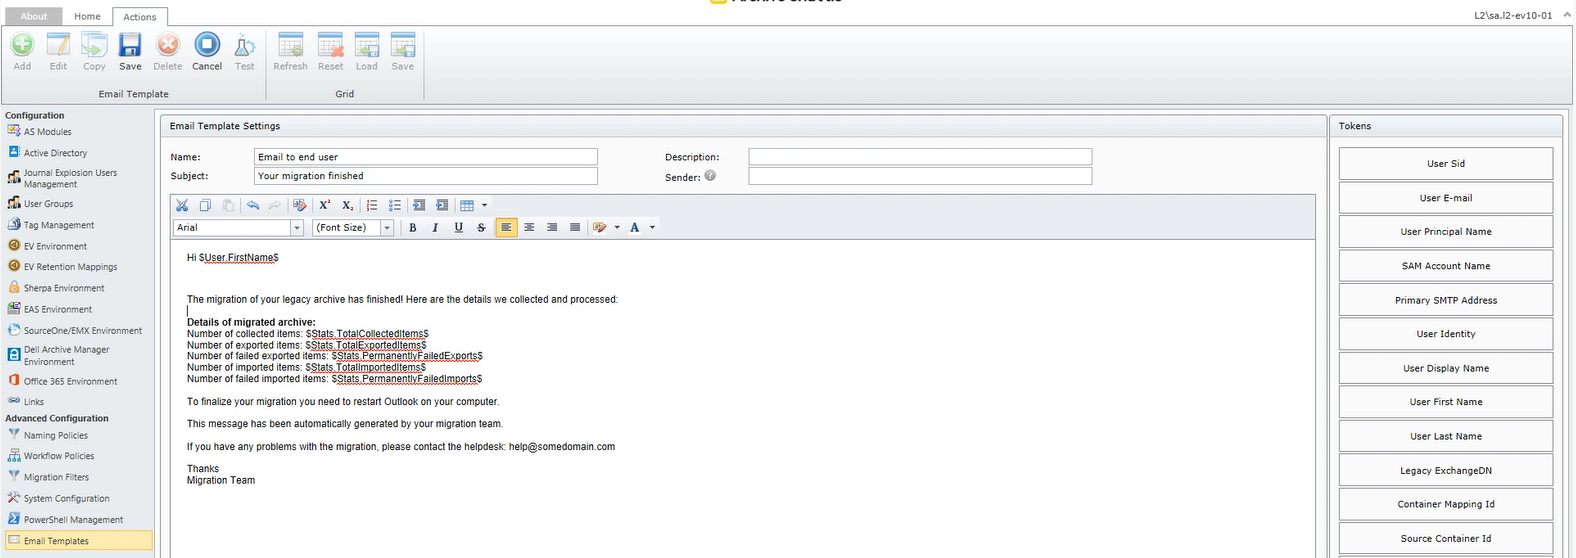
In the Name field, enter the name of the template, for example, Email to end user.
Enter the Subject line you want to appear on the email, for example, Your migration is complete.
If desired, enter a Description of the template and a Sender name.
Enter email text and Tokens, and apply desired formatting.
Once your email is complete, click Save.
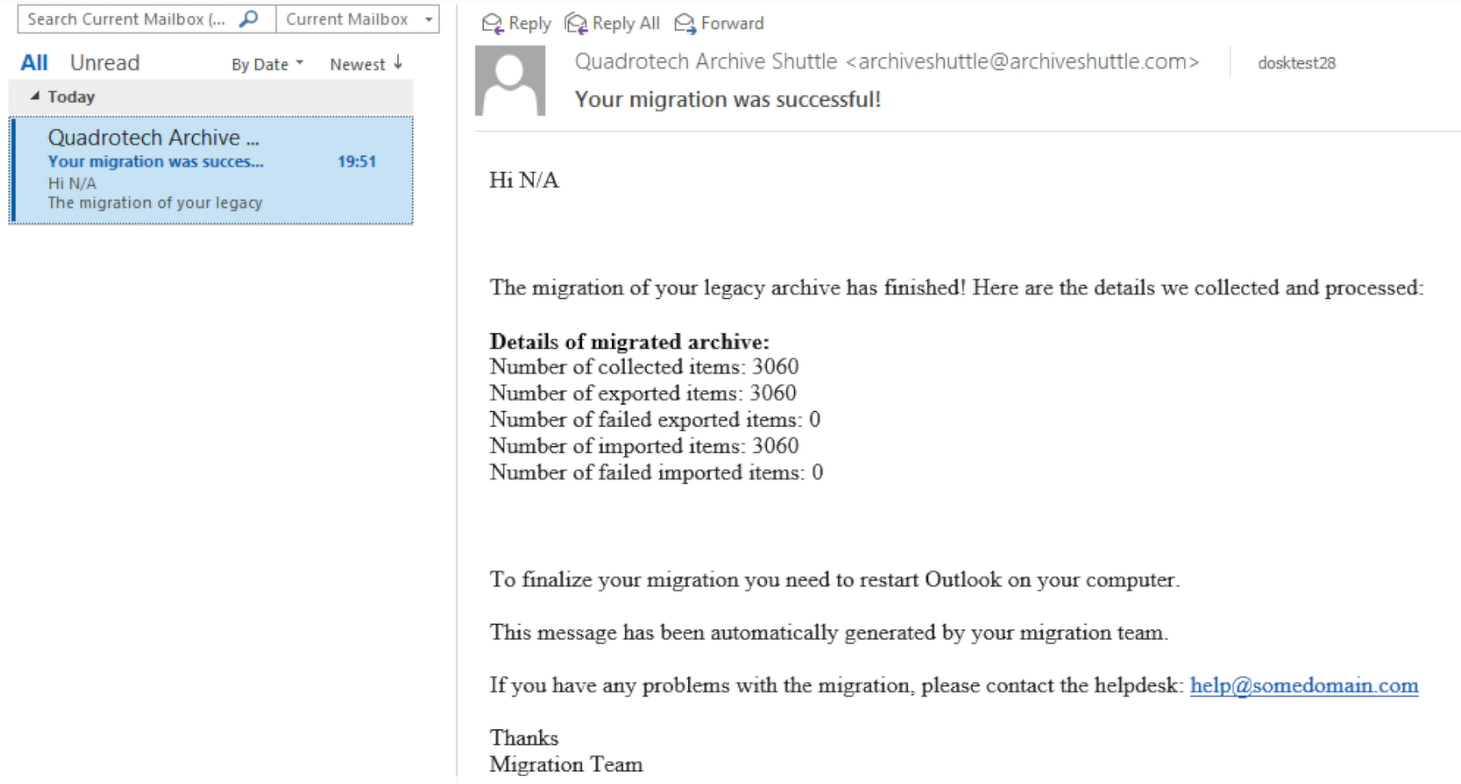
Here’s how it might look:
Step 2: Test the template
Next, ensure your email formatting, tokens, and SMTP settings are correct by generating a test email. To do this, follow these steps:
On the Configuration > Email Templates page, select the check box next to the email template you’ll test.
Click Test.
Enter the email address where you want to send the test email.
Select a container mapping.
Click Send.
A notification displays in the top right corner of Archive Shuttle telling whether the test email was successfully sent.
Step 3: Add the template to a Stage 2 workflow policy
To send an email using one of the email templates, you must add a step to a Stage 2 workflow policy that causes the email to be sent. Here’s how to do it:
Go to Configuration > Workflow Policies.
Select the policy to which you’ll add the template, and then click Edit.
In the Commands column on the right, locate SendEmailNotification and click on it to add it to the Workflow Policy Flow frame.
Depending on the type of email you’re sending, you might want to send the email in the middle of the Workflow Policy Flow. If desired, drag the workflow step to a different location within the workflow policy.
Click the SendEmailNotification command’s Edit Options link.
Set workflow step’s options, and then click Save. For example, use the Email Template field to select the message you’ll send during the step. Or, use the Send to recipient attached to container field to specify who’ll receive the message (source container owner, target container owner, or custom recipient, such as an administrator).
Click Save in the top menu bar to save changes you made to the workflow policy.
Your Request will be reviewed by our technical reviewer team and, if approved, will be added as a Topic in our Knowledgebase.
Recommended Content
Product(s):
Archive Shuttle
Topic(s):
Troubleshooting
Article History:
Created on: 2/13/2021 Last Update on: 5/7/2023
Thank you for your feedback for Topic Request
Your Request will be reviewed by our technical reviewer team and, if approved, will be added as a Topic in our Knowledgebase.
Welcome to Quest Support
You can find online support help for Quest *product* on an affiliate support site. Click continue to be directed to the correct support content and assistance for *product*.
Search All Articles
IE 8, 9, & 10 No longer supported
The Quest Software Portal no longer supports IE8, 9, & 10 and it is recommended to upgrade your browser to the latest version of Internet Explorer or Chrome.