
-
Title
Maintenance period configuration in ApexSQL Manage -
Description
Performing regular SQL Server instance maintenance is vital in maintaining the top efficiency of an instance. While every DBA has his/her own maintenance plans, the interval of said maintenance is heavily dependent on the company regulations and peak SQL instance traffic meaning, maintenance is performed when there is minimal usage of the SQL instance. Given that scheduled operations can be created in ApexSQL Manage, configuring a maintenance period will stop any scheduled operations from executing if they overlap with the predefined maintenance period. This article serves as a guide on how to configure maintenance periods in ApexSQL Manage. -
Resolution
Prior to configuring SQL Server instance maintenance periods, which can be performed before or after creating schedules, a SQL instance must be added.
For more information on adding SQL instances and creating schedules in ApexSQL Manage refer to the following articles:
- Automate and schedule operations in SQL manage instance software
- How to discover SQL Server instances, SSRS, SSAS and SSIS services across the network
Configure maintenance period
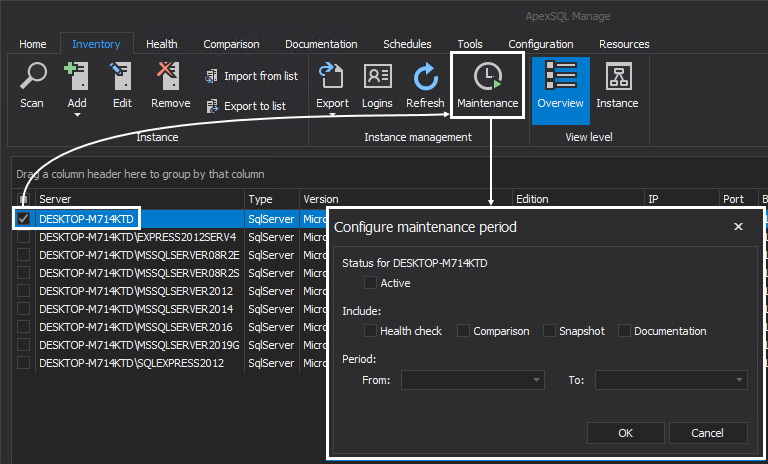
To configure a maintenance period, go to the Inventory tab in the main ribbon, check the desired SQL instance from the shown grid, and click the Maintenance button.
This will open the Configure maintenance period window where the maintenance plan can be configured:
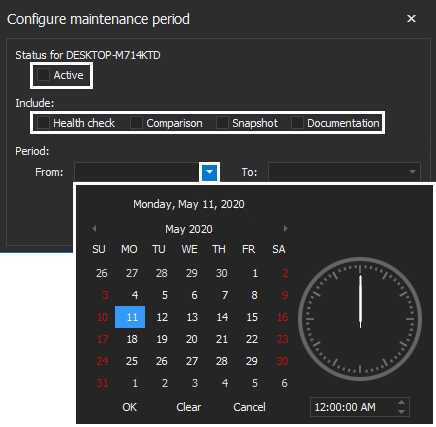
Several options of the SQL Server instance maintenance period can be configured, and they serve to address specific operations from the tool:
- Status of a maintenance period can be set to Active or Inactive, depending on the situation and its purpose
- Maintenance period can be specified for Health check, Comparison, Snapshot and Documentation operations
- Last but not least, a date can be set for when the maintenance is active
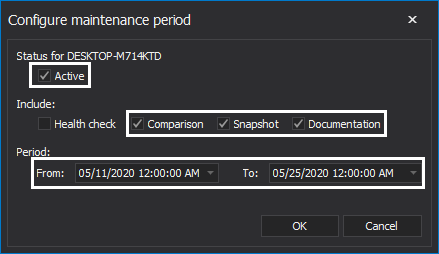
For the purpose of this article, a maintenance period with the following parameters will be configured:
- Status will be set to active
- Comparison, Snapshot and Documentation operations will be included
- Period will be set:
- From: 5/11/2020 12:00 AM
- To: 5/25/2020 12:00 AM
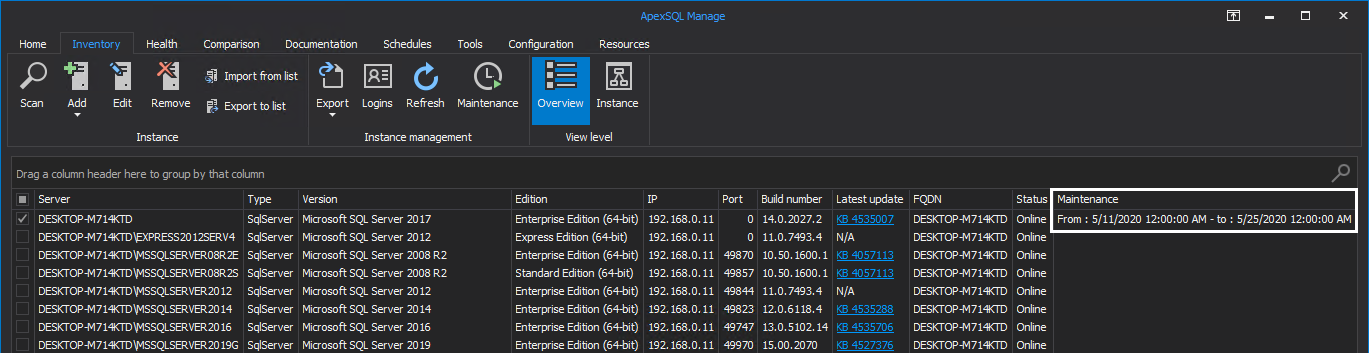
Click the OK button to save the configuration of the maintenance period to the above-mentioned parameters:
The maintenance period for the checked SQL instance is now configured and visible in the column labeled Maintenance in the main grid of the Inventory tab:
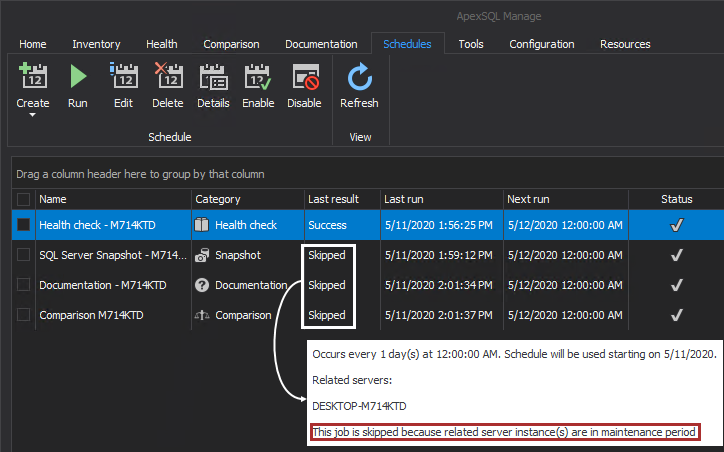
Now, when running a Health check, Comparison, Snapshot, or Documentation schedule from the Schedules tab of the main ribbon, the results will vary depending on the maintenance period configuration.
The health check schedule of the previously configured SQL instance will be successful while Snapshot, Documentation, and Comparison schedules will show Skipped in the column labeled Last result. Hovering the cursor over the results will show a tooltip message stating that the job was skipped because the related server instance(s) are in the maintenance period:
To summarize, the main benefits of configuring maintenance periods in ApexSQL Manage are:
- Easier overview of all maintenance periods for managed SQL Server instances
- Scheduled operations will not interfere while a maintenance period is in effect